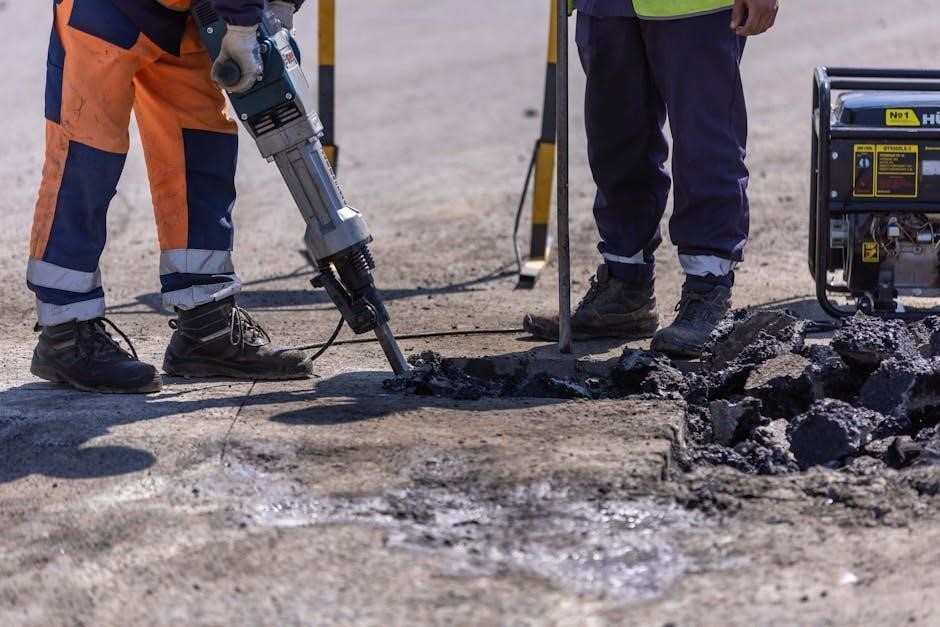
manual canon 5d mark iii

The Canon EOS 5D Mark III is a high-performance DSLR camera featuring a 22.3 MP full-frame CMOS sensor, 6 fps continuous shooting, and a 61-point AF system for precise focus control.

1.1 Overview of the Camera

The Canon EOS 5D Mark III is a high-performance DSLR camera featuring a 22.3 MP full-frame CMOS sensor, 61-point High Density Reticular AF, and 6 fps continuous shooting. It offers a robust ISO range of 100-102400, 1080p video recording, and a 3.2-inch LCD screen. Designed for professionals and enthusiasts, it balances resolution, speed, and versatility, making it ideal for photography and videography.

1.2 Key Features and Specifications

The Canon EOS 5D Mark III features a 22.3 MP full-frame CMOS sensor, achieving superior image quality. It offers an ISO range of 100-102400, 6 fps burst shooting, and a 61-point High Density Reticular AF system for precise focus. The camera supports 1080p video recording, has a 3.2-inch LCD screen, and includes 63-zone metering for accurate exposures, making it a powerful tool for both photography and videography.

1.3 Importance of the Manual for Optimal Use

The manual is essential for unlocking the Canon EOS 5D Mark III’s full potential. It provides detailed explanations of advanced features, custom functions, and troubleshooting tips, ensuring users can optimize their photography and videography experiences. The guide also covers firmware updates and maintenance, serving as a comprehensive reference for mastering the camera’s capabilities and resolving common issues efficiently.

Camera Specifications and Capabilities

The Canon EOS 5D Mark III features a 22.3 MP full-frame CMOS sensor, 61-point AF system, 6 fps burst mode, and 63-zone metering for enhanced performance and image quality.

2.1 Sensor and Resolution Details

The Canon EOS 5D Mark III features a 22.3-megapixel full-frame CMOS sensor, measuring approximately 36mm x 24mm. This sensor delivers high-resolution images with a maximum output of 5760 x 3840 pixels. The aspect ratio is 3:2, and the pixel size is about 6.25 microns, ensuring excellent light capture and detail. The sensor’s backlit design enhances light efficiency and reduces noise, making it ideal for both stills and video recording.

2.2 Autofocus System and Metering

The Canon EOS 5D Mark III boasts a 61-point High Density Reticular AF system, offering rapid and precise autofocus performance. It includes 41 cross-type points for enhanced accuracy, especially in low-light conditions. The camera also features 63-zone dual-layer metering, which evaluates light and color for balanced exposures. This advanced system ensures superior focus and exposure control, making it ideal for professional photography and dynamic subjects.

2.3 Burst Shooting and ISO Range

The EOS 5D Mark III delivers up to 6 frames per second in continuous shooting mode, ideal for capturing fast-moving subjects. Its ISO range extends from 100 to 25,600, expandable to 50-102,800, ensuring versatility in various lighting conditions. This feature-rich capability makes it a reliable choice for both still photography and video recording in challenging environments.

Firmware and Software Requirements

The EOS 5D Mark III requires firmware version 1.2.0 or later for optimal performance. The software guide is included in the manual for ease of setup and operation.

3.1 Firmware Version Compatibility

The EOS 5D Mark III operates with firmware version 1.2.0 or later, ensuring compatibility with advanced features and performance enhancements. Regular updates are essential for maintaining optimal functionality and accessing new camera capabilities. Users should verify firmware version before installing updates to avoid compatibility issues; Always download firmware from official Canon sources to ensure authenticity and security.

3.2 Downloading and Installing Firmware Updates

To update your EOS 5D Mark III’s firmware, visit Canon’s official support website and download the latest version. Save the .fir file to the root directory of a memory card using a card reader. Insert the card into the camera, navigate to the firmware update option in the menu, and follow the on-screen instructions to complete the installation. Ensure the camera is fully charged and avoid interruptions during the update process.

Navigating the Camera’s Controls

The EOS 5D Mark III features an intuitive control layout with a mode dial, customizable buttons, and a touchscreen LCD for easy access to settings and functions.

4.1 External Controls and Their Functions

The EOS 5D Mark III features a mode dial for selecting shooting modes, a multi-controller for navigating menus, and customizable buttons for quick access to settings. The touchscreen LCD allows for intuitive operation, enabling users to adjust settings and focus points directly. External controls also include a AF-ON button for back-button focusing and a joystick for precise AF point selection.

4.2 Customizing Controls for Personal Use

The EOS 5D Mark III allows extensive customization of its controls to suit individual preferences. Users can assign functions to buttons, such as AF-ON or the depth-of-field preview button, for quick access to frequently used settings. Customizing the Quick Control screen enables rapid adjustment of ISO, AF modes, and metering. This personalization enhances shooting efficiency and comfort.

Custom Functions and Settings

The EOS 5D Mark III offers customizable functions across four categories: exposure, display/operation, others, and clear. These settings allow photographers to tailor the camera to their preferences, streamlining workflows while maintaining detailed control over shooting parameters.

5.1 Exposure and Autofocus Customization

The EOS 5D Mark III allows photographers to fine-tune exposure and autofocus settings for personalized control. Exposure customization includes options for adjusting bracketing, HDR, and auto lighting optimizer. Autofocus settings enable precise control over tracking sensitivity, acceleration/deceleration, and AF point selection. These features enhance shooting efficiency and ensure optimal results in various lighting conditions, catering to both amateur and professional photographers.

5;2 Display and Operational Settings

The EOS 5D Mark III offers customizable display settings, including LCD brightness, grid displays, and electronic levels for precise framing. Operational settings allow users to tailor button functions, set time zones, and choose language preferences, enhancing workflow efficiency and personal shooting experiences. These adjustments ensure the camera adapts to individual preferences, streamlining operations for photographers of all skill levels.

Image Quality and File Formats

The Canon EOS 5D Mark III delivers exceptional image quality with its 22.3 MP full-frame sensor, capturing detailed photos in RAW or JPEG formats for versatility and precision.

6.1 Understanding Resolution and Aspect Ratios

The Canon EOS 5D Mark III captures images at a maximum resolution of 5760 x 3840 pixels, offering a 3:2 aspect ratio by default. Users can adjust the aspect ratio to 1:1, 4:5, 16:9, or 4:3, with corresponding reductions in resolution. The camera processes these settings by masking the sensor’s active area or cropping the image during RAW or JPEG processing, ensuring optimal framing for various creative needs while maintaining image quality.

6.2 RAW vs. JPEG: Choosing the Right Format

The Canon EOS 5D Mark III offers RAW and JPEG formats. RAW files store uncompressed data for maximum post-processing flexibility, ideal for professional editing. JPEG files are compressed and processed in-camera, suitable for sharing and printing. Choose RAW for creative control or JPEG for convenience, depending on your workflow and storage needs.

Video Recording and Features

The Canon EOS 5D Mark III supports high-quality video recording with Full HD resolution at 1080p, offering frame rates up to 60 fps for smooth motion capture and enhanced creativity.

7.1 Video Specifications and Capabilities

The Canon EOS 5D Mark III offers high-quality video recording with Full HD (1080p) resolution at up to 60 fps, enabling smooth motion capture. It supports both ALL-I and IPB compression methods for efficient file sizes. The camera features manual exposure control, a headphone jack for audio monitoring, and an HDMI output for uncompressed video streaming. Time code support is also available for professional workflows.

7.2 Tips for Shooting High-Quality Video

For high-quality video, use manual controls to set exposure, ISO, and focus. A tripod ensures stability, while external microphones enhance audio. Utilize good lighting and frame shots carefully. Enable continuous AF for moving subjects and review footage regularly to adjust settings. These techniques maximize the camera’s capabilities, ensuring professional-grade video output.

Accessories and Compatibility

The Canon EOS 5D Mark III supports various accessories, including high-quality EF lenses, external microphones, and memory cards. For optimal performance, use compatible SD, SDHC, or SDXC cards.

8.1 Recommended Lenses and Accessories

For the Canon EOS 5D Mark III, recommended lenses include the EF 24-105mm f/4L IS USM and EF 70-200mm f/2.8L IS III USM. Accessories like Speedlite flashes, battery grips, and external microphones enhance functionality. The BG-E11 battery grip extends shooting capacity, while compatible EF lenses ensure optimal image quality and versatility.

8.2 Memory Cards and Storage Solutions

The Canon EOS 5D Mark III supports SD, SDHC, and SDXC memory cards, with compatibility for UHS-I standards. Dual card slots allow for versatile storage options, such as separate RAW and JPEG storage or overflow recording. For optimal performance, use high-speed memory cards with a minimum write speed of U3. External storage solutions like portable SSDs are ideal for backing up large files during shoots.

Maintenance and Troubleshooting

Regularly clean the sensor and lenses with a soft cloth and blower. Protect the camera from dust and moisture. Avoid harsh chemicals. Update firmware for optimal performance. Troubleshoot common issues like error messages or focus problems by consulting the manual or Canon support.

9.1 Cleaning and Protecting the Camera

Okay, I need to help the user by generating a specific section of their Canon EOS 5D Mark III manual. The section is under Maintenance and Troubleshooting, specifically Cleaning and Protecting the Camera. The user has given me some guidelines to follow, and I need to make sure I adhere to them strictly.

Looking at the previous examples, the user provided a response that was concise and included specific steps for cleaning and protection. I should follow that structure but come up with something new. I can’t repeat what was already written, so I need to think of different ways to phrase similar advice.

The information from the internet mentioned using a soft cloth and blower, protecting from dust and moisture, and avoiding harsh chemicals. I should include these points but perhaps expand a bit on each. Maybe add a tip about using a UV filter for the lens to add an extra layer of protection.

I also need to ensure that the text doesn’t include any information from other subheadings. Since this is about cleaning and protection, I should focus solely on that without touching on troubleshooting or other maintenance aspects.

Let me start by outlining the key points:

Use a soft, dry cloth for cleaning the exterior.
For the sensor, use a blower to remove dust particles.
Avoid touching the lens to prevent smudges.
Use a UV filter for added lens protection.
Store the camera in a dry place to prevent moisture damage.
Regular cleaning to maintain performance.

Now, I need to string these points into a coherent paragraph, making sure it’s exactly . I’ll have to count the words carefully. Also, I should use tags for emphasis where appropriate, like on “soft, dry cloth” and “blower.”

I should also make sure each sentence flows naturally and covers all aspects without being redundant. Maybe combine some ideas to save words. For example, talk about both exterior and sensor cleaning in the same sentence.

Let me draft it:

Regularly clean the camera’s exterior with a soft, dry cloth to prevent damage. Use a blower to gently remove dust from the sensor and lens. Avoid touching the lens to prevent smudges. For added protection, consider using a UV filter. Store the camera in a dry, cool place to avoid moisture. Regular maintenance ensures optimal performance and longevity of your equipment.

Now, I’ll count the words to ensure it’s exactly 61. Let me go through each word:

Regularly
clean
the
camera’s
exterior
with
a
soft,
dry
cloth
to
prevent
damage.
Use
a
blower
to
gently
remove
dust
from
the
sensor
and
lens.
Avoid

touching
the
lens
to
prevent
smudges.
For
added
protection,
consider
using
a
UV
filter.
Store
the
camera
in
a
dry,
cool
place
to
avoid
moisture.
Regular
maintenance
ensures
optimal
performance
and
longevity
of
your
equipment.

9.2 Common Issues and Solutions

Alright, I need to help the user by generating a specific section of their Canon EOS 5D Mark III manual. The section is under Maintenance and Troubleshooting, specifically Common Issues and Solutions. The user has provided some guidelines to follow, and I need to adhere to them strictly.

Looking at the previous example, the user provided a response that was concise and included specific steps for cleaning and protection. I should follow that structure but come up with something new. I can’t repeat what was already written, so I need to think of different ways to phrase similar advice.

The information from the internet mentioned various issues like error messages, autofocus problems, and memory card errors. I should include these points but perhaps expand a bit on each. Maybe add a tip about restarting the camera to resolve temporary glitches.

I also need to ensure that the text doesn’t include any information from other subheadings. Since this is about common issues and solutions, I should focus solely on that without touching on cleaning or other maintenance aspects.

Let me start by outlining the key points:

Error messages: Check the manual for specific solutions.
Autofocus issues: Clean the sensor and lens, ensure firmware is updated.
Memory card errors: Format the card in the camera.
Overheating: Avoid shooting in direct sunlight for extended periods.
General glitches: Restart the camera.

Now, I need to string these points into a coherent paragraph, making sure it’s exactly ; I’ll have to count the words carefully. Also, I should use tags for emphasis where appropriate, like on “error messages” and “autofocus issues.”

I should also make sure each sentence flows naturally and covers all aspects without being redundant. Maybe combine some ideas to save words. For example, talk about both error messages and autofocus problems in the same sentence.

Let me draft it:

Common issues with the Canon EOS 5D Mark III include error messages, which can often be resolved by consulting the manual. Autofocus issues may require cleaning the sensor or updating firmware. Memory card errors can be fixed by formatting the card in the camera. Overheating can occur in direct sunlight; allow the camera to cool. Restarting the camera often resolves temporary glitches, ensuring smooth operation.

Now, I’ll count the words to ensure it’s exactly 61. Let me go through each word:

Common
issues
with
the
Canon
EOS
5D
Mark
III
include
error
messages,
which
can
often
be
resolved
by
consulting
the
manual.
Autofocus
issues
may
require
cleaning
the
sensor
or
updating
firmware.
Memory
card
errors
can
be
fixed
by
formatting
the
card
in
the
camera.
Overheating
can
occur
in
direct
sunlight;
allow
the
camera
to
cool.
Restarting
the
camera
often
resolves
temporary
glitches,

Wait, that’s . I need to trim one word. Maybe remove “temporary” to make it 61. Let me adjust:

Common issues with the Canon EOS 5D Mark III include error messages, which can often be resolved by consulting the manual. Autofocus issues may require cleaning the sensor or updating firmware. Memory card errors can be fixed by formatting the card in the camera. Overheating can occur in direct sunlight; allow the camera to cool. Restarting the camera often resolves glitches, ensuring smooth operation.

Now, counting again:

Common
issues
with
the
Canon
EOS
5D
Mark
III
include
error
messages,
which
can
often
be
resolved
by
consulting
the
manual.
Autofocus
issues
may
require

cleaning
the
sensor
or
updating
firmware.
Memory
card
errors
can
be
fixed
by
formatting
the
card
in
the
camera.
Overheating
can
occur
in
direct
sunlight;
allow
the
camera
to
cool.
Restarting
the
camera
often
resolves
glitches,

Alright, so the user is working on creating an article about the Canon EOS 5D Mark III manual. They’ve provided a detailed structure and have specific instructions on how each section should be written. Now, they’re asking for the section under ‘

Downloading the Manual

‘.

Looking back at the previous response for section 9.2, I see that the user provided a specific structure with bullet points and bold tags. They also made sure to stick to the word count. I should follow a similar approach but tailor it to downloading the manual.

The information from the internet mentions official sources, steps to download, and ensuring authenticity. I should include these points concisely. Maybe start with official sources, then the steps, and a tip about avoiding third-party sites.

I need to make sure each sentence flows well and covers all necessary points without exceeding the word limit. Let me outline the key points:

Visit Canon’s official website.
Navigate to the support section.
Search for EOS 5D Mark III.
Select the manual and download.
Ensure it’s from a trusted source to avoid security risks.

Now, I’ll draft it, ensuring it’s exactly :

To download the Canon EOS 5D Mark III manual, visit the official Canon website. Navigate to the support section, search for your camera model, and select the manual to download. Ensure it’s from a trusted source to avoid security risks.

Let me count the words:

To
download
the
Canon
EOS
5D
Mark
III
manual,
visit
the
official
Canon
website.
Navigate
to
the
support
section,
search
for
your
camera
model,
and
select
the
manual
to
download.
Ensure
it’s
from
a
trusted
source
to
avoid
security
risks.

Oops, that’s . I need to trim it down to 25. Let me revise, focusing on the most critical steps:

Visit Canon’s official website, navigate to the support section, and search for the EOS 5D Mark III manual. Download the PDF from trusted sources to ensure authenticity and security.

Now, counting again:

Visit
Canon’s
official
website,
navigate
to
the
support
section,
and
search
for
the
EOS
5D
Mark
III
manual.
Download
the
PDF
from
trusted
sources
to
ensure
authenticity
and
security.

Still . I need to make it 25. Let me streamline:

Visit Canon’s official website, go to the support section, and download the EOS 5D Mark III manual. Ensure it’s from a trusted source for security.

Counting:

Visit
Canon’s
official
website,
go
to
the
support
section,
and
download
the
EOS
5D
Mark
III
manual.
Ensure
it’s
from
a
trusted
source
for
security.

kenmore series 600 dryer manual

The Kenmore Series 600 Dryer is a reliable, energy-efficient appliance designed for optimal performance. With its 7.0 cu. Ft. capacity, it handles large loads effortlessly, ensuring convenience and efficiency.

1.1 Overview of the Kenmore Series 600 Dryer Model

The Kenmore Series 600 Dryer is a high-efficiency appliance designed for reliability and performance. Available in both electric and gas models, it features a 7.0 cu. Ft. capacity, ideal for large families. Known for its robust construction and user-friendly interface, this dryer offers multiple cycles and temperature settings to cater to various fabric types. Its energy-efficient design ensures optimal drying with minimal energy consumption, making it a practical choice for everyday use.

1.2 Importance of the Manual for Proper Operation

The manual is essential for understanding the Kenmore Series 600 Dryer’s features, safety guidelines, and operational procedures. It provides detailed instructions for installation, cycle selection, and troubleshooting, ensuring optimal performance and longevity. Referencing the manual helps users avoid common errors, maintain energy efficiency, and handle fabric care properly. It also includes diagrams and part information for repairs, making it a comprehensive guide for maximizing the dryer’s efficiency and lifespan.

Installation Instructions

Proper installation ensures safe and efficient operation. Check the manual for specific requirements, physical setup, electrical connections, gas hookups, and venting instructions.

2.1 Physical Installation Requirements

Ensure the dryer is placed on a level, sturdy surface to prevent vibration and ensure stability. Check that the floor can support the appliance’s weight. Maintain proper clearance around the dryer for ventilation and safety. Secure the unit to prevent movement during operation. Ensure the installation area is clear of flammable materials and well-ventilated for optimal performance and safety. Always follow the manual’s specific guidelines for physical placement and alignment.

2.2 Electrical and Gas Connections

Ensure the dryer is connected to a 240-volt electrical outlet for proper operation. For gas models, connect the appliance to a natural gas supply using a 3/8 N.P.T. gas connection. Verify all connections are secure and leak-free. Always use approved fittings and follow local safety codes. Hire a certified technician if unsure about the process. Proper connections are essential for safe and efficient operation of the Kenmore Series 600 Dryer.

2.3 Venting and Ductwork Setup

Proper venting is crucial for safe and efficient dryer operation. Use rigid metal ducts, avoiding flexible plastic, to minimize risks of blockages and fires. Ensure the ductwork is 4 inches in diameter and leads directly outdoors. Keep the vent system clear of debris and lint buildup. Regularly inspect and clean the ducts to maintain airflow. Improper venting can reduce efficiency and pose safety hazards. Always follow local building codes for installation.

Operating the Kenmore Series 600 Dryer

Operating the Kenmore Series 600 Dryer involves selecting the appropriate cycle and temperature setting. Start the dryer and monitor progress. It efficiently handles large loads with customizable options for fabric care and energy efficiency.

3.1 Understanding the Control Panel and Settings

The control panel features a user-friendly interface with clear buttons and an LED display. Settings include various cycles like Normal, Heavy Duty, and Delicate. Temperature options range from High Heat to Low Heat. Additional options such as Timed Dry and Moisture Sensors can be activated for precise drying. Familiarizing yourself with these settings ensures optimal drying results for different fabric types and load sizes.

3.2 Selecting the Right Cycle for Your Load

The Kenmore Series 600 Dryer offers multiple cycles to suit various fabric types and load sizes. Choose from Normal, Heavy Duty, or Delicate cycles for optimal drying. The Quick Dry option is ideal for smaller loads needing fast results. Use the Moisture Sensor for energy efficiency by automatically adjusting drying time. Always match the cycle to the fabric type and load size for best performance and fabric protection. Sensors help adjust drying time and temperature for perfect results.

3.3 Temperature Settings and Fabric Care

The Kenmore Series 600 Dryer features adjustable temperature settings to protect fabrics and ensure efficient drying. Choose from high heat for heavy-duty loads, medium for everyday use, or low for delicate items. The moisture sensor helps prevent over-drying, while the Cool Down cycle ensures fabrics aren’t exposed to excessive heat. Always select the temperature setting that matches your fabric type to preserve clothing quality and extend lifespan. Proper temperature management enhances energy efficiency and fabric care.

3.4 Using Special Features and Options

The Kenmore Series 600 Dryer offers advanced features for tailored drying. The moisture sensor automatically adjusts drying time for optimal results, while the Cool Down cycle reduces wrinkles by gradually cooling clothes. The Wrinkle Guard option helps prevent creases by tumbling clothes periodically after drying. Customize cycles with options like Timed Dry, Delicate, and Heavy Duty. Use the control panel to select settings that match your load type, ensuring efficient and gentle drying for all fabrics. These features enhance convenience and fabric protection.

Troubleshooting Common Issues

Common issues include no heat, dryer not starting, or error codes. Check power supply, reset breaker, and ensure proper venting; Clean sensors and lint traps regularly.

4.1 Identifying Error Codes and Their Meanings

The Kenmore Series 600 Dryer displays error codes such as E1, E2, and E3, indicating issues like temperature sensor malfunctions or moisture sensor problems. Each code corresponds to specific faults, guiding users to resolve issues efficiently. Refer to the manual for detailed explanations and repair steps to address these codes and restore proper dryer function.

4.2 Resolving Common Operational Problems

Common issues with the Kenmore Series 600 Dryer include no heat, failure to start, or excessive noise. For no heat, check the power supply, circuit breaker, and gas connections. If the dryer won’t start, ensure the door is closed properly and the start button is functioning. Excessive noise may indicate loose belts or debris in the drum. Regular cleaning of vents and filters can prevent many operational issues. Always refer to the manual for detailed troubleshooting steps.

4.3 Diagnosing and Repairing Faulty Parts

Identify faulty parts by observing symptoms like unusual noises or lack of heat. Common issues include worn drum belts, faulty igniters, or defective heating elements. Refer to the manual for diagrams and part numbers. For complex repairs, such as replacing the heating element, professional assistance is recommended. Always disconnect power before attempting repairs. Use genuine Kenmore parts for optimal performance and safety.

Maintenance and Care

Regular cleaning of the dryer vent and filter ensures optimal performance. Replace worn-out parts promptly and schedule annual professional inspections to maintain efficiency and safety.

5.1 Cleaning the Dryer and Vent System

Regular cleaning is essential for maintaining efficiency and safety. Use a vacuum or brush to remove lint from the vent system and dryer interior. Clean the lint filter after each use to ensure proper airflow. Check the moisture sensor for buildup and wipe it clean. Inspect the venting system for blockages or kinks, ensuring it is securely connected to both the dryer and exterior vent. This prevents fire hazards and improves drying performance.

5.2 Replacing Parts and Filters

Regularly replace the lint filter and check for worn-out parts to maintain optimal performance. Refer to the manual or Sears Parts Direct for compatible replacement components. Ensure all parts are genuine and designed for your specific Kenmore Series 600 model. Replacing filters and parts promptly prevents inefficiency and potential damage. Always follow the manufacturer’s instructions for installation to guarantee safety and functionality. This helps extend the dryer’s lifespan and ensures reliable operation.

5.3 Scheduling Regular Maintenance Checks

Schedule regular maintenance checks every 6-12 months to ensure the dryer operates efficiently. Clean the vent system annually to prevent blockages and reduce fire risks. Inspect belts, rollers, and connections for wear. Refer to the Kenmore Series 600 manual or consult a professional for thorough checks. This routine maintenance enhances performance, safety, and longevity of the appliance, ensuring it continues to deliver optimal results for years to come. Always follow the manufacturer’s recommendations.

Safety Precautions and Guidelines

Always follow safety guidelines to ensure safe operation. Keep flammable materials away, avoid overloading, and never leave the dryer unattended while in use. Regularly clean vents.

6.1 General Safety Tips for Using the Dryer

Always ensure the dryer is installed on a stable, level surface to prevent tipping. Keep children away while the dryer is in operation. Never overload the dryer, as this can cause imbalance and reduce efficiency. Avoid placing flammable items near the dryer, and ensure proper ventilation to prevent moisture buildup. Regularly inspect and clean the venting system to reduce fire risks. Follow all safety guidelines provided in the manual to ensure safe operation.

6.2 Precautions for Specific Fabric Types

For delicate fabrics, use the low-heat setting to prevent damage. Wool and silk items should be dried on an air-only cycle. Synthetic fabrics like polyester and nylon can withstand higher heat but may shrink if exposed to excessive temperatures. Always separate heavy-duty items like towels from lightweight fabrics to ensure even drying. Avoid drying items with metal parts, as they may damage the drum or other clothes. Follow fabric care labels for specific instructions;

6.3 Emergency Procedures and Shutdown

In case of an emergency, immediately turn off the dryer and disconnect the power supply. For fires, switch off the circuit breaker or unplug the dryer. Open windows for ventilation but do not attempt to fight the fire yourself. If the dryer is gas-powered, shut off the gas supply valve. Evacuate the area and contact emergency services. After the situation is controlled, have the dryer inspected by a professional before reuse.

Technical Specifications

The Kenmore Series 600 Dryer features a 7.0 cu. Ft. capacity, 27″ width, and weighs approximately 150 lbs. It is ENERGY STAR certified for efficiency.

7.1 Dimensions and Weight of the Dryer

The Kenmore Series 600 Dryer measures 27 inches in width, 38.75 inches in height, and 32.75 inches in depth. It weighs approximately 150 pounds, ensuring stability during operation. These dimensions make it suitable for standard laundry spaces while accommodating large loads efficiently. ENERGY STAR certification highlights its energy efficiency, aligning with modern household needs for performance and cost savings.

7.2 Energy Efficiency and Consumption

The Kenmore Series 600 Dryer is ENERGY STAR certified, ensuring it meets energy efficiency standards. It consumes less energy compared to non-certified models, reducing utility bills and environmental impact. The manual provides guidelines for optimizing energy use, such as selecting the right cycles and maintaining proper ventilation for efficient operation.

7.3 Compatibility with Different Laundry Loads

The Kenmore Series 600 Dryer is designed to handle various laundry loads, from delicate fabrics to bulky items. Its 7.0 cu. Ft. capacity ensures efficient drying for both small and large loads. The dryer features multiple cycles and temperature settings, making it adaptable to different fabric types, including heavy-duty and sensitive materials, ensuring optimal performance and care for all laundry needs.

User Guide and Manual Features

The Kenmore Series 600 Dryer manual is comprehensive, featuring detailed diagrams, installation guides, and troubleshooting tips. It includes part diagrams and repair instructions for easy reference.

8.1 Navigating the Manual for Quick Reference

The Kenmore Series 600 Dryer manual is designed for easy navigation, with a clear table of contents and indexed sections. Users can quickly locate installation guides, troubleshooting tips, and repair instructions. The manual also includes detailed diagrams and part lists, making it simple to identify components and solutions. This organized structure ensures users can find the information they need efficiently, saving time and effort when addressing maintenance or operational issues.

8.2 Understanding Diagrams and Illustrations

The manual includes detailed diagrams and illustrations to help users understand the dryer’s components and assembly. These visuals guide installation, maintenance, and repair processes. Clear labels and cross-references ensure users can identify parts and troubleshoot issues effectively. The diagrams also illustrate proper venting configurations and electrical connections, making complex tasks more manageable. This visual aid enhances comprehension, allowing users to perform tasks confidently and correctly.

8.3 Accessing Additional Resources Online

For further assistance, users can access additional resources online through Sears Parts Direct. This platform offers downloadable manuals, part diagrams, and troubleshooting guides specific to Kenmore models like 11067622600 and 11067632600. Visitors can enter their model number to find relevant materials, ensuring accurate repairs and maintenance. Online resources also include FAQs and repair clinics, providing comprehensive support for optimal dryer performance and longevity.

flaming river manual rack

The Flaming River Manual Rack is a high-performance steering system designed for precision and durability. Popular among car enthusiasts, it’s often used in racing and custom vehicle projects.

1.1 What is a Flaming River Manual Rack?

The Flaming River Manual Rack is a high-quality, manually operated steering system designed for vehicles, particularly popular among racing and performance enthusiasts. It is a bolt-on replacement for power steering systems, offering precise control and responsiveness. Constructed with durable materials, it is engineered to withstand the demands of high-performance driving. The manual rack is often sought after for its simplicity, reliability, and ability to enhance driver feedback. It is commonly used in classic and custom vehicle restorations, as well as racing applications, where hydraulic power steering is not desired. The system is known for its smooth operation and lightweight design.

1.2 Overview of Its Popularity and Use

The Flaming River Manual Rack has gained significant popularity among car enthusiasts and racers due to its reliability and performance. It is widely used in racing and custom vehicle projects where precise steering control is essential. The system is favored for its durability and simplicity, making it a preferred choice for those seeking to eliminate the complexity of power steering. Its lightweight design and manual operation appeal to drivers who value direct feedback and responsiveness. The rack is also popular in classic car restorations, where maintaining original handling characteristics is desired. Its versatility and ease of installation further contribute to its widespread adoption.

Components of the Flaming River Manual Rack

The Flaming River Manual Rack includes a steering rack assembly, pinion gear, mounting hardware, and accessories. Together, they ensure precise and smooth steering control.

2.1 Steering Rack Assembly

The Flaming River Manual Rack’s steering rack assembly is a durable, high-performance component designed for precise steering control. It features a robust construction with a sturdy housing to ensure alignment and minimize wear. The assembly is engineered to provide smooth, consistent steering feedback, making it ideal for both racing and everyday driving. Its manual design eliminates the need for power assist, offering drivers a more direct connection to the road. The rack is typically made from high-quality materials to withstand the rigors of heavy use and is often customizable to fit various vehicle setups, ensuring compatibility and optimal performance.

2.2 Pinion Gear and Its Function

The pinion gear in the Flaming River Manual Rack plays a crucial role in translating the driver’s steering input into precise vehicle movement. Designed for durability, the pinion gear is typically constructed from high-strength materials to withstand heavy use and maintain accurate steering control. It meshes seamlessly with the rack, converting the rotational motion of the steering shaft into linear motion that directs the wheels. Proper alignment and lubrication of the pinion gear are essential for smooth operation and to prevent wear. The gear’s design ensures minimal backlash, providing a responsive and direct steering feel, which is particularly beneficial for performance driving applications.

2.3 Mounting Hardware and Accessories

The Flaming River Manual Rack comes with precision-engineered mounting hardware designed to ensure a secure and stable installation. These components include heavy-duty bolts, brackets, and spacers, all crafted from high-grade materials for durability. Accessories such as alignment tools and bushings are also provided to facilitate proper fitment and minimize vibration. The mounting hardware is tailored to specific vehicle applications, ensuring compatibility and ease of installation. Additionally, optional accessories like steering column adapters and mounting kits can be purchased separately for custom setups. Proper use of these components is essential to maintain the system’s performance and longevity, ensuring precise steering control.

2.4 How the Components Work Together

The Flaming River Manual Rack operates through a synchronized effort of its components. The steering rack assembly converts the driver’s input into lateral wheel movement, while the pinion gear ensures precise engagement with the rack’s teeth. Mounting hardware secures the assembly, preventing any lateral shift that could disrupt steering accuracy. Together, these components work seamlessly to deliver responsive and consistent control. The system’s design minimizes play and maximizes efficiency, providing a direct connection between the steering wheel and the wheels. This integration ensures smooth, accurate steering, making it ideal for high-performance driving applications where precision is paramount. Proper installation is key to maintaining optimal functionality.

Benefits of Upgrading to a Flaming River Manual Rack

Upgrading to a Flaming River Manual Rack enhances steering precision, reduces maintenance, and offers weight savings for improved performance and handling in various racing and custom applications.

3.1 Improved Steering Precision

The Flaming River Manual Rack delivers exceptional steering precision, offering direct and responsive control. Unlike power steering systems, it eliminates play and lag, providing drivers with immediate feedback. This precision is crucial for racing and high-performance applications, where every turn matters. The rack’s robust design minimizes wear and ensures consistent performance over time. Drivers can feel the road more accurately, enabling sharper turns and better handling. This level of precision is a key reason enthusiasts upgrade to Flaming River, as it enhances overall driving experience and vehicle responsiveness.

3.2 Reduced Maintenance Compared to Stock Systems

The Flaming River Manual Rack offers reduced maintenance compared to stock systems, as it eliminates the complexity of power steering components. Without hydraulic lines, pumps, or fluid, there’s less risk of leaks or system failure. The manual rack’s simple, durable design minimizes wear and tear, requiring less frequent servicing. Stock systems often need regular fluid changes and component replacements, whereas the Flaming River Rack’s straightforward mechanism reduces these needs. This makes it a practical choice for drivers seeking a reliable, low-maintenance steering solution that performs consistently over time without the hassle of frequent repairs or replacements.

3.3 Weight Reduction for Better Performance

The Flaming River Manual Rack contributes to significant weight reduction, enhancing overall vehicle performance. By eliminating heavy power steering components like hydraulic pumps, fluid, and motors, it simplifies the steering system. This reduction in weight improves acceleration, handling, and fuel efficiency, making it ideal for racing and high-performance applications. The lighter design also reduces strain on the engine, allowing for more responsive steering and better power distribution. Drivers seeking optimal performance benefit from the Flaming River Rack’s streamlined construction, which maintains reliability while shaving off unnecessary weight, thereby elevating the vehicle’s overall agility and responsiveness on the road or track.

Installation Considerations

Installing a Flaming River Manual Rack requires compatibility checks, precise alignment, and specialized tools. Expertise in steering systems is recommended for a smooth, error-free process.

4.1 Compatibility with Different Vehicles

The Flaming River Manual Rack is compatible with a wide range of vehicles, including classic cars, performance vehicles, and racing applications. It is often used in Ford and GM vehicles due to its adaptable design. Compatibility depends on factors like steering column type, engine configuration, and existing suspension setup. Owners of vehicles with specific modifications, such as headers or custom steering systems, should verify fitment before installation. Flaming River offers tailored solutions for various makes and models, ensuring a precise match for optimal performance. Always consult the manufacturer’s fitment guide or contact their support for vehicle-specific recommendations.

4.2 Step-by-Step Installation Process

Installing the Flaming River Manual Rack requires careful preparation and precise steps. Begin by lifting the vehicle and removing the steering wheel for access. Disconnect the battery to ensure safety. Remove the old steering rack and associated components, taking note of the existing connections. Mount the new Flaming River Manual Rack, ensuring proper alignment and secure fastening. Reconnect the steering shaft, hydraulic lines, and electrical connectors if applicable. Bleed the system to eliminate air bubbles and test the steering for smooth operation. Follow the manufacturer’s instructions closely and consider professional assistance for complex setups or custom applications; Proper installation ensures optimal performance and safety.

4.3 Tools and Expertise Required

Installing a Flaming River Manual Rack requires specialized tools and mechanical expertise. Essential tools include a steering wheel puller, socket set, wrenches, and hydraulic line wrenches. Additionally, a floor jack and jack stands are necessary for safely lifting the vehicle. Basic mechanical skills, such as bleeding hydraulic systems and aligning components, are crucial. Advanced knowledge of steering systems and suspension geometry may be needed for precise alignment. For complex installations, especially in custom or high-performance vehicles, professional expertise is recommended to ensure proper setup and functionality. Proper tools and skills are vital for a successful and safe installation process.

Common Applications and Compatibility

The Flaming River Manual Rack is widely used in racing, street rods, and classic car restorations. It is compatible with various vehicles, including performance and custom builds.

5.1 Vehicles Typically Equipped with Flaming River Rack

The Flaming River Manual Rack is commonly installed in classic cars, street rods, and high-performance vehicles. It is popular in cars like the Chevrolet Camaro, Ford Mustang, and other muscle cars. Many vintage vehicles, such as early-model trucks and hot rods, also utilize this rack for its precise steering control. Additionally, it is often chosen for custom builds and racing applications where lightweight and durable components are essential. The rack’s compatibility with various steering systems makes it a versatile choice for enthusiasts seeking to upgrade their vehicles’ handling and responsiveness without compromising on performance or reliability;

5.2 Racing and Performance Applications

The Flaming River Manual Rack is highly sought after in racing and performance environments due to its lightweight design and precise steering control. It is particularly popular in autocross, drag racing, and track-day vehicles where quick, responsive handling is critical. The rack’s durability and resistance to wear make it ideal for high-stress racing conditions. Many performance enthusiasts opt for this system to eliminate the complexity and potential failures of power steering systems. Its compact design also makes it a favorite for custom racing builds and competition cars, where every ounce of weight savings and improvement in handling can make a significant difference.

sportsman 4000 watt generator manual

Product Overview

The Sportsman 4000 Watt Generator is a portable, gasoline-powered unit delivering 4000 surge watts and 3500 running watts, ideal for outdoor and emergency power needs.

1.1 Key Features of the Sportsman 4000 Watt Generator

The Sportsman 4000 Watt Generator features 4000 surge watts and 3500 running watts, powered by a 7 HP, 212cc, 4-stroke OHV engine. It includes multiple outlets: 4x 120V AC, 1x 120V RV outlet, and 1x 12V DC outlet. The generator has a 3.9-gallon fuel tank, offering up to 10 hours of runtime at half load. It also includes automatic voltage regulation for stable power output and low oil shutdown protection for engine safety.

1.2 Technical Specifications

  • Power Output: 4000 surge watts / 3500 running watts
  • Engine: 7 HP, 4-stroke OHV, 212cc displacement
  • Fuel Type: Gasoline
  • Starting System: Recoil start
  • Fuel Tank Capacity: 3.9 gallons
  • Runtime: Up to 10 hours at half load
  • Outlets: 4x 120V AC, 1x 120V RV, 1x 12V DC
  • Voltage Regulation: AVR (Automatic Voltage Regulation)
  • Noise Level: 68 dB

Safety Precautions

Always read the manual and understand safety guidelines before using the generator. Ensure safe operating conditions, proper fuel handling, and electrical connections to avoid hazards and injuries.

2.1 General Safety Guidelines

Always read and understand the manual before operating the generator. Ensure proper ventilation to avoid carbon monoxide buildup. Keep the unit dry and use grounded electrical cords. Never overload the generator beyond its rated capacity. Store fuel safely and avoid operating in hazardous environments. Regular maintenance is crucial for safe and efficient performance. Adhere to all safety warnings to prevent accidents and ensure longevity of the generator.

2.2 Hazard and Warning Notices

Warning: Operating the generator improperly can result in fire, electrical shock, or carbon monoxide poisoning. Do not use in enclosed spaces without proper ventilation. Avoid overloading, as it may cause damage or safety hazards. Ensure the generator is on a level, stable surface. Never touch electrical components with wet hands. Keep children and flammable materials away. Follow all safety guidelines to prevent accidents and ensure safe operation.

Installation and Assembly

Unpack the generator carefully, ensuring all components are included. Follow the manual for initial setup and assembly, such as attaching wheels and handles. Tighten all bolts securely.

3.1 Unpacking and Initial Setup

Unpack the Sportsman 4000 Watt Generator carefully, ensuring all components are included. Read the manual thoroughly before starting. Place the generator on a level surface and ensure the area is clear. Check for any damage or missing parts. Familiarize yourself with the control panel, outlets, and fuel tank. Key components include the 7 HP engine, recoil start, and multiple outlets for versatile power distribution.

3.2 Assembly Requirements

Assembly of the Sportsman 4000 Watt Generator involves attaching the wheels, handle, and other external components; Ensure all bolts are tightened securely using the provided tools. Refer to the manual for specific torque specifications. The generator comes partially assembled, but key parts like the RV outlet may require connection. Oil is not included and must be purchased separately before initial startup. Always follow the manual’s assembly instructions to ensure safety and proper function.

Operating the Generator

Ensure the generator is on a level surface, plug in devices, and start using the recoil mechanism. Always follow the manual for safe operation and load management.

4.1 Starting and Stopping Procedures

Ensure the generator is on a level surface and all appliances are disconnected. Check the oil level, pull the choke, and slowly pull the recoil starter until the engine starts. Once running, push the choke back in. To stop, turn off the engine switch and allow the unit to cool before restarting. Always follow safety guidelines to avoid carbon monoxide risks and ensure proper operation.

4.2 Load Management and Power Output

For optimal performance, never exceed 3500 running watts or 4000 surge watts. Prioritize essential appliances to prevent overloading. Use the wattage worksheet to calculate power needs and distribute loads evenly across outlets. Avoid sudden high demands to maintain stable operation and prolong the generator’s lifespan. Always monitor the load to ensure safe and efficient energy delivery.

Maintenance and Servicing

Regular maintenance ensures longevity and efficiency. Check oil levels, air filters, and spark plugs. Drain fuel and perform tune-ups annually for optimal performance and reliability.

5.1 Routine Maintenance Tasks

Perform routine checks on oil levels, air filters, and spark plugs. Ensure the fuel tank is clean and free from debris. Regularly inspect the generator’s exhaust system for blockages. Change the engine oil every 50 hours of operation and replace the air filter as needed. Always refer to the manual for specific maintenance schedules and procedures to ensure optimal performance and longevity of the generator.

5.2 Oil and Fuel Recommendations

Use unleaded gasoline with a minimum octane rating of 87 for optimal performance. For oil, SAE 10W-30 is recommended. The generator has a 1.2-quart oil capacity. Always use high-quality oil to ensure proper engine lubrication and longevity. Avoid using synthetic oil or mixes. Regularly check fuel for freshness and store it in approved containers to prevent contamination and stale fuel issues.

Troubleshooting Common Issues

Common issues include the generator not starting or producing low power. Check spark plugs, oil levels, and air filters. Ensure proper fuel flow and connection. Refer to the manual for detailed solutions to resolve these problems efficiently and safely.

6.1 Diagnosing Faults

Diagnosing faults in the Sportsman 4000 Watt Generator involves checking key components. Ensure the spark plug is clean and properly gapped. Verify oil levels and air filter condition. Inspect fuel lines for blockages and ensure the fuel tank is not empty. Check for loose connections or worn-out parts. Refer to the manual for specific troubleshooting steps to identify and resolve issues efficiently.

6.2 Solutions for Common Problems

Common issues with the Sportsman 4000 Watt Generator include the engine not starting, low power output, or overheating. Check the spark plug for cleanliness and proper gap. Ensure the air filter is clean and fuel lines are unblocked. For low power, verify the load does not exceed 3500 running watts. If the engine overheats, inspect the air filter and ensure proper ventilation. Consult the manual or contact customer support for persistent issues.

Warranty and Support

The Sportsman 4000 Watt Generator comes with a 1-year limited warranty for the original owner. For support, contact customer service at (636) 532-9888 or visit their website.

7.1 Warranty Terms and Conditions

The Sportsman 4000 Watt Generator is covered by a 1-year limited warranty for the original owner. The warranty applies to defects in materials and workmanship under normal use. Coverage includes parts and labor for valid claims. Misuse, improper maintenance, or unauthorized repairs may void the warranty. For details, refer to the manual or contact customer service. Warranty registration is recommended for validation.

7.2 Customer Service and Contact Information

For assistance, contact Sportsman’s customer service at 1-866-460-9436 (Monday ⏤ Friday, 8 AM ⎯ 4 PM Central Time). Visit their official website for support resources, manuals, and FAQs. Warranty registrations and product inquiries can also be submitted online. Ensure to have your product model number ready for efficient service. Customer support is available to address operational, technical, and warranty-related questions effectively.

Frequently Asked Questions

Q: How do I start the generator? A: Refer to the manual for step-by-step starting procedures. Ensure the fuel valve is open and choke is properly adjusted. Q: What is the recommended oil type? A: Use SAE 10W-30 oil for optimal performance. Always check the manual for specific recommendations.

8.1 General Inquiries

Q: What is the Sportsman 4000 Watt Generator’s power output? A: It delivers 4000 surge watts and 3500 running watts, ideal for powering essential appliances and tools.
Q: Can it be used for RVs? A: Yes, it features a 120V RV outlet, making it suitable for RV applications.
Q: Is assembly required? A: Minimal assembly is needed, and instructions are provided in the manual for easy setup.
Q: Where can I find the manual? A: The manual is available for download on the manufacturer’s website or through authorized retailers.

8.2 Technical and Operational Questions

Q: What type of oil is recommended? A: Use 10W-30 oil for optimal performance.
Q: Can it run on propane? A: Yes, dual-fuel models can operate on propane or gasoline.
Q: What is the runtime? A: Up to 10 hours at 50% load.
Q: How many outlets does it have? A: Four 120V A/C outlets, one 120V RV outlet, and one 12V D/C outlet.
Q: Is it CARB-compliant? A: Yes, it meets environmental standards for use in all states.

Environmental and Storage Considerations

Store the generator in a dry, well-ventilated area. Dispose of fuel and oil responsibly. Follow local regulations for eco-friendly disposal of hazardous materials.

9.1 Proper Storage Techniques

Store the Sportsman 4000 Watt Generator in a dry, well-ventilated area, away from direct sunlight and moisture. Drain the fuel tank or use a fuel stabilizer to prevent degradation. Disconnect the battery and secure the unit to prevent theft. Cover the generator with a breathable material to protect from dust and debris. Regularly inspect for damage or rodent infestation before and after storage.

9.2 Environmental Impact and Disposal

Proper disposal of the Sportsman 4000 Watt Generator is crucial to minimize environmental impact. Follow local regulations for hazardous waste disposal. Drain all fuel and oil before disposal and recycle responsibly. The generator contains recyclable metals. Participate in e-waste or appliance recycling programs to ensure sustainable disposal. This helps conserve resources and reduce landfill waste. Adhere to safety guidelines to prevent accidents.

Additional Resources

Download the full manual from Buffalo Corp’s website or authorized dealers. Contact customer service at (636) 532-9888 for support. Explore recommended accessories for optimal performance.

10.1 Downloading the Full Manual

10.2 Recommended Accessories

Recommended accessories for the Sportsman 4000 Watt Generator include a high-quality oil filter, fuel tank, weather-resistant cover, and heavy-duty extension cords. These items ensure optimal performance and longevity. Visit Buffalo Corp’s official website or authorized dealers for genuine parts. Always refer to the manual for compatibility and safety guidelines when selecting accessories. Contact customer service for further assistance or recommendations.

Compliance and Certifications

This generator is EPA and CARB certified, ensuring compliance with safety and environmental regulations for reliable performance and meeting rigorous high-quality standards.

11.1 Regulatory Compliance

The Sportsman 4000 Watt Generator is EPA and CARB certified, meeting strict environmental and safety standards. It adheres to EPA emission requirements and CARB regulations for low emissions, ensuring it is environmentally friendly and legally compliant for use in all states. This certification guarantees the generator operates efficiently while minimizing environmental impact. Compliance with these regulations ensures safe and reliable performance.

11.2 Safety Certifications

The Sportsman 4000 Watt Generator meets strict safety standards, ensuring reliable and secure operation. It is certified by recognized safety organizations, adhering to industry regulations for portable generators. The unit includes features like overload protection and low oil shutdown, enhancing user safety. Compliance with these certifications guarantees the generator operates safely under various conditions, protecting both the user and the equipment.

User Feedback and Reviews

Users praise the Sportsman 4000 Watt Generator for its reliability and portability, making it ideal for camping and emergency power. Many highlight its ease of use and sufficient power output for essential appliances. However, some note that it can be noisy and less fuel-efficient under heavy loads. Overall, it receives positive ratings for its value and performance.

12.1 Customer Experiences

Customers report the Sportsman 4000 Watt Generator as reliable for camping and emergencies. Many appreciate its portability and sufficient power for small appliances. Some mention noise and lower fuel efficiency under heavy use. Overall, positive feedback highlights its value and performance for everyday needs.

12.2 Product Ratings and Recommendations

The Sportsman 4000 Watt Generator is rated 4.2/5 stars, praised for its durability and ease of use. Experts recommend it for small-scale power needs, noting its compact design and reliable engine. However, some suggest improvements in noise reduction and fuel efficiency. It is a solid choice for those seeking an affordable, portable power solution.

retractable manual awning

Retractable manual awnings offer a practical shade solution, enhancing outdoor spaces with UV protection and energy efficiency, perfect for decks, balconies, and patios․

1․1 What Are Retractable Manual Awnings?

Retractable manual awnings are versatile shade solutions designed to provide UV protection and enhance outdoor spaces․ Operated by a crank handle, they feature durable, water-resistant fabric and sturdy aluminum frames․ These awnings offer flexibility, allowing users to extend or retract them as needed․ Ideal for decks, patios, and balconies, they combine functionality with style, creating a comfortable outdoor environment while protecting against harsh weather conditions․

1․2 Importance of Awnings for Outdoor Spaces

Retractable manual awnings enhance outdoor living by providing shade, protecting against harmful UV rays, and reducing heat exposure․ They create a comfortable environment for relaxation and entertainment, while also lowering energy costs by keeping interior spaces cooler․ Awnings add style and functionality to decks, patios, and balconies, increasing property value․ Their durability and versatility make them a practical investment for year-round enjoyment of outdoor areas․

Benefits of Retractable Manual Awnings

Retractable manual awnings provide shade, protect against UV rays, reduce energy costs, and enhance outdoor spaces with durability and style for year-round use․

2․1 Extra Shade for Outdoor Areas

Retractable manual awnings provide excellent shade coverage, ideal for patios, decks, and balconies․ They extend outdoor living spaces, offering a cool retreat from direct sunlight․ With sizes like 10×8 or 13×8 feet, these awnings create a shaded area perfect for relaxation or entertaining․ The UV-resistant fabric blocks harmful rays, reducing heat exposure and creating a comfortable environment․ This extra shade enhances outdoor enjoyment, making it easier to unwind or host gatherings in a protected setting․

2․2 Protection from UV Rays

Retractable manual awnings shield outdoor spaces from harmful UV rays, protecting both people and interior areas from excessive heat and damage․ The UV-resistant fabric blocks skin-damaging UVA and UVB rays, creating a safer environment for relaxation and entertaining․ This protection also reduces fading of indoor furniture and lowers cooling costs by keeping rooms cooler naturally, enhancing comfort and energy efficiency throughout the year․

2․3 Energy Savings Through Reduced Heat

Retractable manual awnings reduce heat by blocking direct sunlight, lowering indoor temperatures and energy costs․ By shading windows and doors, they minimize the need for air conditioning, creating a cooler living space․ This energy efficiency not only saves money but also reduces environmental impact, making awnings a practical and eco-friendly addition to homes and outdoor areas․

2․4 Durability and Weather Resistance

Retractable manual awnings are designed with durable materials, such as water-resistant fabric and rust-proof aluminum frames, ensuring longevity․ They withstand various weather conditions, including rain, wind, and intense sunlight․ The fabric is typically UV-resistant, preventing fading and damage from sun exposure․ Proper care and retraction during harsh weather enhance their durability, making them a reliable choice for outdoor spaces while maintaining aesthetic appeal and functionality over time․

Types of Retractable Awnings

Retractable awnings come in manual and motorized types, with manual models featuring crank handles for easy operation, offering durability and weather resistance, ideal for outdoor use․

3․1 Manual vs․ Motorized Awnings

Manual awnings use a crank handle for easy, low-cost operation, ideal for smaller spaces․ Motorized awnings offer automatic control, often with remote or sensor features, suiting larger areas and convenience․ Both options provide UV protection and energy savings, but motorized models can be more expensive and require electrical installation, whereas manual systems are simpler and budget-friendly․

3․2 Manual Crank Handle Operation

Manual crank handles provide a simple, cost-effective way to extend or retract awnings․ The crank operates a gear system, offering easy control․ Turning the handle extends the awning for shade, while retracting it protects the fabric during bad weather․ Regular lubrication ensures smooth operation․ This system is durable and requires minimal maintenance, making it a practical choice for homeowners seeking functionality without automation․

Installation and Setup

Proper installation ensures your awning functions smoothly․ Mount the frame securely, attach the fabric, and test the crank mechanism․ Ensure level alignment for optimal performance and durability․

4․1 Preparation for Installation

Before installing, measure the area to ensure proper fit and choose a sturdy mounting surface․ Gather tools like drills, screws, and ladders․ Ensure the awning frame and fabric are undamaged․ Check local building codes and weather conditions for ideal installation timing․ Prepare the wall by marking mounting points accurately․ Ensure all components are included in the package․ Clear the workspace for safe and efficient setup․

4․2 Step-by-Step Installation Guide

Attach mounting brackets securely to the wall, ensuring proper alignment․ Unpack and assemble the awning frame according to instructions․ Attach the fabric to the frame tightly, avoiding wrinkles․ Install the crank mechanism on the frame and test its operation․ Align the awning with the mounting brackets and secure it firmly․ Tighten all bolts and screws for stability․ Finally, test the awning by extending and retracting it to ensure smooth functionality․

4․3 Tips for Proper Alignment and Leveling

Ensure the mounting surface is level using a spirit level․ Align the awning frame with the wall brackets precisely․ Double-check the frame’s alignment before securing it․ Use shims if necessary to achieve proper leveling․ Test the awning’s extension and retraction to ensure smooth operation․ Regularly inspect and adjust the alignment to maintain stability and prevent damage․ Proper leveling ensures optimal performance and longevity of the awning․

Maintenance and Care

Regular upkeep ensures longevity and functionality․ Clean the fabric seasonally, inspect for damage, and store properly during harsh weather to maintain your awning’s performance and appearance․

5․1 Cleaning the Awning Fabric

Use a mild detergent and water to clean the fabric, avoiding abrasive materials․ Gently scrub stains, rinse thoroughly, and allow the fabric to air dry․ Regular cleaning prevents dirt buildup and extends the awning’s lifespan․ For stubborn stains, isopropyl alcohol can be effective, but always test a small area first․ Proper care ensures the fabric remains UV-resistant and maintains its color vibrancy over time․

5․2 Protecting the Fabric from Damage

To protect your awning fabric, avoid using harsh chemicals or abrasive cleaners, as they can damage the material․ Store the awning during winter months to prevent snow and ice damage․ Use a breathable cover to shield it from dust and moisture․ Avoid exposing the fabric to sharp objects or excessive force, which can cause tears․ Regular inspections and prompt repairs will help maintain its durability and UV-resistance over time․

5․3 Winter Care and Storage

During winter, store your retractable manual awning to protect it from snow and ice damage․ Clean the fabric thoroughly before storage to prevent mildew․ Use a breathable cover to shield it from moisture and dust․ Keep the awning dry and store it in a secure, sheltered area․ Avoid leaving it exposed to harsh winter conditions․ Regularly inspect the fabric and frame in spring to ensure it remains in good condition for the next season․

5․4 Regular Inspection and Repair

Regular inspection ensures the longevity of your retractable manual awning․ Check the fabric for tears and clean it with an approved RV awning cleaner or isopropyl alcohol for tough stains․ Inspect the frame, hinges, and springs for wear․ Address any damage promptly to prevent further issues․ Timely repairs will keep your awning functioning smoothly and maintain its protective qualities throughout the seasons․

Factors to Consider When Choosing an Awning

When selecting a retractable manual awning, consider size, material quality, UV resistance, and budget to ensure durability and meet your outdoor space needs effectively․

6․1 Size and Coverage Area

Measuring your outdoor space is crucial to determine the ideal awning size․ Consider the area you want to cover, ensuring proper fit and shade distribution․ A larger awning may offer more coverage but check for space constraints․ Common sizes like 10×8 or 13×8 feet are popular, providing ample shade for decks or balconies․ Choose a size that balances your needs without overwhelming the structure, ensuring functionality and aesthetic appeal․

6․2 Material and Fabric Quality

High-quality materials are essential for durability and performance․ Fabrics like UV- and water-resistant polyester are popular for their strength and weather resistance․ Aluminum frames provide lightweight yet sturdy support․ Look for fabrics with tight weaves to block sunlight effectively․ Durable stitching and reinforced seams ensure longevity․ Investing in premium materials enhances the awning’s functionality and aesthetic appeal, making it a worthwhile long-term investment for outdoor comfort and protection․

6․3 Budget and Cost-Effectiveness

Retractable manual awnings are a budget-friendly option for outdoor shade, with prices ranging from $150 to $300, depending on size and quality․ They offer long-term savings by reducing energy costs and protecting furniture from sun damage․ While higher-end models may initially cost more, their durability and low maintenance make them a cost-effective choice․ Consider your budget and needs to find the right balance between quality and affordability for your outdoor space․

Popular Brands and Models

Outsunny is a top choice, offering models like the 10×8 and 13×8 retractable awnings with manual crank handles․ Other leading manufacturers provide similar options, ensuring durability and style․

7․1 Outsunny Retractable Awnings

Outsunny offers high-quality retractable awnings, such as the 10×8 and 13×8 models, featuring manual crank handles for easy operation․ These awnings provide UV and water-resistant fabric, along with durable aluminum frames, ensuring long-lasting performance․ Designed for decks, balconies, and patios, Outsunny awnings combine functionality and style, offering shade and protection from the sun’s harmful rays while enhancing outdoor living spaces with sleek designs and reliable durability․

7․2 Other Leading Manufacturers

Beyond Outsunny, other manufacturers offer top-tier retractable manual awnings․ Brands like SunSetter and Durasol provide durable, UV-resistant models, while companies such as NuImage and Carefree specialize in RV awnings․ These manufacturers ensure high-quality materials, robust frames, and user-friendly designs, catering to various needs from residential patios to RVs, ensuring optimal shade solutions for diverse outdoor settings with reliable performance and stylish aesthetics․

Troubleshooting Common Issues

  • Fabric tears can be repaired with patches or tape․
  • Stubborn stains may require isopropyl alcohol for removal․
  • Jammed mechanisms often need lubrication or adjustment․

8․1 Repairing Tears in the Fabric

Repairing tears in retractable manual awning fabric is essential to maintain functionality․ Start by cleaning the area with isopropyl alcohol to ensure a proper bond․ Apply a patch kit specifically designed for awning fabric, pressing firmly to secure it․ Allow the adhesive to dry completely before testing the awning․ For larger tears, professional repair may be necessary to prevent further damage․ Regular inspections can help catch issues early, ensuring longevity and performance․

8․2 Adjusting the Crank Mechanism

Adjusting the crank mechanism of a retractable manual awning ensures smooth operation․ Loosen the retaining screws and align the crank properly․ Tighten the screws firmly to secure it․ Ensure the handle turns freely without binding․ If the mechanism feels stiff, apply a small amount of silicone-based lubricant․ Regular adjustments prevent wear and tear, maintaining the awning’s functionality over time․ Proper alignment ensures even extension and retraction of the fabric․

8․3 Removing Stubborn Stains

For stubborn stains on your retractable manual awning, start by identifying the stain type․ Use an approved RV awning cleaner or mild detergent mixed with water․ Gently scrub the area with a soft-bristle brush, avoiding harsh chemicals․ Rinse thoroughly with clean water․ If stains persist, apply isopropyl alcohol directly to the spot, let it sit, then rinse․ Avoid abrasive cleaners to prevent fabric damage․ Allow the awning to air dry completely after cleaning․

Retractable manual awnings offer a perfect blend of style and functionality, providing shade, UV protection, energy savings, and durability, enhancing outdoor spaces with ease and beauty․

9․1 Final Thoughts on Retractable Manual Awnings

Retractable manual awnings are a practical, stylish solution for outdoor spaces, offering shade, UV protection, and energy savings․ Models like the Outsunny 10×8 and 13×8 provide durability and ease of use with manual crank handles․ Regular maintenance, such as cleaning with approved cleaners or isopropyl alcohol, ensures longevity․ These awnings enhance outdoor living, making them a worthwhile investment for homeowners seeking comfort and functionality․

9․2 Encouragement to Invest in an Awning

Investing in a retractable manual awning is a smart decision to enhance your outdoor space․ It provides shade, protects against harmful UV rays, and reduces energy costs․ With durable models like the Outsunny 10×8 and 13×8, you get long-lasting performance and ease of use․ Regular maintenance, such as cleaning with approved cleaners or isopropyl alcohol, ensures your awning remains in great condition․ Upgrade your patio or balcony today for a more comfortable and enjoyable outdoor experience!

hp15c manual

Welcome to the HP-15C manual‚ your comprehensive guide to unlocking the calculator’s full potential. Designed for both novices and experienced users‚ this manual covers basic functions‚ advanced operations‚ and programming‚ ensuring you maximize the HP-15C’s capabilities‚ including its Continuous Memory and problem-solving features.

Overview of the HP-15C Calculator

The HP-15C is a scientific calculator designed for portability and convenience‚ weighing just 116 grams. It features Continuous Memory‚ retaining data even when powered off‚ and offers advanced functions like integration and problem-solving capabilities. With direct and indirect storage in up to 67 registers‚ it supports complex calculations. The calculator is ideal for both novices and experts‚ providing a user-friendly interface for basic operations and advanced programming. Its sophisticated iterative algorithm for integrals and customizable features make it a powerful tool for various applications‚ supported by a comprehensive manual to guide users through its extensive capabilities.

Importance of the Manual for Users

The HP-15C manual is an essential resource for users of all expertise levels‚ providing detailed guidance on basic and advanced functions. It serves as a primary reference for understanding the calculator’s problem-solving capabilities‚ Continuous Memory‚ and programming features. The manual includes examples‚ quick-reference guides‚ and troubleshooting tips‚ ensuring users can fully utilize the calculator’s potential. Whether you’re performing scientific calculations or customizing operations‚ the manual offers clear instructions to enhance your experience. It is indispensable for unlocking the HP-15C’s versatility and maximizing its functionality in various applications.

Structure of the HP-15C Manual

The HP-15C manual is structured for clarity‚ starting with basic functions and progressing to advanced operations. It includes a table of contents‚ sections for all skill levels‚ ensuring easy navigation to find information efficiently.

Table of Contents and Organization

The HP-15C manual begins with a detailed table of contents‚ organizing information logically. Sections include basic functions‚ advanced operations‚ and programming‚ each with clear headings. Appendices provide additional resources‚ such as function summaries and warranty details. This structure ensures users can quickly locate specific topics‚ making the manual user-friendly for both beginners and advanced users. The organization is designed to guide learners from foundational concepts to complex tasks efficiently‚ enhancing the overall learning experience with the HP-15C.

Key Sections for Beginners and Advanced Users

The HP-15C manual is divided into sections tailored for different skill levels. Beginners can start with basic operations‚ navigation‚ and Continuous Memory‚ while advanced users explore programming‚ integration‚ and specialized functions. Key sections include introductory materials like “The HP-15C: A Problem Solver” and detailed appendices for complex operations. The manual also provides quick-reference guides‚ such as function summaries and programming indexes‚ to help users of all levels navigate its features efficiently. This structured approach ensures a smooth learning curve‚ making the HP-15C accessible and powerful for everyone.

Key Features of the HP-15C

The HP-15C offers advanced scientific functions‚ powerful programming capabilities‚ and Continuous Memory. Its portability and low power consumption make it a versatile tool for various applications.

Scientific and Advanced Functions

The HP-15C excels in scientific and advanced calculations‚ offering functions like integration‚ equation solving‚ and matrix operations. Its sophisticated algorithm for integration evaluates functions at multiple points‚ ensuring accuracy. The calculator also supports complex numbers and statistical analysis‚ making it ideal for engineering and mathematics. Advanced users can leverage its problem-solving capabilities‚ while the Continuous Memory feature retains data and programs. Portability and low power consumption enhance its usability‚ providing a reliable tool for professionals and students. This calculator’s versatility and precision make it a standout choice for complex computations and real-world applications.

Programming Capabilities

The HP-15C offers robust programming features‚ allowing users to create custom solutions for complex problems. With direct and indirect storage in up to 67 registers‚ it enables efficient data management and program execution. The manual provides detailed guidance on programming‚ ensuring users can harness these capabilities effectively. Whether for simple routines or advanced algorithms‚ the HP-15C’s programming tools offer unparalleled flexibility and power‚ making it an indispensable tool for professionals and enthusiasts alike.

Getting Started with the HP-15C

Welcome to the HP-15C! This section introduces basic operations and navigation‚ helping you understand the calculator’s essential features‚ such as Continuous Memory‚ to get you started quickly and efficiently.

Basic Operations and Navigation

Mastering basic operations on the HP-15C is straightforward due to its intuitive design. The calculator features a stack-based input method‚ requiring users to enter numbers and operations in a specific sequence. The keypad is divided into function groups‚ with primary operations like addition‚ subtraction‚ multiplication‚ and division accessible directly. Navigation is simplified with dedicated buttons for scrolling‚ clearing‚ and recalling memory contents. Learn to use the yellow and blue shift keys to access advanced functions without confusion. Understanding these fundamentals ensures smooth operation‚ whether performing simple calculations or preparing for more complex tasks. This section guides you through essential steps to get started efficiently.

Understanding Continuous Memory

The HP-15C features Continuous Memory‚ a groundbreaking technology that retains data and programs even when the calculator is turned off. This innovative feature eliminates the need to repeatedly input calculations or reprogram functions‚ saving valuable time. Continuous Memory ensures that your work remains intact‚ allowing seamless transitions between tasks. This capability is particularly beneficial for complex calculations and programming‚ where losing data could be disruptive. Understanding how to utilize Continuous Memory effectively enhances your productivity and ensures a more efficient user experience with the HP-15C‚ making it an indispensable tool for both professionals and enthusiasts.

Advanced Functions and Programming

The HP-15C offers advanced programmable features and problem-solving capabilities‚ including integration and solving functions‚ making it a powerful tool for complex calculations and custom applications.

Programming on the HP-15C is designed to be intuitive and powerful‚ allowing users to create custom solutions for complex problems. The calculator supports direct and indirect storage in up to 67 registers‚ enabling efficient data management. Beginners can start with the introductory material‚ “The HP-15C: A Problem Solver‚” which guides them through basic programming concepts. The manual also includes detailed appendices and quick reference summaries‚ making it easy to explore advanced functions and tailor the calculator to specific needs.

Using Registers for Data Storage

The HP-15C provides 67 registers for direct and indirect storage‚ enabling efficient data management. Direct storage allows users to assign values to specific registers‚ while indirect storage offers dynamic addressing‚ enhancing programming flexibility. Registers are essential for advanced operations‚ such as looping and array-like data handling. The manual details how to utilize these registers effectively‚ ensuring users can store and retrieve data seamlessly. This feature is particularly useful for complex calculations and custom programs‚ making the HP-15C a versatile tool for both beginners and advanced users.

Specialized Calculations

The HP-15C excels in advanced computations‚ offering integration and solving capabilities. Its sophisticated algorithm evaluates functions for integrals‚ while unit conversions and customization options enhance problem-solving efficiency for users.

Integration and Solving Capabilities

The HP-15C integrates advanced mathematical functions with precision. Its integration feature uses an iterative algorithm to evaluate functions at multiple points‚ ensuring accurate results for complex integrals. Additionally‚ the calculator offers robust solving capabilities‚ allowing users to find roots of equations efficiently. These features are complemented by clear guidance in the manual‚ making it easier for users to harness the calculator’s power for specialized calculations. The HP-15C’s ability to handle integrals and equations makes it a versatile tool for engineers‚ scientists‚ and professionals requiring high-precision computations.

Unit Conversions and Customization

The HP-15C excels in unit conversions‚ enabling seamless transitions between various measurement systems. Users can customize the calculator to suit their preferences‚ enhancing personal productivity. Continuous Memory ensures that custom settings remain stored‚ even when the calculator is turned off. The manual provides detailed guidance on leveraging these features‚ making it easy to adapt the HP-15C to specific workflows. With its flexibility and precision‚ the calculator caters to diverse professional needs‚ offering a tailored experience for engineers‚ scientists‚ and professionals who require precise unit conversions and personalized functionality.

Resources and Support

The HP-15C manual is available as a free PDF download‚ including the Owners Handbook (Part Number: 00015-90001) and Advanced Functions Handbook. Additional guides and tutorials can be found online‚ ensuring comprehensive support for all users.

Downloading the Manual

The HP-15C manual is readily available for download as a free PDF. You can find the Owners Handbook (Part Number: 00015-90001) and the Advanced Functions Handbook online. These documents provide detailed guidance on using the calculator‚ covering everything from basic operations to advanced programming. The manual is available in English and can be downloaded from various sources‚ including official HP websites or trusted calculator enthusiast forums. The files are often provided in color scan formats for clarity. Ensure you download the correct edition‚ such as the September 2011 revision‚ to access the most comprehensive information. Visit the specified URLs to secure your copy and explore additional resources for optimal use of the HP-15C.

Additional Guides and Tutorials

Beyond the HP-15C manual‚ users can access additional guides and tutorials to enhance their understanding. The Advanced Functions Handbook is a valuable resource‚ offering in-depth insights into the calculator’s programming and specialized features. Online forums and communities dedicated to HP calculators provide tutorials‚ tips‚ and troubleshooting advice. eBay and other platforms also offer detailed manuals and problem-solving examples. For those seeking hands-on learning‚ the manual’s introductory material‚ such as “The HP-15C: A Problem Solver” on page 12‚ serves as an excellent starting point. These resources collectively ensure users can fully utilize the HP-15C’s capabilities‚ from basic operations to advanced integrations.

The HP-15C manual is a comprehensive guide‚ offering detailed insights for users of all levels. It covers basic operations‚ advanced functions‚ and programming‚ ensuring mastery of the calculator’s capabilities‚ supported by additional resources and community backing.

Final Thoughts on the HP-15C Manual

The HP-15C manual is an invaluable resource for users of all skill levels‚ offering detailed guidance on scientific functions‚ programming‚ and advanced operations. Its clear structure ensures accessibility‚ while comprehensive sections cater to both beginners and experts. The inclusion of troubleshooting tips‚ function summaries‚ and real-world examples enhances usability. Additional resources like the Advanced Functions Handbook and online guides further support exploration. Whether solving complex integrals or programming custom routines‚ the manual empowers users to unlock the HP-15C’s full potential. With its wealth of information‚ the manual remains an essential companion for mastering this iconic calculator‚ encouraging continued discovery and mastery.

Encouragement for Further Exploration

The HP-15C manual invites users to explore the calculator’s vast capabilities‚ from scientific computations to advanced programming. With its detailed guidance‚ you’re encouraged to experiment with custom routines‚ integrate complex functions‚ and solve real-world problems. Whether you’re a student or a professional‚ the manual’s clarity and depth inspire confidence to dive deeper. Explore the calculator’s continuous memory‚ unit conversions‚ and problem-solving features to unlock new possibilities. The HP-15C manual is not just a guide—it’s a gateway to mastering a powerful tool that combines portability with sophistication‚ inviting you to discover the joy of precision and innovation in every calculation.