Kenmore Dishwasher Model 665 User Manual: A Comprehensive Guide
This manual details the Kenmore 665 dishwasher, offering guidance on installation, operation, maintenance, and troubleshooting for optimal performance and longevity.
Welcome to the world of efficient dishwashing with your new Kenmore 665 dishwasher! This appliance is designed to provide reliable and convenient cleaning for your household needs. This manual serves as a comprehensive guide, ensuring you understand all features and functions. The Kenmore 665 boasts a robust build and user-friendly controls, aiming to simplify your daily routine.
Before first use, carefully review the safety precautions outlined in this manual to prevent potential hazards. Familiarize yourself with the dishwasher’s parts and their functions, as detailed in the included diagram. Proper loading techniques, detergent usage, and regular maintenance are crucial for optimal performance and extending the lifespan of your Kenmore 665. We are confident this dishwasher will become an invaluable asset in your kitchen.
Safety Precautions
To ensure your safety and prevent damage to the Kenmore 665 dishwasher, please adhere to the following precautions. Always disconnect the power supply before performing any maintenance or cleaning. Never allow children to operate the dishwasher unsupervised. Avoid storing detergents or rinse aids within reach of children.
Do not attempt to repair the dishwasher yourself; contact qualified service personnel for assistance. Ensure proper grounding to prevent electrical shock. Avoid using flammable materials near the appliance. Do not overload the dishwasher, as this can affect cleaning performance and potentially cause damage. Regularly inspect the power cord for any signs of wear or damage. Following these guidelines will guarantee safe and efficient operation.
Dishwasher Parts Diagram
Understanding the components of your Kenmore 665 dishwasher is crucial for maintenance and troubleshooting. This diagram illustrates key parts, including the spray arms (upper and lower), filter system, detergent dispenser, rinse aid dispenser, and interior racks. It also identifies the control panel, door latch, and water inlet valve.
Refer to this visual guide when cleaning or replacing parts. Familiarize yourself with the location of the filter for easy access during routine cleaning. Knowing the function of each component will aid in diagnosing potential issues. Detailed part numbers are available in the separate parts list for convenient ordering of replacements. Proper identification ensures correct maintenance and optimal dishwasher performance;

Getting Started
Prepare for efficient dishwashing with proper installation, loading techniques, and understanding detergent/rinse aid usage for your Kenmore 665 model.
Initial Setup and Installation
Before first use, carefully unpack your Kenmore 665 dishwasher and inspect for any shipping damage. Ensure the dishwasher is level to guarantee optimal performance; adjustable feet are provided for this purpose.
Connect the water supply line, ensuring a secure fit to prevent leaks. Properly connect the drain hose to the designated drain point, avoiding kinks or obstructions.
Electrical connection requires adherence to local codes; a dedicated 120V, 60Hz circuit is typically needed. Once connected, run an initial empty cycle with detergent to flush the system and verify proper operation.
Refer to the detailed installation guide included with your dishwasher for specific instructions and safety precautions.
Loading the Dishwasher Correctly
Optimal loading maximizes cleaning efficiency. Place heavily soiled items on the lower rack, facing the spray arm. Ensure items don’t obstruct the spray arm’s rotation.
The upper rack is designed for glasses, cups, and smaller items. Secure delicate items to prevent breakage during the wash cycle. Avoid overcrowding, allowing water to reach all surfaces.
Silverware should be placed in the designated basket, alternating forks and spoons to prevent nesting; Knives should be placed blade-down for safety.
Check that no food particles remain on dishes before loading, as this can clog the filter. Proper loading ensures sparkling clean results every time.
Detergent and Rinse Aid Usage
Use only dishwasher detergent specifically designed for automatic dishwashers. The amount of detergent depends on water hardness and soil level; consult the detergent packaging for guidance.
Avoid using hand dish soap, as it creates excessive suds and can damage the dishwasher. Fill the detergent dispenser before each wash cycle, ensuring it closes securely.
Rinse aid helps dishes dry faster and prevents water spots. Fill the rinse aid dispenser regularly, adjusting the dosage setting based on water hardness.
Proper detergent and rinse aid usage ensures optimal cleaning and sparkling results.

Operating the Dishwasher
This section provides detailed instructions on utilizing the Kenmore 665 dishwasher’s control panel, cycle selections, and initiating a wash cycle effectively.
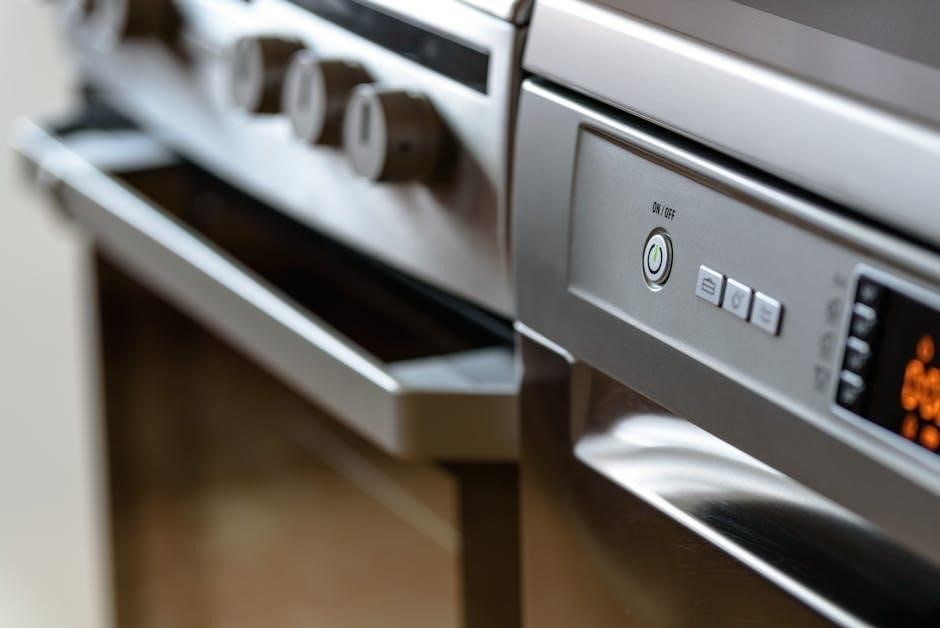
Control Panel Overview
The Kenmore 665 dishwasher’s control panel is designed for intuitive operation. It features clearly labeled buttons for cycle selection, options like heated dry and delay start, and indicator lights to display the current cycle status.
The ‘Power’ button initiates or cancels the dishwasher’s operation. Cycle buttons include Normal, Heavy, Delicate, and Quick Wash, catering to various cleaning needs. Option buttons allow customization, such as enabling a high-temperature wash or adjusting rinse aid levels.
Indicator lights signal when the dishwasher is running, paused, or has completed a cycle. A ‘Low Rinse Aid’ light alerts you to replenish the rinse aid dispenser. Familiarizing yourself with these controls ensures efficient and effective dishwasher use.
Cycle Selection Guide
The Kenmore 665 dishwasher offers a variety of cycles to suit different dishwashing needs. The ‘Normal’ cycle is ideal for everyday loads with moderate soiling. For heavily soiled pots and pans, select the ‘Heavy’ cycle for increased cleaning power.
The ‘Delicate’ cycle provides gentle cleaning for fragile items like glassware and china. ‘Quick Wash’ is perfect for lightly soiled dishes when time is limited. An ‘Auto’ cycle intelligently adjusts settings based on soil levels.
Consider the load type and soil level when choosing a cycle. Using the appropriate cycle optimizes cleaning performance and conserves water and energy. Refer to the control panel for cycle duration estimates.
Starting a Wash Cycle
Before initiating a wash cycle, ensure the dishwasher door is securely latched. Verify the spray arms rotate freely and are unobstructed; Confirm adequate detergent and rinse aid levels are present in their respective dispensers.
Select your desired wash cycle using the control panel. Press the ‘Start’ button to begin the cycle; a light indicator will illuminate. Avoid interrupting a cycle mid-process, as this may affect cleaning performance.
The dishwasher will automatically progress through the wash, rinse, and dry stages. Once complete, the cycle will end, and the dishwasher will beep. Carefully unload dishes, starting with the lower rack to prevent water from dripping onto clean items.
Maintenance and Cleaning
Regular cleaning of the filter, spray arms, and exterior surfaces ensures optimal performance and extends the lifespan of your Kenmore 665 dishwasher.
Cleaning the Filter System
Maintaining a clean filter system is crucial for optimal dishwasher performance. The Kenmore 665 dishwasher features a self-cleaning filter, but periodic manual cleaning is still recommended. Locate the filter, typically at the bottom of the dishwasher’s interior. Carefully remove the filter assembly, often by twisting a locking mechanism.
Rinse the filter under warm running water, using a soft brush to remove any food particles or debris. Inspect the filter for any damage and replace if necessary. Reinstall the filter assembly, ensuring it’s securely locked into place. A clogged filter can lead to reduced cleaning effectiveness and potential drainage issues, so regular cleaning—at least monthly—is highly advised for consistent results.
Cleaning the Spray Arms
To ensure thorough cleaning, regularly inspect and clean the Kenmore 665 dishwasher’s spray arms. Locate the upper and lower spray arms inside the dishwasher. Carefully detach each spray arm, usually by unscrewing or unclipping them. Examine the spray arm holes for any blockages caused by food particles or mineral deposits.
Use a toothpick or small wire to clear any obstructions in the spray arm holes. Rinse the spray arms thoroughly under warm running water. Reattach the spray arms, ensuring they are securely fastened. Clogged spray arms reduce water pressure and cleaning efficiency, leading to spots or residue on dishes. Cleaning them monthly maintains optimal performance.
Exterior Cleaning Instructions
Maintaining a clean exterior enhances the appearance of your Kenmore 665 dishwasher. Regularly wipe down the door and control panel with a damp, soft cloth. For stainless steel models, use a stainless steel cleaner to prevent streaks and fingerprints. Avoid abrasive cleaners, as they can scratch the surface.
To remove stubborn stains, mix a mild dish soap with warm water and gently scrub the affected area. Rinse thoroughly with a clean, damp cloth and dry with a soft towel. Pay attention to the edges of the door and around the control panel where grime tends to accumulate. Consistent exterior cleaning keeps your dishwasher looking its best.

Troubleshooting Common Issues
This section provides solutions for typical problems with your Kenmore 665 dishwasher, including starting failures, poor cleaning, and potential leaks.
Dishwasher Not Starting
If your Kenmore 665 dishwasher fails to start, first verify the power supply. Ensure the dishwasher is properly plugged into a functioning electrical outlet and that the circuit breaker hasn’t tripped.
Next, check the door latch; it must be securely closed for the dishwasher to operate. A faulty door latch switch may prevent starting. Also, examine the control panel for any locked or inactive settings.
If the ‘Delay Start’ function is activated, it will postpone the cycle. Finally, a thermal fuse may have blown, requiring professional repair. If these steps don’t resolve the issue, contact a qualified appliance technician for assistance.
Poor Cleaning Performance
If your Kenmore 665 dishwasher isn’t cleaning dishes effectively, several factors could be at play. Begin by confirming you’re using the correct amount of detergent and a fresh rinse aid. Insufficient detergent or expired product reduces cleaning power.
Next, inspect the spray arms for clogs caused by food particles; remove any obstructions to ensure proper water distribution. A dirty filter system significantly hinders performance, so clean it thoroughly.
Improper loading – overcrowding or blocking spray arm access – also contributes to poor results. Finally, select the appropriate wash cycle for the load’s soil level.
Leaking Issues
Discovering a leak with your Kenmore 665 dishwasher requires immediate attention. First, check the door gasket for damage or debris preventing a tight seal. Ensure the dishwasher is level; an uneven unit can cause water spillage.
Inspect the water inlet valve and drain hose connections for looseness or cracks. Tighten connections carefully, and replace damaged hoses promptly. A clogged drain can also lead to leaks, so verify the drain is clear of obstructions.
If leaks persist, examine the spray arm connections and the pump housing for any signs of damage or wear.
Advanced Features & Settings
Explore the Kenmore 665’s delay start, high-temperature wash, and energy-saving modes for customized cleaning and efficient operation, enhancing your dishwashing experience.
Delay Start Function
The Kenmore 665 dishwasher’s Delay Start function allows you to conveniently schedule wash cycles to begin at a later time, optimizing energy usage and fitting your lifestyle. This feature is particularly useful for taking advantage of off-peak electricity rates or ensuring dishes are clean when you return home. To activate, simply press the “Delay Start” button and select the desired delay duration – options typically range from 2 to 24 hours.
The control panel will display the remaining time until the cycle initiates. Remember to add detergent and rinse aid before setting the delay. Avoid using this function with perishable items inside, as prolonged storage could lead to unwanted odors or spoilage. The dishwasher will automatically begin the selected cycle once the delay time has elapsed, providing fresh, clean dishes exactly when you need them.
High Temperature Wash Option
The Kenmore 665 dishwasher features a High Temperature Wash option designed for enhanced sanitation and tackling heavily soiled dishes. This setting increases the water temperature during the wash cycle, providing a more thorough cleaning and effectively removing stubborn food residues and grease. It’s ideal for baby bottles, cutting boards, and items requiring a higher level of hygiene.
To activate, select the “High Temp Wash” button on the control panel alongside your desired cycle. Note that this option may slightly increase energy consumption. Ensure your water heater is set to a sufficient temperature (at least 120°F/49°C) for optimal performance. This feature delivers sparkling clean and sanitized dishes, offering peace of mind and superior cleaning power.
Energy Saving Mode
The Kenmore 665 dishwasher incorporates an Energy Saving Mode to minimize water and electricity usage, promoting environmental responsibility and reducing utility bills. This mode optimizes wash cycles for efficiency without compromising cleaning performance. It typically achieves this by lowering water temperatures, extending cycle times slightly, and utilizing eco-friendly spray patterns.
To engage this feature, locate and select the “Energy Saver” or “Eco” option on the control panel before initiating a wash cycle. Utilizing this mode contributes to a smaller carbon footprint and long-term cost savings. While cycle times may be extended, the results remain consistently clean, making it a practical choice for everyday dishwashing needs.

Technical Specifications
This section outlines the Kenmore 665’s dimensions, capacity, water consumption, and electrical requirements for proper installation and operation understanding.
Dimensions and Capacity
Understanding the physical specifications and interior space of your Kenmore 665 dishwasher is crucial for seamless integration into your kitchen and efficient dishwashing. The standard dimensions typically include a height of approximately 34.5 inches, a width of 24 inches, and a depth of around 25 inches – always verify these measurements before installation to ensure a proper fit within your designated space.
Regarding capacity, the Kenmore 665 generally offers enough room to accommodate 12 to 14 place settings, making it suitable for families or those who frequently entertain. This capacity is distributed across multiple racks designed to hold various dishware sizes, including plates, bowls, glasses, and cutlery. Proper loading, as detailed later in this manual, maximizes space and ensures optimal cleaning performance.
Water Consumption Details
Efficient water usage is a key feature of the Kenmore 665 dishwasher, designed with conservation in mind. On average, this model utilizes approximately 4.25 to 5 gallons of water per wash cycle, depending on the selected cycle type – heavier cycles naturally require more water for thorough cleaning. This figure is significantly lower than handwashing, contributing to both environmental responsibility and reduced utility bills.
The dishwasher incorporates advanced water filtration and recirculation systems to minimize waste and maximize cleaning effectiveness. Regularly cleaning the filter, as outlined in the maintenance section, ensures optimal water flow and prevents increased consumption. Understanding these details allows you to operate your Kenmore 665 responsibly and efficiently.
Electrical Requirements
Proper electrical connection is crucial for the safe and efficient operation of your Kenmore 665 dishwasher. This model requires a standard 120-volt, 60Hz electrical supply. A dedicated 15-amp circuit breaker is highly recommended to prevent overloading and ensure stable performance. The dishwasher’s power cord is equipped with a three-prong grounded plug, which must be inserted into a properly grounded outlet.
Never use extension cords or adapters, as they can pose a safety hazard. Ensure the voltage matches the dishwasher’s specifications to avoid damage. If you are unsure about your electrical system, consult a qualified electrician before installation. Incorrect wiring can void the warranty and create a potential fire risk.

Warranty Information
Kenmore provides a warranty covering defects in materials and workmanship for the 665 dishwasher, offering peace of mind and reliable support.
Kenmore Warranty Coverage
Your Kenmore 665 dishwasher is protected by a comprehensive warranty against defects in materials and workmanship. The limited warranty typically covers parts and labor for one year from the date of purchase. Specifically, this includes coverage for components that fail during normal household use.
However, the warranty does not cover damage resulting from misuse, improper installation, accidents, or alterations. Cosmetic issues, such as scratches or dents that don’t affect performance, are also generally excluded. To make a claim, retain your proof of purchase and contact Kenmore’s customer support team. They will guide you through the process and arrange for authorized service if needed.
Contacting Customer Support
For assistance with your Kenmore 665 dishwasher, several customer support avenues are available. You can reach Kenmore directly through their official website, which features a comprehensive FAQ section and troubleshooting guides. Alternatively, a dedicated customer service phone line is staffed by knowledgeable representatives ready to assist with any questions or concerns you may have regarding operation or warranty claims.
Online chat support is also frequently offered for immediate assistance. When contacting support, have your model number (665) and proof of purchase readily available to expedite the process. Detailed contact information, including phone numbers and website links, can be found within this manual and on the Kenmore website.