
Honeywell TH5220D1003 Thermostat Overview
The Honeywell TH5220D1003 is a non-programmable digital thermostat from the FocusPro 5000 series, offering a user-friendly interface for efficient heating and cooling system control with clear display indicators․
1․1 Key Features of the Honeywell TH5220D1003 Thermostat
The Honeywell TH5220D1003 is a non-programmable digital thermostat designed for simplicity and efficiency․ It features a user-friendly interface with a clear display for easy temperature adjustments and system status monitoring․ The thermostat supports automatic changeover between heating and cooling modes, ensuring optimal comfort․ It is compatible with a wide range of HVAC systems, including gas unit heaters and duct furnaces․ The device also offers basic functionality without complex programming, making it ideal for homeowners seeking straightforward temperature control․ Its compact design and intuitive controls provide a seamless user experience․
1․2 Compatibility with Heating and Cooling Systems
The Honeywell TH5220D1003 thermostat is compatible with a variety of heating and cooling systems, including gas unit heaters, duct furnaces, and heat pumps․ It supports systems such as HD/HDB, HDS/HDC, PTS/BTS, PTC, PDP/BDP, and duct furnaces in D, H, I, and O series․ The thermostat is designed to work with 24V systems and can handle single-stage or dual-stage heating and cooling setups․ Its versatility ensures it can adapt to different HVAC configurations, making it a reliable choice for various home systems․

Pre-Installation Requirements
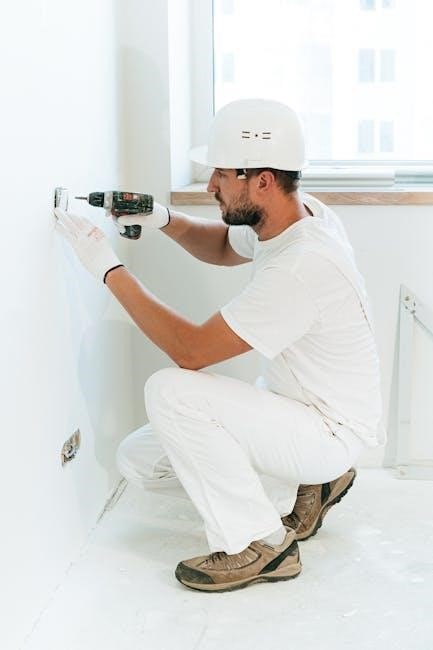
Before installing the Honeywell TH5220D1003, ensure the power supply is disconnected to prevent electrical shock․ Gather all necessary tools and materials, and review the installation manual thoroughly․
2․1 Safety Precautions Before Installation
Before starting the installation, ensure the power supply to the heating and cooling system is completely disconnected to avoid electrical shock or equipment damage․ Verify the system type (heat-only, cool-only, or heat pump) to ensure compatibility with the Honeywell TH5220D1003․ Always follow local electrical codes and safety guidelines․ Use appropriate tools and wear protective gear if necessary․ Never touch bare wires or internal components without proper precautions to prevent short circuits or injury․
2․2 Tools and Materials Needed for Installation
To install the Honeywell TH5220D1003 thermostat, you will need a few basic tools and materials․ Start with a screwdriver (both flathead and Phillips) for removing the old thermostat and securing the new wallplate․ Wire strippers may be necessary if the existing wires require trimming or adjustment․ A drill and wall anchors are recommended if the wallplate needs to be mounted on a plaster or drywall surface․ Additionally, ensure you have the installation manual and any specific materials mentioned in the guide for a smooth setup process․
Installation Process
The Honeywell TH5220D1003 installation involves removing the old thermostat, mounting the wallplate, and installing the new unit․ This straightforward process ensures efficient heating and cooling control․
3․1 Removing the Old Thermostat
To remove the old thermostat, first, switch off the power supply at the circuit breaker to ensure safety․ Verify that the heating and cooling systems are completely off․ Next, use a screwdriver to remove the mounting screws that hold the old thermostat in place․ Gently pull the thermostat away from the wall, taking care not to damage any wires connected to it․ Label each wire with its corresponding terminal using masking tape or a marker for easy identification during the new installation․ If there are any additional components like a mounting bracket, remove them as well․ Clean the wall area to prepare for the new thermostat installation, ensuring a proper fit and good contact with the wall․ If necessary, inspect and clean any debris or old adhesive․ Set the old thermostat aside and proceed with installing the new Honeywell TH5220D1003․
3․2 Mounting the Wallplate
After removing the old thermostat, begin by mounting the wallplate for the Honeywell TH5220D1003․ Ensure the wall is clean and dry for proper adhesion․ Peel the backing from the adhesive on the wallplate and press it firmly against the wall, making sure it is level․ If screws are required, mark the screw holes, drill pilot holes if necessary, and secure the wallplate using the provided screws․ Once mounted, snap the wallplate into place to prepare for installing the thermostat unit․ Follow the manual for correct wire connections․
3․3 Installing the Thermostat Unit
Once the wallplate is securely mounted, attach the Honeywell TH5220D1003 thermostat unit by aligning the notches on the back with the mounting posts on the wallplate․ Gently push the unit onto the wallplate until it clicks into place․ Ensure all wires are properly connected to their respective terminals as per the wiring diagram․ Secure the unit by tightening the screws provided․ After installation, turn the power back on at the circuit breaker and test the thermostat by adjusting the temperature to ensure it responds correctly․ Follow the manual for any additional settings․

Wiring Diagrams and Connections
This section provides detailed wiring diagrams and connection instructions for the Honeywell TH5220D1003 thermostat, ensuring correct installation and troubleshooting of heating and cooling systems․
4․1 Understanding the Wiring Diagram
The wiring diagram is a visual guide that illustrates the connections between the thermostat and your heating/cooling system․ It specifies which wires connect to specific terminals (e․g․, R, W, Y, G, C) and outlines the correct configuration for your system type․ The diagram ensures proper installation by detailing power supply, heating, cooling, and fan connections․ By following the wiring diagram, you can avoid installation errors and ensure safe, efficient operation of your Honeywell TH5220D1003 thermostat․ Always refer to the diagram in the manual for system-specific instructions․
4․2 Connecting the Wires to the Thermostat
To connect the wires, ensure the power supply is turned off․ Match the wires from your system to the thermostat terminals (e․g․, R, W, Y, G, C)․ Use a screwdriver to secure them tightly․ Verify connections align with the wiring diagram to avoid errors․ If unsure, consult the manual or a professional․ Proper wiring ensures safe and efficient operation of your Honeywell TH5220D1003 thermostat․ Double-check all connections before restoring power to prevent electrical issues․

Thermostat Setup and Configuration
After installation, press and hold the “S” and “FAN” buttons to enter setup mode․ Use the “S” and “T” buttons to navigate and configure settings like system type and operational modes․
5․1 Setting Up the Thermostat Functions
To set up the thermostat functions, press and hold the “S” and “FAN” buttons to enter setup mode․ Use the “S” button to navigate through options and the “T” button to adjust settings․ Configure system type (e․g․, heat pump or conventional), temperature differential, and fan operation․ Set the changeover mode (auto, heat, cool, or off) based on your system requirements․ Ensure the date and time are correctly set for accurate operation․ Refer to the manual for specific function codes and detailed configuration steps to optimize performance․
5․2 Configuring the Installer Settings
To configure installer settings, enter setup mode by pressing and holding the “S” and “FAN” buttons․ Use function codes to adjust system-specific settings, such as heat pump configuration or two-stage heating/cooling․ Set the system type (e․g․, 2Heat/2Cool or heat pump) and enable features like auto-changeover or auxiliary heat․ Adjust temperature differential and compressor protection timings as needed․ Ensure proper wiring matches the selected configuration․ Refer to the manual for detailed function code explanations and validation of settings to ensure system compatibility and optimal performance․
Operating the Thermostat
The Honeywell TH5220D1003 operates efficiently with a simple, intuitive interface․ Adjust temperature settings and system modes (Heat/Cool/Off) using the keypad and display․
6․1 Basic Operations and Controls
The Honeywell TH5220D1003 features straightforward controls for managing your HVAC system․ Use the keypad to adjust temperature settings, with clear indicators showing the current mode and setpoint․ The display provides real-time updates, ensuring easy monitoring․ Press the “System” button to cycle between Heat, Cool, and Off modes, while the “Fan” button controls blower operation․ Adjustments are made using the up and down arrows, offering precise temperature control․ This user-friendly design ensures seamless operation for both heating and cooling systems․
6․2 Switching Between Heat and Cool Modes
To switch modes on the Honeywell TH5220D1003, press the “System” button until the desired mode appears on the display․ The options include Heat, Cool, Auto, and Off․ In Heat mode, the thermostat activates your heating system to reach the set temperature․ Cool mode engages the cooling system․ Auto mode allows the thermostat to automatically switch between heating and cooling based on the setpoint․ The display will show “HEAT,” “COOL,” or “AUTO” to indicate the active mode․ This feature ensures efficient operation and comfort year-round․

Troubleshooting Common Issues
Common issues with the Honeywell TH5220D1003 include display malfunctions, wiring problems, or improper installation․ Always check connections and ensure correct system setup for optimal performance․
7․1 Common Installation Mistakes
Common installation mistakes for the Honeywell TH5220D1003 include forgetting to disconnect power before starting, incorrect wiring connections, and improper mounting of the wallplate․ Ensure the system is powered off to prevent electrical shock․ Verify all wires are securely connected to the correct terminals, as miswiring can lead to malfunction․ Additionally, failing to level the thermostat or not removing the old thermostat correctly can cause issues․ Always follow the manual’s step-by-step guide to avoid these errors and ensure proper functionality․
7․2 Resolving Display or Wiring Issues
If the display is unresponsive or shows errors, ensure the thermostat is properly powered․ Check for loose connections and verify wiring against the diagram․ Reset the thermostat by removing batteries or pressing the reset button․ Consult the manual for error codes and their solutions․ If issues persist, contact Honeywell support or a professional for assistance․ Always turn off power at the breaker before troubleshooting to ensure safety․
Maintenance and Upkeep
Regularly clean the thermostat display and ensure proper wiring connections․ Replace batteries as needed and update settings to maintain optimal performance and efficiency․
8․1 Cleaning the Thermostat
To maintain optimal performance, clean the Honeywell TH5220D1003 thermostat regularly․ Use a soft, dry cloth to wipe the display and exterior surfaces․ Avoid harsh chemicals or liquids, as they may damage the device․ Turn off the power supply before cleaning to ensure safety․ Gently remove any dust or debris that may accumulate on the thermostat’s surface or vents․ Checking and cleaning the wiring connections periodically can also prevent issues․ Regular maintenance ensures accurate temperature control and extends the product’s lifespan․
8․2 Updating Thermostat Settings
To update the Honeywell TH5220D1003 thermostat settings, access the Installer Setup mode by pressing and holding specific buttons․ Navigate through the menu using the adjustment buttons to modify system settings, such as switching between heat and cool modes or enabling auto changeover․ Save changes to ensure they take effect․ Regularly review and update settings to optimize performance and energy efficiency․ Always refer to the manual for detailed instructions on configuring advanced features and ensuring proper system operation․
Downloading the Honeywell TH5220D1003 Manual
The Honeywell TH5220D1003 manual is available for download as a PDF from Honeywell’s official website and other reputable sources, offering detailed installation and setup instructions․
9․1 Finding the Official Installation Manual
The official Honeywell TH5220D1003 installation manual can be easily found on Honeywell’s official website or trusted platforms like ManualsLib and ThermostatManuals․com․ Simply search for the model number, and download the PDF․ This manual provides comprehensive guidance for installing and configuring the thermostat, ensuring a smooth setup process․ It includes detailed wiring diagrams, step-by-step instructions, and troubleshooting tips to help users successfully install and operate their device․ Always verify the source to ensure you’re accessing the correct and official documentation․
9․2 Navigating the PDF Manual
The Honeywell TH5220D1003 installation manual is structured for easy navigation, starting with a table of contents that directs users to specific sections․ Key areas include installation steps, wiring diagrams, and troubleshooting․ The manual is typically 8 pages long, ensuring concise yet detailed instructions․ Use the PDF’s built-in search function to quickly locate topics like “wiring diagrams” or “installer settings․” Clear headings and visual aids, such as diagrams, help users understand complex procedures․ Familiarize yourself with the manual’s layout to efficiently find the information you need for installation and setup․
The Honeywell TH5220D1003 is a reliable and efficient thermostat designed for seamless control of heating and cooling systems․ Its user-friendly interface and clear instructions ensure easy installation and operation․ By following the installation manual, users can ensure proper setup and optimal performance․ The PDF manual provides comprehensive guidance, making it an essential resource for troubleshooting and maintenance․ With its straightforward design and robust features, the Honeywell TH5220D1003 remains a top choice for homeowners seeking precise temperature control and energy efficiency․