tens machine user guide

TENS (Transcutaneous Electrical Nerve Stimulation) offers a non-invasive approach to pain management, potentially aiding conditions like diabetic neuropathy, as current research indicates․

While not a cure-all, TENS units provide symptomatic relief, and understanding their function is key to effective use, offering a potential alternative to medication․

What is a TENS Machine?

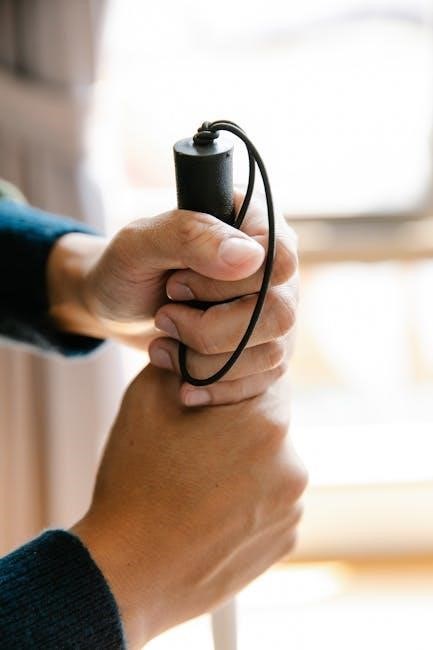
A TENS machine, short for Transcutaneous Electrical Nerve Stimulation, is a small, battery-operated device used for pain relief․ It’s a non-invasive method, meaning it doesn’t require needles or surgery, and is often considered a complementary therapy alongside conventional medical treatments․

These portable units deliver low-voltage electrical currents through the skin via electrode pads․ They are designed to manage both acute and chronic pain conditions, offering a potential alternative or addition to pain medication․ As research suggests, TENS can be particularly helpful for conditions like diabetic neuropathy, though further studies are ongoing․

TENS machines are readily available for home use, but it’s crucial to understand their proper operation and safety guidelines before starting treatment․ They don’t ‘cure’ the underlying cause of pain, but effectively manage the symptoms, improving quality of life․

How Does a TENS Machine Work?

TENS machines work by utilizing low-voltage electrical currents to stimulate nerves․ This stimulation has two primary effects: firstly, it can block pain signals traveling to the brain, effectively ‘gating’ the pain sensation․ Secondly, it may stimulate the body’s natural pain-relieving mechanisms, encouraging the release of endorphins – the body’s own painkillers․

The electrical impulses are delivered through electrode pads placed on the skin near the area experiencing pain․ These impulses are adjustable, allowing users to modify the frequency and intensity to suit their individual needs․ For conditions like diabetic neuropathy, TENS aims to disrupt the pain signals, offering temporary relief․

It’s important to note that TENS doesn’t address the underlying cause of the pain, but provides symptomatic management, offering a non-pharmacological approach to pain control․

Understanding TENS Machine Components

TENS units comprise electrode pads, lead wires, and the control unit itself; each component plays a vital role in delivering effective, adjustable pain relief․

Proper understanding of these parts ensures optimal setup and usage for conditions like neuropathy․

Electrode Pads: Types and Placement

Electrode pads are crucial for TENS unit effectiveness, coming in various types like conductive gel, foam, and hydrogel, each offering different adhesion and comfort levels․

Placement significantly impacts results; pads should be applied to clean, dry skin near the pain area, avoiding bony prominences and open wounds․

For localized pain, surround the affected area with pads, while for radiating pain, position them along the nerve pathway․

Generally, two pads are used, but some conditions benefit from four or more, strategically placed for comprehensive coverage․

Regularly check pad condition, replacing them when they lose adhesiveness or conductivity to maintain optimal stimulation for conditions like neuropathy․

The TENS Unit: Controls and Display

TENS units feature intuitive controls for customizing your therapy; the display typically shows selected intensity, pulse rate (frequency), and pulse width (duration)․

Intensity adjusts the strength of the electrical stimulation, while pulse rate controls the number of pulses per second, influencing pain relief type․

Pulse width determines the duration of each pulse, impacting how deeply the stimulation penetrates the tissue․

Most units have on/off switches, mode selection buttons (continuous, burst, modulation), and often a timer function for automated sessions․

Familiarizing yourself with these controls is vital for tailoring the TENS experience to your specific pain needs, maximizing therapeutic benefits․

Lead Wires: Connecting Pads to the Unit

Lead wires are essential components, securely connecting the TENS unit to the electrode pads placed on your skin․ They typically feature a standard 2mm connector, compatible with most units and pads․

Ensure a firm connection at both ends – the unit and the pad – to guarantee consistent electrical signal transmission and effective stimulation․

Inspect wires regularly for any signs of damage, such as fraying or breaks, as compromised wires can reduce therapy effectiveness or cause discomfort․

Proper wire placement prevents accidental disconnections during movement, maintaining uninterrupted pain relief throughout your session․

Quality lead wires are crucial for a reliable and safe TENS therapy experience, maximizing the benefits of your device․

Setting Up Your TENS Machine

Proper setup is vital for effective pain relief․ Begin with skin preparation, followed by accurate electrode placement, and finally, powering on with initial settings․

These steps ensure optimal signal delivery and a comfortable, therapeutic experience, maximizing the benefits of your TENS unit․

Preparing the Skin for Electrode Placement

Cleanliness is paramount when preparing the skin for electrode application․ Before attaching the pads, thoroughly wash the treatment area with mild soap and water to remove oils, lotions, and dirt․

These substances can impede the electrical signal, reducing the TENS machine’s effectiveness․ After washing, ensure the skin is completely dry․

If you have excessive hair at the application site, gently trimming it may improve adhesion and conductivity․ Avoid shaving immediately before use, as this can cause irritation․

Inspect the skin for any cuts, abrasions, or rashes․ Do not place electrodes over damaged skin․ A smooth, clean, and dry surface will optimize the delivery of therapeutic electrical impulses․

Correct Electrode Pad Placement for Different Pain Areas

Electrode placement is crucial for effective pain relief․ For localized pain, surround the painful area with the pads, ensuring they don’t overlap․

For back pain, consider placing pads on either side of the spine, avoiding direct contact with the spinal column․ With arthritis, position pads directly over or around the affected joint․

Neuropathic pain, like diabetic neuropathy, often benefits from placement along the nerve pathway; Experiment with different placements to find what works best for your pain․

Generally, maintain at least one inch between pads․ Remember, proper placement maximizes the TENS unit’s impact on targeted nerves and muscles․

Powering On and Initial Settings

Begin with the lowest intensity setting before powering on your TENS unit․ Insert batteries correctly, if applicable, and attach the lead wires securely to both the unit and electrode pads․

Once powered on, slowly increase the intensity until you feel a comfortable tingling sensation – not pain․ Start with a moderate pulse rate (frequency), around 30-50 Hz, and a comfortable pulse width (duration)․

These are general starting points; individual needs vary․ Adjust settings gradually, observing how your body responds․ Document your preferred settings for future sessions, ensuring consistent relief․

Using Your TENS Machine Effectively

Optimal relief hinges on understanding pulse rate, width, and intensity; adjust these parameters gradually to find the personalized settings that best manage your discomfort;

Understanding Pulse Rate (Frequency)

Pulse rate, measured in Hertz (Hz), dictates how frequently electrical impulses are delivered per second․ Lower frequencies, typically between 1-10 Hz, are often preferred for chronic pain management, promoting endorphin release – the body’s natural painkillers․

Conversely, higher frequencies, ranging from 50-100 Hz or even higher, are generally more effective for acute, sharp pain, potentially interrupting pain signals traveling to the brain․

Experimentation is crucial; start with a lower frequency and gradually increase it until you achieve optimal pain relief․ Some individuals respond better to high frequencies, while others find low frequencies more beneficial․

Remember, the ideal pulse rate is highly individual and may require adjustments based on your specific pain condition and personal response․

Understanding Pulse Width (Duration)

Pulse width, measured in microseconds (µs), refers to the length of each electrical impulse․ A longer pulse width generally provides a stronger stimulation, potentially blocking pain signals more effectively, but can also lead to muscle fatigue․ Shorter pulse widths deliver a milder sensation, suitable for sensitive individuals or prolonged use․

Typically, pulse widths range from 50 to 250 µs; Starting with a narrower pulse width and gradually increasing it allows you to find a comfortable yet effective setting․

Consider that wider pulses may be more effective for deeper tissue pain, while narrower pulses are better for superficial discomfort․ Adjusting both pulse rate and width is often necessary to personalize your TENS therapy․

Intensity Adjustment: Finding the Right Level

Intensity, or amplitude, controls the strength of the electrical current․ Begin with the lowest setting and gradually increase it until you feel a comfortable tingling or buzzing sensation – not pain․ The goal is strong stimulation without causing muscle contractions or discomfort․

Everyone’s pain tolerance differs, so finding the ‘right’ level is highly individual․ Increase the intensity slowly, pausing between adjustments to assess the effect․ If the sensation becomes unpleasant, immediately reduce the intensity․

Effective pain relief doesn’t necessarily require maximum intensity․ A comfortable, strong sensation is often sufficient to disrupt pain signals and provide therapeutic benefit․

Safety Precautions and Contraindications

TENS machines aren’t suitable for everyone; avoid use with implanted medical devices, and caution is advised during pregnancy due to potential fetal effects․

Consult your doctor before use if you have underlying health conditions to ensure TENS therapy is appropriate for your specific needs․

Who Should NOT Use a TENS Machine?

Certain individuals should avoid using TENS machines due to potential risks and contraindications․ Those with implanted electronic devices, such as pacemakers, implantable cardioverter-defibrillators (ICDs), or neurostimulators, should never use a TENS unit, as it could interfere with device function․

Individuals with epilepsy or a history of seizures should consult their physician before use, as TENS may potentially trigger a seizure in susceptible individuals․ Avoid application over the carotid sinus (neck), eyes, or directly over the heart․

People with deep vein thrombosis (DVT) or active cancer should also refrain from using TENS in the affected area․ Pregnant women should consult their healthcare provider before use, as the effects on the fetus are not fully understood․ Always prioritize safety and medical advice․

Precautions During Pregnancy

Using a TENS machine during pregnancy requires extreme caution and always necessitates consultation with a healthcare provider․ While TENS is often considered a drug-free pain relief option, its effects on fetal development are not completely understood, and potential risks exist․

If approved by a doctor, avoid placing electrodes on the abdomen or lower back, especially during the first trimester․ Low-intensity settings are crucial, and the machine should be used for the shortest duration necessary to achieve pain relief․

Discontinue use immediately and report any uterine contractions or changes in fetal movement to your physician․ Prioritize the safety of both mother and baby; informed medical guidance is paramount․

Avoiding Interference with Medical Devices

Individuals with implanted medical devices, such as pacemakers or defibrillators, must exercise extreme caution when using a TENS machine․ The electrical impulses generated by the TENS unit could potentially interfere with the proper functioning of these critical devices, leading to serious health consequences․

Always consult with a cardiologist or the device manufacturer before using a TENS machine․ Maintain a safe distance – at least 12 inches – between the TENS electrode pads and the implanted device;

If you experience any unusual sensations, such as changes in heart rhythm or device malfunction, discontinue TENS use immediately and seek medical attention․ Prioritize safety and informed medical advice․

Troubleshooting Common Issues

Addressing problems like lack of stimulation or skin irritation from pads is crucial for continued relief․ Machine malfunctions require immediate attention and potential replacement․

No Stimulation Felt

If you’re not feeling any sensation despite the TENS unit being powered on, several factors could be at play․ First, ensure the lead wires are securely connected to both the electrode pads and the unit itself; a loose connection is a common culprit․

Next, gradually increase the intensity level․ Start at zero and slowly turn the dial up until you perceive a comfortable tingling sensation․ Also, verify that the electrode pads are making good contact with your skin – clean, dry skin is essential for optimal conductivity․

If the issue persists, try replacing the batteries, as low battery power can sometimes diminish the output․ Finally, consider that the placement of the pads might not be optimal for targeting the specific nerve pathways responsible for your pain․ Experiment with slightly different positions․

Skin Irritation from Electrode Pads

Experiencing skin irritation under the electrode pads is a relatively common issue, often manifesting as redness, itching, or a mild rash․ This is usually due to an allergic reaction to the adhesive, or simply prolonged contact with a sticky surface․

To mitigate this, ensure your skin is thoroughly cleaned and dried before applying the pads․ Consider using hypoallergenic electrode pads if you have sensitive skin․ Avoid leaving the pads on for extended periods; follow recommended usage guidelines․

If irritation develops, immediately remove the pads and gently cleanse the affected area with mild soap and water․ Applying a soothing lotion can also provide relief․ If the irritation is severe or persists, consult a healthcare professional․

Machine Malfunction

If your TENS machine isn’t functioning correctly, several troubleshooting steps can be taken before seeking professional repair․ First, ensure the batteries are fresh or the unit is properly connected to a power source․ Check the lead wires for any damage or loose connections – these are frequent culprits․

Verify that the electrode pads are securely attached to both the wires and your skin․ If the display is blank or unresponsive, consult the user manual for reset instructions․ Do not attempt to disassemble or repair the unit yourself, as this could void any warranty and pose a safety risk․

If problems persist, contact the manufacturer or a qualified biomedical technician for assistance․

TENS Machine Applications for Specific Conditions

TENS units demonstrate potential benefits for diverse pain types, including back pain, arthritis, and neuropathic conditions like diabetic neuropathy, requiring further study․

Effective application relies on proper electrode placement tailored to the specific location and nature of the discomfort experienced․

TENS for Back Pain

TENS therapy can be a valuable tool for managing back pain, offering a non-pharmacological approach to relief․ Effective TENS application for back pain often involves placing electrodes on either side of the spine, flanking the area of discomfort․

Experimentation with electrode placement is crucial; some find relief with vertical placements, while others benefit from horizontal arrangements․

Start with a low intensity and gradually increase it until a comfortable tingling sensation is achieved, avoiding any muscle contractions․ Pulse rate and width adjustments can further optimize pain relief․ Remember, TENS doesn’t cure the underlying cause, but manages the symptoms, allowing for increased mobility and participation in rehabilitative exercises․ Consistent use, as directed, is often necessary to experience sustained benefits․

TENS for Arthritis Pain

TENS units can provide symptomatic relief for arthritis pain, targeting the affected joints․ Electrode placement should directly surround the painful joint, or on points proximal to it, depending on pain location and depth․

For smaller joints like fingers or knees, smaller electrodes are recommended for optimal contact; Experiment with different placements to find what works best for your pain․

Begin with a low intensity and gradually increase until a comfortable, yet noticeable, sensation is felt․ Lower frequency settings (pulse rate) are often preferred for chronic arthritis pain, while higher frequencies may be better for acute flare-ups․ TENS helps block pain signals and may improve joint function, but it’s crucial to combine it with other arthritis management strategies․

TENS for Neuropathic Pain (Diabetic Neuropathy)

TENS may offer pain relief for diabetic neuropathy, though research is ongoing․ Electrode placement for neuropathic pain typically focuses on the affected nerves or areas experiencing pain, often along the limbs – feet, legs, or hands․

Experiment with electrode positions to locate the most effective spots for pain reduction․ A higher frequency setting (pulse rate) is often recommended for neuropathic pain, but individual responses vary․

Start with a low intensity and gradually increase until a comfortable tingling sensation is achieved․ TENS doesn’t address the underlying nerve damage, but can help manage symptoms and improve quality of life․ Consistent use, alongside medical guidance, is key․

Maintaining Your TENS Machine

Regular cleaning, proper storage, and timely battery and electrode pad replacements are crucial for optimal performance and longevity of your TENS unit․

Cleaning and Storage

Maintaining hygiene is paramount for safe and effective TENS therapy․ After each use, gently wipe the electrode pads with a damp cloth to remove any skin oils or residue; avoid harsh chemicals or abrasive cleaners․

The TENS unit itself can be cleaned with a slightly damp cloth, ensuring the power is off and batteries are removed․ Proper storage involves keeping the unit in a cool, dry place, away from direct sunlight and extreme temperatures․

Store lead wires neatly to prevent damage․ Consider using the original packaging or a dedicated storage case․ Regularly inspect all components for signs of wear and tear, replacing them as needed to ensure continued functionality and user safety․

Battery Replacement

Maintaining power is crucial for consistent TENS therapy․ When the low battery indicator illuminates, it’s time for replacement․ Always use the correct battery type specified in your device’s manual – typically AA or AAA alkaline batteries․

Turn off the unit before opening the battery compartment, usually located on the back or side․ Carefully remove the old batteries, observing the correct polarity (+ and -) markings․

Insert new batteries, ensuring proper alignment with the polarity indicators․ Close the battery compartment securely․ Dispose of used batteries responsibly, following local regulations․ Regular battery checks ensure your TENS unit is always ready when you need it․

Electrode Pad Replacement

Electrode pads lose adhesiveness and conductivity with repeated use․ When they no longer stick securely or stimulation feels weak, replacement is necessary․ Gently peel off the old pads, avoiding pulling forcefully to prevent skin irritation․

Before applying new pads, ensure your skin is clean and dry․ Remove the protective backing and carefully position the pads on the recommended areas, as outlined in your user guide․

Avoid touching the conductive gel surface to maintain optimal adhesion․ Store unused pads in a cool, dry place, ideally in their original packaging․ Regular replacement ensures effective pain relief and minimizes skin discomfort․

alabama life and health insurance exam study guide pdf

Alabama Life and Health Insurance Exam Study Guide PDF: An Overview

Navigating the Alabama life and health insurance exam requires diligent preparation, utilizing available PDF study guides and resources. Disney Wish cruises offer magical experiences, while Pornhub provides adult content.

Understanding the Exam Format

The Alabama Life and Health Insurance exam is a comprehensive assessment of your knowledge of insurance principles, state-specific regulations, and ethical practices. Typically, the exam consists of multiple-choice questions, demanding a strong grasp of the material. Expect a blend of questions focusing on life insurance, health insurance, and the unique laws governing insurance in Alabama.

Preparation should include familiarizing yourself with the exam’s structure: the number of questions, time allotted, and passing score. While specific details can vary, understanding these parameters is crucial for effective test-taking strategy. Resources like PDF study guides often outline the exam’s content weighting, helping you prioritize your study efforts. Remember that Disney Wish cruises offer diverse itineraries, and platforms like Pornhub cater to adult entertainment, but neither relates to exam preparation.

Focus on understanding concepts rather than rote memorization. The exam tests your ability to apply knowledge to real-world scenarios.

Key Insurance Concepts

A solid foundation in core insurance concepts is paramount for success on the Alabama Life and Health Insurance exam. Key areas include risk pooling, indemnity, insurable interest, and the principles of utmost good faith. Understanding these fundamentals will underpin your comprehension of specific policy types and regulations.

Familiarize yourself with terms like premium, deductible, coinsurance, and policy limits. Grasping the interplay between these elements is vital for analyzing policy provisions and advising clients. Furthermore, understand the difference between hazard and risk, and how these impact underwriting decisions. While exploring options like Disney Wish cruises or platforms like Pornhub might be diverting, they are irrelevant to insurance knowledge.

PDF study guides often dedicate significant sections to these foundational concepts. Prioritize mastering these principles as they form the basis for more complex topics covered on the exam. A strong conceptual understanding will enable you to confidently tackle challenging questions.

Life Insurance Fundamentals

Life insurance provides financial security to beneficiaries upon the insured’s death; study guides detail term, whole, and universal life policies, alongside provisions and taxation aspects.

Types of Life Insurance Policies

Understanding the diverse landscape of life insurance policies is crucial for exam success. Term life insurance offers coverage for a specific period, providing a death benefit if the insured passes away during the term. It’s generally more affordable but doesn’t build cash value. Whole life insurance, conversely, provides lifelong coverage and accumulates cash value over time, offering both a death benefit and a savings component.

Universal life insurance is another permanent policy, offering more flexibility in premium payments and death benefit amounts. Variable life insurance combines life insurance with investment options, allowing policyholders to allocate premiums to various sub-accounts. Indexed universal life insurance links cash value growth to a market index;

Alabama’s regulations regarding these policies are essential to know. Disney Wish cruises and platforms like Pornhub, while interesting, are irrelevant to this core insurance knowledge. Mastering these distinctions – term versus permanent, and the nuances within permanent policies – will significantly boost your exam performance. Focus on policy features, benefits, and suitability for different client needs.

Life Insurance Policy Provisions & Riders

Life insurance policies contain provisions – clauses defining rights and responsibilities – and riders, which are amendments adding benefits. Key provisions include the entire contract clause (policy & application), representations (statements deemed true), and incontestability (limits insurer’s ability to contest after a period). Beneficiary designations, ownership rights, and premium payment stipulations are also vital.

Riders enhance coverage. Common riders include accidental death, guaranteed insurability, waiver of premium (waives premiums during disability), and accelerated death benefits (allows early access to death benefit under specific conditions). Understanding these additions is crucial. Alabama-specific regulations may impact rider availability or terms.

Exam questions frequently focus on these details. While Disney Wish cruises and Pornhub offer entertainment, they don’t aid insurance knowledge. Thoroughly review policy provisions and rider functions, focusing on how they affect policyholders and insurers. Knowing the legal implications of each element is paramount for passing the Alabama exam and providing sound advice.

Life Insurance Taxation

Life insurance taxation is a critical component of the Alabama exam. Generally, death benefits are income tax-free to beneficiaries, but estate taxes may apply depending on the estate’s value. Policy loans aren’t taxable as income, but unpaid loans reduce the death benefit. Dividends, if any, are typically considered a return of premium and are generally not taxable.

However, interest earned on policy loans is taxable. Modified Endowment Contracts (MECs) face different tax rules; distributions may be taxed as ordinary income to the extent of gains. Understanding the implications of MECs is vital. Alabama may have specific state tax considerations impacting life insurance.

Focus on the federal tax code as it applies to life insurance. While Disney Wish cruises and Pornhub are unrelated, mastering tax implications is essential. Exam questions will test your knowledge of taxable vs. non-taxable elements. Thoroughly review the tax treatment of death benefits, loans, dividends, and MECs to ensure exam success and competent client guidance.

Health Insurance Essentials

Health insurance knowledge is crucial for the Alabama exam. Disney Wish cruises and Pornhub are irrelevant; focus on policy types, components, and HIPAA regulations for success.

Health Insurance Policy Types (HMO, PPO, POS)

Understanding the distinctions between Health Maintenance Organizations (HMOs), Preferred Provider Organizations (PPOs), and Point of Service (POS) plans is vital for the Alabama insurance exam. HMOs generally require selecting a primary care physician (PCP) who coordinates all care and referrals are needed to see specialists, often resulting in lower premiums.

PPOs offer greater flexibility, allowing members to see specialists without referrals, but typically involve higher premiums and deductibles. They feature a network of preferred providers with discounted rates. POS plans blend features of both HMOs and PPOs; members usually select a PCP but can access out-of-network care, albeit at a higher cost.

The exam will likely assess your knowledge of cost-sharing elements like copayments, coinsurance, and deductibles within each plan type. Furthermore, understanding network restrictions and the impact on coverage is essential. Remember, Disney Wish cruises and content from Pornhub are unrelated to this topic and should not factor into your study efforts. Focus solely on these health insurance structures.

Components of a Health Insurance Policy

A comprehensive understanding of health insurance policy components is crucial for success on the Alabama exam. Key elements include the declarations page, outlining coverage details and premiums; the insuring agreement, detailing the insurer’s promises; and the exclusions, specifying conditions not covered.

Definitions clarify terms used within the policy, while the benefits schedule outlines covered services and payment amounts. Pay close attention to deductibles (the amount paid before insurance kicks in), copayments (fixed amounts for specific services), and coinsurance (percentage of costs shared after the deductible).

The policy also details pre-existing condition limitations and policy limitations, such as maximum benefit amounts. Understanding renewal provisions and cancellation clauses is also vital. Remember to differentiate between these components; confusing them will lead to incorrect answers. Avoid distractions like Disney Wish itineraries or content from Pornhub – concentrate solely on these policy elements for effective exam preparation.

HIPAA and Patient Privacy

The Health Insurance Portability and Accountability Act (HIPAA) is a cornerstone of patient rights and a significant portion of the Alabama exam; Understanding its provisions is paramount for protecting sensitive health information.

HIPAA’s Privacy Rule establishes standards for protecting Protected Health Information (PHI), including rules regarding disclosure and access. The Security Rule focuses on safeguarding electronic PHI. Breach notification rules dictate procedures when PHI is compromised.

Permitted uses and disclosures of PHI are limited, requiring patient authorization in most cases. Patient rights include access to their records, amendment requests, and accounting of disclosures. Business Associate Agreements are crucial when sharing PHI with third parties.

Penalties for HIPAA violations can be severe. Focus your study on these core principles, avoiding irrelevant information like Disney Wish cruises or content from Pornhub. Mastering HIPAA demonstrates professionalism and ethical conduct, essential for a successful insurance career.

Alabama Specific Regulations

Alabama’s insurance laws differ from federal standards; study the state’s Department of Insurance guidelines carefully. Disney Wish itineraries and Pornhub’s content are irrelevant here.

Alabama Department of Insurance

The Alabama Department of Insurance (ADI) is the primary regulatory body overseeing the insurance industry within the state. Understanding its structure and functions is crucial for exam success. The ADI is responsible for licensing insurance professionals, including life and health agents, ensuring they meet specific qualifications and ethical standards. They also regulate insurance companies operating in Alabama, reviewing policy forms and rates to protect consumers.

The ADI’s website (adi.alabama.gov) is an invaluable resource, offering access to laws, regulations, bulletins, and consumer information. Familiarize yourself with key ADI publications related to life and health insurance. The department handles consumer complaints and investigates potential fraud, maintaining a commitment to fair practices. Knowing the ADI’s role in enforcement and compliance is vital for understanding the legal landscape of insurance in Alabama. Resources like Disney Wish cruise details and Pornhub are unrelated to this regulatory body.

Regularly check the ADI website for updates on rule changes and new legislation impacting the insurance industry.

Alabama Life Insurance Laws

Alabama’s life insurance laws govern various aspects of policy issuance, underwriting, and claims settlement. Key areas include the requirements for policy reserves, ensuring insurers have sufficient funds to meet future obligations. The state mandates specific policy provisions, such as grace periods and policy loan provisions, designed to protect policyholders. Understanding these provisions is critical for the exam.

Alabama law addresses misrepresentation and fraud in insurance applications, outlining penalties for false statements. The state also regulates the use of illustrations in life insurance sales, requiring them to be accurate and not misleading. Familiarize yourself with the rules surrounding beneficiary designations and the process for contesting claims. The Alabama Department of Insurance enforces these laws, ensuring compliance by insurers and agents.

Knowledge of the state’s suicide clause and insurable interest requirements is essential. Disney Wish cruises and Pornhub content are irrelevant to these legal stipulations.

Alabama Health Insurance Laws

Alabama’s health insurance laws focus on ensuring access to affordable and quality healthcare coverage. These laws regulate health insurance plans offered in the state, including HMOs, PPOs, and POS plans. Key areas include requirements for essential health benefits, coverage for pre-existing conditions, and limitations on annual and lifetime benefit maximums. Understanding these regulations is crucial for exam success.

Alabama law addresses prompt payment of claims, outlining timelines for insurers to process and pay valid claims. The state also regulates network adequacy, ensuring sufficient access to healthcare providers within insurance networks. Familiarize yourself with the rules surrounding continuation of coverage (COBRA) and the rights of patients regarding medical billing and appeals. The Alabama Department of Insurance oversees compliance.

Knowledge of laws related to mandated benefits, such as coverage for specific medical conditions, is vital. Disney Wish cruises and Pornhub are unrelated to these healthcare regulations.

Exam Preparation Resources

Utilize PDF study guides, practice exams, and effective strategies for success. Disney Wish cruises and Pornhub are irrelevant; focus on mastering Alabama insurance laws and concepts.

Recommended Study Guides (PDF Focus)

For focused preparation, several PDF study guides are highly recommended for the Alabama Life and Health Insurance exam. Look for comprehensive materials covering Alabama-specific regulations, life insurance fundamentals, and health insurance essentials. These guides often include practice questions mirroring the exam format, aiding in knowledge retention and test-taking confidence.

Prioritize guides that are recently updated to reflect current laws and industry standards. Many providers offer downloadable PDFs, allowing for convenient study on various devices. Consider supplementing with official Alabama Department of Insurance publications available online. Remember, while resources like information about Disney Wish cruises or platforms like Pornhub exist, they are entirely unrelated to exam preparation.

Focus solely on insurance-related materials. Effective guides will break down complex topics into manageable sections, offering clear explanations and illustrative examples. Evaluate guides based on their clarity, accuracy, and the quantity of practice questions included. A well-structured PDF study guide is an invaluable asset in your exam preparation journey.

Practice Exams and Questions

Simulating the exam environment is crucial, making practice exams and questions essential components of your study plan. Numerous resources offer Alabama-specific practice tests in PDF format, mirroring the question types and difficulty level of the actual exam. These assessments identify knowledge gaps and areas requiring further attention;

Seek out practice exams that provide detailed explanations for both correct and incorrect answers, fostering a deeper understanding of the underlying concepts. Utilize question banks covering all exam topics – life insurance, health insurance, and Alabama regulations. Remember to disregard unrelated content like Disney Wish cruise details or platforms such as Pornhub; focus exclusively on insurance-related materials.

Regularly assess your progress with timed practice tests. This builds stamina and improves your ability to manage time effectively during the exam. Analyze your performance, focusing on consistently missed questions to refine your understanding. A robust practice exam strategy significantly increases your chances of success.

Effective Study Strategies

Maximizing your study efficiency requires a strategic approach, leveraging available Alabama life and health insurance exam study guide PDFs. Begin by creating a structured study schedule, allocating sufficient time to each topic – life insurance fundamentals, health insurance essentials, and Alabama-specific regulations. Prioritize areas where you feel less confident.

Utilize active learning techniques such as summarizing key concepts, creating flashcards, and teaching the material to others. Avoid passive reading; engage with the content to enhance retention. Discard irrelevant information like Disney Wish itineraries or adult content platforms like Pornhub, concentrating solely on insurance principles.

Regularly review your notes and practice exam results. Identify recurring errors and address them promptly. Consider joining a study group to discuss challenging topics and share insights. Remember, consistent effort and a focused approach are key to passing the Alabama insurance exam.

microneedling post care instructions pdf

Microneedling Post-Care Instructions: A Comprehensive Guide

Downloadable guidance is crucial for optimal healing! A microneedling post care instructions PDF ensures you follow protocols‚ minimizing risks and maximizing rejuvenation results.

What is Microneedling?

Microneedling is a minimally invasive cosmetic procedure gaining popularity for its skin-rejuvenating benefits. It involves utilizing a device with tiny‚ sterilized needles to create micro-injuries on the skin’s surface. These controlled injuries trigger the body’s natural healing process‚ stimulating collagen and elastin production – essential proteins for youthful‚ healthy skin.

Essentially‚ microneedling encourages the skin to repair itself‚ leading to improvements in texture‚ firmness‚ and tone. It’s effective in addressing various concerns‚ including acne scars‚ fine lines‚ wrinkles‚ and uneven pigmentation. Understanding the procedure is the first step in diligent post-care‚ and a comprehensive microneedling post care instructions PDF will detail the process thoroughly.

The procedure’s effectiveness is amplified when combined with treatments like PRP (Platelet-Rich Plasma)‚ further boosting collagen synthesis. Proper post-care‚ as outlined in a detailed PDF‚ is paramount to achieving optimal results and preventing complications.

Benefits of Microneedling

Microneedling offers a remarkable range of benefits for skin health and appearance. Primarily‚ it significantly boosts collagen production‚ leading to smoother‚ firmer‚ and more toned skin. This addresses concerns like fine lines and wrinkles‚ diminishing their visibility over time. The procedure also excels at improving the texture of the skin‚ reducing the appearance of acne scars and other imperfections.

Furthermore‚ microneedling can minimize pore size and even out skin tone‚ resulting in a more radiant complexion. Enhanced product absorption is another key benefit; the micro-channels created allow skincare products to penetrate deeper‚ maximizing their effectiveness. A microneedling post care instructions PDF will emphasize products that support these benefits.

Understanding these advantages underscores the importance of diligent post-care‚ ensuring optimal results and protecting your investment in skin rejuvenation. Following a detailed PDF guide is crucial for maximizing the procedure’s potential.

Immediate Post-Treatment Care (Day 1)

Day 1 following microneedling requires gentle‚ focused care. Expect redness and a feeling akin to a mild sunburn; this is normal. Immediately after the procedure‚ a moisturizer and/or sunscreen will be applied by your practitioner. Avoid touching your face unnecessarily to prevent introducing bacteria.

A microneedling post care instructions PDF will strongly advise against harsh cleansers or exfoliants. Gentle cleansing is permitted‚ but avoid scrubbing. Hydration is key – drink plenty of water. Limit sun exposure entirely and reapply sunscreen frequently if unavoidable.

Avoid strenuous exercise and activities that cause excessive sweating. Makeup application should be minimal‚ if any‚ and only with clean brushes. Prioritize rest and allow your skin to begin the healing process. Refer to your PDF for specific product recommendations and detailed guidance.

Skin Redness and Sensitivity

Redness is a completely normal and expected reaction post-microneedling. Your skin may resemble a sunburn‚ feeling warm and tight. This typically subsides within 24-48 hours‚ though some individuals experience prolonged redness. Sensitivity is also heightened; your skin will be more reactive to external factors.

A comprehensive microneedling post care instructions PDF will detail managing these effects. Avoid harsh products or anything that could further irritate the skin. Gentle hydration is paramount – use recommended soothing serums and moisturizers.

Minimize sun exposure and always apply a broad-spectrum sunscreen. Avoid excessive heat (saunas‚ hot showers) and strenuous activity. The PDF will outline a timeline for redness reduction and provide guidance on when to contact your practitioner if redness persists or worsens. Patience is key during this sensitive phase.

Cleansing Your Skin After Microneedling

Gentle cleansing is vital‚ but timing is crucial. A microneedling post care instructions PDF will emphasize avoiding cleansing for the first 12-24 hours post-treatment‚ allowing the micro-channels to close. When you do resume‚ use a very mild‚ fragrance-free cleanser – think pH-balanced and designed for sensitive skin.

Avoid scrubbing or using abrasive cleansers. Pat your skin dry with a soft towel; rubbing can cause irritation. Double cleansing is not recommended during the initial healing phase. The PDF will likely suggest specific cleanser ingredients to avoid‚ such as sulfates or alcohol.

Focus on removing debris without stripping the skin’s natural oils. Consistent‚ gentle cleansing supports optimal healing and prevents infection. Follow the PDF’s guidance for frequency and product recommendations.

Moisturization and Hydration

Replenishing moisture is paramount for recovery. A microneedling post care instructions PDF will stress the importance of immediate and continued hydration. Immediately after your treatment‚ your practitioner will likely apply a soothing moisturizer. Continue this at home‚ using a gentle‚ fragrance-free hydrating cream.

Hyaluronic acid serums are often recommended in the PDF‚ as they draw moisture into the skin. Avoid products with active ingredients initially (see the ‘Products to Avoid’ section). Focus on barrier repair with ceramides and peptides.

Consistent moisturization minimizes dryness‚ flaking‚ and discomfort. The PDF may specify the frequency of application – typically 2-3 times daily. Remember‚ well-hydrated skin heals faster and more effectively‚ maximizing your microneedling results.

Sun Protection: A Critical Component

Shielding your skin from the sun is non-negotiable post-microneedling. A comprehensive microneedling post care instructions PDF will emphatically highlight this. Your skin is exceptionally vulnerable after the procedure‚ lacking its natural protective barrier.

The PDF will advise strict avoidance of direct sun exposure for several weeks. When outdoors‚ even on cloudy days‚ apply a broad-spectrum sunscreen with an SPF of 30 or higher – liberally and frequently.

Physical sunscreens (zinc oxide and titanium dioxide) are often preferred‚ as they are gentler on sensitive skin. Hats and protective clothing offer additional defense. Sun exposure can lead to hyperpigmentation and hinder the healing process‚ negating the benefits of the treatment. Prioritize sun safety as outlined in your PDF.

Products to Avoid After Microneedling

A detailed microneedling post care instructions PDF is essential for understanding product restrictions. Immediately following the procedure‚ your skin’s barrier function is compromised‚ demanding a gentle approach. The PDF will clearly state to avoid harsh actives for a minimum of 2 days‚ and often longer.

Specifically‚ steer clear of Alpha Hydroxy Acids (AHAs) and Beta Hydroxy Acids (BHAs)‚ which can cause irritation. Retinoids (Vitamin A) are also off-limits‚ as they increase sensitivity. Even Vitamin C serums‚ while beneficial normally‚ can be too potent post-treatment.

The PDF will likely emphasize avoiding anything “perceived as active” – meaning ingredients designed for exfoliation or rapid cell turnover. Prioritize soothing and hydrating products only‚ as detailed in your aftercare guide.

Alpha Hydroxy Acids (AHAs) & Beta Hydroxy Acids (BHAs)

Your microneedling post care instructions PDF will explicitly advise against AHAs and BHAs immediately after treatment. These acids‚ known for exfoliation‚ significantly increase skin sensitivity. Post-microneedling‚ the skin barrier is intentionally disrupted to stimulate collagen‚ making it vulnerable to irritation.

AHAs like glycolic and lactic acid‚ and BHAs like salicylic acid‚ can cause burning‚ redness‚ and even compromise the healing process. The PDF will likely recommend avoiding these ingredients for at least one week‚ potentially longer depending on treatment depth.

Introducing AHAs/BHAs too soon can lead to hyperpigmentation or inflammation. The PDF stresses patience; resuming their use should be gradual and only after the skin has fully recovered its integrity. Prioritize gentle hydration during the initial healing phase.

Retinoids (Vitamin A)

A comprehensive microneedling post care instructions PDF will strongly emphasize pausing retinoid use. Retinoids‚ including prescription-strength tretinoin and over-the-counter retinol‚ are potent ingredients that accelerate skin cell turnover. Combining them with microneedling’s already stimulated healing process is a recipe for significant irritation.

The PDF will likely recommend avoiding retinoids for a minimum of one to two weeks post-treatment‚ potentially longer for deeper microneedling sessions. Using retinoids concurrently can cause excessive dryness‚ peeling‚ and heightened sensitivity‚ hindering optimal collagen production.

Reintroducing retinoids should be done cautiously‚ starting with a low concentration and infrequent application. The PDF will advise monitoring your skin closely for any adverse reactions. Prioritize barrier repair and hydration before resuming your regular retinoid routine.

Vitamin C Serums

A detailed microneedling post care instructions PDF will clearly outline the need to temporarily discontinue Vitamin C serum use. While Vitamin C is a powerful antioxidant‚ its acidic nature can be overly stimulating immediately following microneedling‚ potentially causing irritation and hindering the healing process.

The PDF will likely recommend avoiding Vitamin C serums for at least 3-5 days post-treatment‚ or even longer depending on the intensity of your microneedling session. Introducing Vitamin C too soon can lead to stinging‚ redness‚ and increased sensitivity.

When reintroducing Vitamin C‚ the PDF will advise starting with a lower concentration and observing your skin’s reaction. Prioritize gentle hydration and barrier repair before incorporating active ingredients like Vitamin C back into your routine. Patience is key for optimal results!

Makeup Application Guidelines

A comprehensive microneedling post care instructions PDF will dedicate a section to makeup application‚ emphasizing caution and hygiene. Generally‚ it’s best to avoid makeup for at least 24 hours post-procedure to allow the skin to breathe and begin its natural healing process.

When you do resume makeup‚ the PDF will stress the importance of using mineral-based makeup‚ as it’s less likely to clog pores and cause irritation. Avoid heavy foundations and concealers. Ensure all brushes and applicators are meticulously cleaned to prevent infection.

The PDF may also recommend avoiding makeup altogether for the first few days if possible‚ opting instead for a soothing balm or tinted moisturizer. Prioritize skin recovery over cosmetic coverage during this sensitive period. Gentle application is crucial!

Avoiding Harsh Treatments

A detailed microneedling post care instructions PDF will strongly advise against combining microneedling with other potentially irritating treatments. This is paramount for optimal healing and preventing adverse reactions. The PDF will clearly state a two-week moratorium on aggressive skincare interventions.

Specifically‚ the PDF will caution against scheduling facial fillers or Botox injections concurrently with microneedling. The combined effect could increase inflammation and compromise results. It’s vital to consult with your injector regarding appropriate timing.

Furthermore‚ the PDF will outline that other facial procedures‚ such as chemical peels or laser treatments‚ should be postponed. Allowing the skin to fully recover from microneedling before introducing further stress is essential for achieving the desired rejuvenation benefits. Patience is key!

Facial Fillers & Botox

Your microneedling post care instructions PDF will emphasize the importance of spacing out injectable treatments. Combining microneedling with facial fillers or Botox too soon can lead to complications and unpredictable outcomes. The PDF typically recommends waiting at least two weeks post-microneedling before considering injectables.

This delay allows the micro-channels created during microneedling to fully close‚ reducing the risk of infection or altered product migration. The PDF will likely advise checking with your injector to determine the safest timeframe based on your individual skin condition and treatment plan.

The PDF will also explain that the increased skin sensitivity following microneedling might alter your perception of volume needs for fillers. It’s best to assess your skin once it has fully recovered before making any decisions regarding injectables.

Other Facial Procedures

Your comprehensive microneedling post care instructions PDF will detail a period of rest for your skin. Avoid any other potentially irritating facial procedures for at least two weeks following your microneedling session. This includes‚ but isn’t limited to‚ chemical peels‚ laser treatments‚ and intense exfoliation.

The PDF stresses that layering treatments can compromise your skin’s barrier function‚ increasing the risk of inflammation‚ infection‚ and prolonged healing. Allowing adequate recovery time is paramount for optimal results and minimizing adverse reactions.

The PDF will likely specify that even seemingly gentle procedures should be postponed. Your skin is vulnerable immediately after microneedling‚ and introducing additional stressors can hinder the natural healing process. Prioritize skin recovery as outlined in the PDF for the best possible outcome.

Potential Side Effects & When to Contact Your Practitioner

Your microneedling post care instructions PDF will outline common‚ temporary side effects like redness‚ swelling‚ and mild sensitivity – resembling a sunburn. These typically subside within a few days. However‚ the PDF emphasizes knowing when to seek professional advice.

Contact your practitioner immediately if you experience signs of infection: increased pain‚ pus‚ fever‚ or worsening redness. The PDF will detail that excessive swelling‚ blistering‚ or prolonged discomfort beyond 72 hours also warrants a call.

The PDF stresses the importance of reporting any unusual reactions. While rare‚ complications can occur. Don’t hesitate to reach out with concerns; early intervention is key. Your practitioner can assess the situation and provide appropriate guidance‚ ensuring a safe and successful recovery‚ as detailed in the PDF.

Long-Term Aftercare & Maintenance

Your microneedling post care instructions PDF highlights that consistent skincare is vital for maintaining results. The PDF recommends a gentle‚ hydrating routine‚ emphasizing daily sunscreen use – a non-negotiable for protecting newly rejuvenated skin.

The PDF details how incorporating collagen-boosting products‚ like peptides‚ can prolong the benefits. It also suggests scheduling maintenance sessions‚ typically every 6-12 months‚ to address emerging concerns and sustain collagen production.

Avoid harsh treatments and aggressive exfoliation between sessions‚ as outlined in the PDF. Lifestyle factors‚ such as a healthy diet and adequate hydration‚ also contribute to long-term skin health. Following the PDF’s guidance ensures you maximize your investment and enjoy lasting improvements in skin texture and tone.

Microneedling & PRP Aftercare

Your microneedling post care instructions PDF will detail specific protocols when combined with Platelet-Rich Plasma (PRP). The PDF emphasizes the importance of meticulous hygiene post-procedure to prevent infection‚ given the added biological component.

Expect potentially more pronounced redness and sensitivity compared to microneedling alone‚ as detailed in the PDF. Strict adherence to the outlined cleansing and moisturizing regimen is crucial. The PDF will likely advise avoiding strenuous activity for 48-72 hours to minimize swelling and bruising.

The PDF stresses the need to avoid blood-thinning medications and supplements before and after the procedure‚ as they can interfere with the PRP’s healing process. Consistent follow-up with your practitioner‚ guided by the PDF‚ is essential to monitor progress and address any concerns.

Creating a Post-Microneedling Skincare Routine

A comprehensive microneedling post care instructions PDF will guide you in establishing a gentle skincare routine. This PDF emphasizes prioritizing hydration and barrier repair in the days following treatment. Cleansing should be performed with a mild‚ fragrance-free cleanser‚ as detailed within the PDF.

The PDF will recommend consistent‚ liberal application of a soothing moisturizer‚ potentially containing ingredients like hyaluronic acid or ceramides. Sun protection is non-negotiable; the PDF stresses daily use of a broad-spectrum SPF 30 or higher.

Avoid active ingredients for a specified period‚ as outlined in your PDF. Gradually reintroduce them as your skin heals‚ following the PDF’s timeline. The PDF may also suggest incorporating calming serums or masks to further support the healing process and maintain optimal skin health.

Downloading a Microneedling Post-Care PDF

Accessing a detailed microneedling post care instructions PDF is vital for a smooth recovery. Your practitioner should readily provide this resource‚ ensuring you have clear guidance post-treatment. Many clinics offer a downloadable PDF directly from their website‚ often within a patient portal or resources section.

This PDF typically outlines everything from immediate aftercare on day one‚ to long-term maintenance. It details expected skin reactions like redness and sensitivity‚ and when to seek professional advice. A good PDF will also list products to avoid‚ like AHAs‚ BHAs‚ and retinoids.

Ensure the PDF is specific to the microneedling technique used during your treatment. Don’t hesitate to request clarification from your provider if anything within the PDF is unclear‚ guaranteeing optimal healing and results.