tommee tippee sanitizer instructions

The Tommee Tippee sanitizer is an innovative, all-in-one solution for sterilizing baby items, combining UV technology with drying and storage capabilities, ensuring a safe and chemical-free process.

Overview of the Tommee Tippee Sanitizer

The Tommee Tippee sanitizer is a versatile and efficient solution for sterilizing baby essentials. Designed for convenience, it combines UV sterilization, drying, and storage in one unit. This chemical-free method ensures items are safe for your baby while maintaining their quality. Its sleek design and user-friendly interface make it an essential tool for parents seeking a reliable and hygienic way to care for their little ones. Perfect for bottles, pacifiers, and other accessories, it offers a hassle-free experience for busy families.

Key Features of the Tommee Tippee Sanitizer

The Tommee Tippee sanitizer boasts advanced UV sterilization technology, killing 99.9% of bacteria and germs. It features a spacious interior, accommodating multiple baby items like bottles, pacifiers, and breast pumps. The unit also includes a drying function, ensuring items are ready for use or storage. Its sleek, compact design saves space while offering a chemical-free sterilization process. With automatic shut-off and a user-friendly interface, it provides a safe and efficient solution for parents. The sanitizer is also eco-friendly and energy-efficient, making it a practical choice for daily use.

Components of the Tommee Tippee Sanitizer

The Tommee Tippee sanitizer includes a UV sterilisation chamber, drying rack, and storage compartment. It features a BPA-free design with stackable trays for efficient organisation of baby essentials.

Understanding the UV Sterilisation Technology

The Tommee Tippee sanitizer uses UV-C light to eliminate 99.9% of germs and bacteria from baby items; This chemical-free method ensures items are sterilised without harsh substances. The UV technology is automated, providing a safe and efficient process. Designed for baby bottles, pacifiers, and other accessories, it ensures deep sterilisation while maintaining item integrity. The UV light targets harmful microorganisms, creating a hygienic environment for baby essentials. This advanced technology is both effective and easy to use, offering parents peace of mind with minimal effort required.

Parts and Accessories Included

The Tommee Tippee sanitizer comes with a UV sterilisation chamber, multiple trays for organizing items, and a UV protection shield. It includes a power adapter, user manual, and a warranty card. Additional accessories like a cleaning brush and optional extra trays can be purchased separately for convenience. The unit is designed to hold various baby essentials, ensuring efficient sterilisation and storage. These components work together to provide a comprehensive solution for maintaining hygiene and organization in baby care.

Assembly and Preparation

Place the sanitizer on a flat surface, insert the trays, and plug in the power. Ensure all parts are securely fitted before first use for optimal performance.

Step-by-Step Assembly Instructions

  • Unbox the sanitizer and thoroughly wash your hands before starting assembly.
  • Place the main unit on a flat, stable surface, ensuring good ventilation.
  • Gently insert the trays into the designated slots, aligning the guides for proper fit.
  • Connect the power cord to the sanitizer and plug it into a nearby outlet.
  • Ensure all components are securely locked and no parts are loose.
  • Check that the UV light and fan are unobstructed for optimal performance.
  • Run a test cycle to confirm everything is functioning correctly.
  • Refer to the user manual for any specific adjustments or additional steps.

Follow these steps carefully to ensure safe and effective use of the sanitizer.

Preparing Items for Sterilisation

  • Wash items with warm soapy water and rinse thoroughly before sterilisation.
  • Dismantle all parts, such as bottle teats and caps, to ensure thorough cleaning.
  • Place items in the steriliser trays, ensuring proper spacing for even UV exposure.
  • Do not overcrowd the trays, as this may block UV light distribution.
  • Ensure items are completely dry before placing them in the sanitizer.
  • All items should face downward to prevent water spots during drying.

Proper preparation ensures effective sterilisation and maintains the quality of your baby items.

Operating the Sanitizer

Operating the Tommee Tippee sanitizer is straightforward, with user-friendly controls and multiple cycle options to ensure efficient and effective sterilisation of baby essentials.

How to Use the Tommee Tippee Sanitizer

To use the Tommee Tippee sanitizer, simply place the items inside, ensuring they are properly arranged for even exposure. Select the desired cycle using the intuitive controls. Press start, and the UV light will activate, eliminating germs and bacteria; The process is quick and chemical-free, leaving items clean and ready for use. Always follow the manufacturer’s guidelines for loading and cycle selection to ensure optimal results and maintain the sanitizer’s efficiency.

Cycle Options and Settings

The Tommee Tippee sanitizer offers multiple cycle options to suit different needs. Choose from a 30-minute cycle for quick sterilisation and drying or a 60-minute cycle for deeper sanitisation. The device also features an automatic shut-off for energy efficiency. Settings are easy to navigate using the control panel, allowing you to customise the process based on the items being sterilised. Refer to the manual for specific cycle recommendations to ensure optimal performance and hygiene. This versatility ensures all baby essentials are thoroughly cleaned and ready for use.

Safety Precautions

Always handle the UV light and hot surfaces with care. Keep children away during operation. Avoid direct exposure to UV light to prevent eye damage. Ensure proper ventilation and follow all instructions carefully to maintain safety while using the Tommee Tippee sanitizer.

Important Safety Tips for Users

  • Always handle the UV light and hot surfaces with care to avoid burns or injuries.
  • Keep children away from the sanitizer during operation to prevent accidents.
  • Avoid direct exposure to UV light, as it can cause eye damage.
  • Ensure proper ventilation in the room to prevent moisture buildup.
  • Never leave the sanitizer unattended while it is in use.
  • Use oven mitts or tongs to handle hot items after sterilisation.
  • Ensure the area around the sanitizer is clear of flammable materials.
  • Follow the manufacturer’s guidelines for safe and effective use.

Preventing Accidents and Ensuring Safe Use

To ensure safe use of the Tommee Tippee sanitizer, always place it on a stable, flat surface to prevent tipping over. Regularly inspect the unit for damage or wear and tear. Avoid using the sanitizer near water or in humid environments to minimize electrical risks. Never modify or tamper with the device, as this could compromise its safety features. Always follow the manufacturer’s guidelines for operation and maintenance. Regularly check for updates or recalls to ensure optimal performance and safety.

  • Keep the sanitizer out of reach of children and pets.
  • Avoid using damaged cables or adapters.
  • Ensure all electrical components are dry before use.
  • Do not leave the sanitizer unattended during operation.

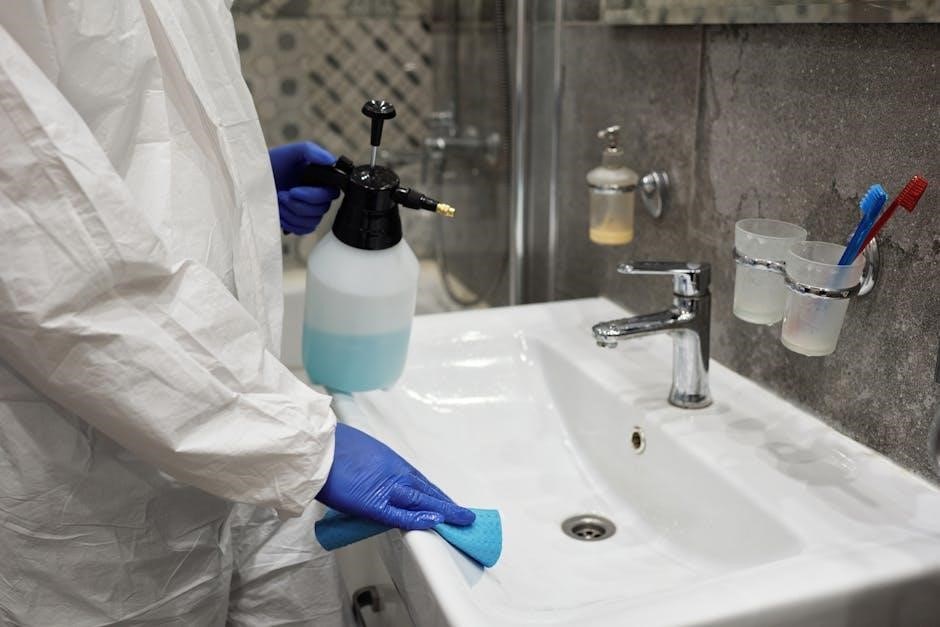
Cleaning and Maintenance

Regularly clean the Tommee Tippee sanitizer by wiping surfaces with a damp cloth and descaling to prevent mineral buildup, ensuring optimal performance and longevity.

How to Clean the Sanitizer

Regular cleaning of the Tommee Tippee sanitizer is essential for maintaining hygiene and functionality. Start by unplugging the device and allowing it to cool. Use a soft, damp cloth to wipe down the exterior and interior surfaces, removing any visible residue. For tougher stains, a diluted vinegar solution can be used, but avoid harsh chemicals or abrasive cleaners. Descale the unit periodically if water mineral buildup occurs. Dry the sanitizer thoroughly after cleaning to prevent moisture accumulation. Always refer to the manual for specific cleaning instructions tailored to your model.

Maintenance Tips for Longevity

Regular maintenance ensures the Tommee Tippee sanitizer operates effectively and lasts longer. Check and replace UV bulbs as recommended to maintain sterilization efficiency. Descale the unit every 1-3 months, depending on water hardness, to prevent mineral buildup. Store the sanitizer in a dry, cool place when not in use. Avoid exposing it to direct sunlight or extreme temperatures. Refer to the user manual for specific maintenance schedules and guidelines tailored to your model. Proper care will extend the lifespan and performance of the sanitizer.

Drying and Storage

The Tommee Tippee sanitizer includes advanced drying features to ensure items remain sterile and ready for use. Store sterilised items in a clean, dry place to maintain hygiene and safety.

Drying Process After Sterilisation

The Tommee Tippee sanitizer includes an efficient drying process post-sterilisation, ensuring items remain clean and moisture-free. After the UV sterilisation cycle, the unit transitions to a drying phase, using air circulation to remove residual moisture. This step is crucial for preventing bacterial growth and maintaining item hygiene. The sanitizer’s drying cycle is designed to be gentle yet effective, ensuring items are ready for safe storage or immediate use. Always allow the unit to cool slightly before handling sterilised items to ensure optimal drying results and safety.

Storage Solutions for Sterilised Items

The Tommee Tippee sanitizer offers convenient storage solutions, ensuring sterilised items remain clean and organised. The unit includes compartments designed to keep items dry and protected from contamination. For optimal storage, place items in airtight containers or use the built-in compartments provided. This helps maintain hygiene and prevents moisture buildup. Always store sterilised items in a cool, dry place, away from direct sunlight, to preserve their quality and ensure they remain safe for use.

Troubleshooting Common Issues

Common issues include the UV light not turning on or strange noises. Check power connections, ensure the lid is closed properly, and clean the interior regularly.

Resolving Common Problems

Common issues with the Tommee Tippee sanitizer include the UV light not turning on or cycles not completing. Ensure the unit is properly plugged in, the lid is closed securely, and no obstructions block the UV light. If the machine makes unusual noises, check for loose parts or debris inside. For malfunctioning sensors, clean the interior thoroughly and restart the device. If problems persist, refer to the user manual or contact customer support for assistance. Regular cleaning and maintenance can often resolve these issues effectively.

FAQs About the Tommee Tippee Sanitizer

Frequently asked questions about the Tommee Tippee sanitizer include queries about its capacity, compatibility with various baby items, and effectiveness against bacteria. Users often inquire about the duration of sterilisation cycles, which typically range from 15 to 60 minutes. Many ask if the unit requires water, and the answer is no—it uses UV light for sterilisation. Another common question is whether it can be used for items other than bottles, with the answer being yes, provided they fit inside. These FAQs highlight its versatility and ease of use for parents seeking a reliable sanitising solution.

The Tommee Tippee sanitizer offers an efficient, chemical-free solution for sterilizing baby items. Its UV technology ensures a germ-free environment while being easy to use and maintain.

Final Thoughts on the Tommee Tippee Sanitizer

The Tommee Tippee sanitizer is a must-have for parents seeking a reliable, all-in-one solution for sterilizing baby items; Its UV technology ensures a chemical-free process, while the integrated drying and storage features make it incredibly convenient. Easy to use and maintain, this sanitizer provides peace of mind by effectively eliminating germs and bacteria. With its modern design and user-friendly interface, it stands out as a practical and efficient choice for keeping baby essentials clean and safe. A worthwhile investment for any family.

how to manually retract slide out

Understanding Your RV Slide Mechanism

RV slide mechanisms vary by type, including rack-and-pinion, hydraulic, and Schwintek systems. Each requires specific manual retraction techniques to ensure safety and proper functioning. Understanding your system is crucial for troubleshooting and maintenance, as improper handling can lead to damage or accidents. Always consult your owner’s manual or manufacturer guidelines for system-specific instructions to ensure smooth operation and prevent potential issues during travel or storage.

Identifying the Type of Slide System

Start by inspecting your RV’s slide mechanism to determine its type. Rack-and-pinion systems have visible gears and a motor with a hex nut or extension rod. Hydraulic slides rely on fluid pressure and cylinders, while Schwintek (in-wall) slides operate via a motor inside the wall. Consulting your owner’s manual or manufacturer guidelines can help confirm the system type. Identifying the correct mechanism is essential for applying the appropriate manual retraction method, ensuring safety and preventing damage to the slide or motor components.

Checking the Owner’s Manual

Always begin by consulting your RV’s owner’s manual, as it provides specific instructions for your slide system. The manual outlines the manufacturer’s recommended procedures for manual retraction, including safety precautions and tools required. It may also detail emergency retraction processes or troubleshooting steps if the slide malfunctions. Familiarize yourself with the manual’s guidance to avoid damaging the mechanism or causing injury. Keep it handy during the process to ensure compliance with the manufacturer’s instructions and address any system-specific nuances.

Preparing for Manual Retraction

Before manually retracting your RV slide, ensure the area around it is clear of obstructions. Check that the RV is stable and secure to prevent movement during the process. Disconnect power sources to the slide mechanism to avoid accidental activation. Gather necessary tools, such as wrenches or sockets, as specified in your owner’s manual. Familiarize yourself with the manual’s instructions for your specific slide type to ensure a smooth and safe retraction process.

Ensuring Safety and Clearing the Area

Before attempting manual retraction, ensure the area around the slide-out is clear of people, pets, and obstructions. Verify that the RV is on level ground and securely stabilized to prevent movement. Check for any loose items that could fall or cause damage during the process. Ensure all power sources to the slide mechanism are disconnected to avoid accidental activation. Use blocks or stabilizing tools to secure the RV further if needed. Always refer to your owner’s manual for specific safety precautions tailored to your slide system.

Disconnecting Power Sources

Before manually retracting the slide-out, disconnect all power sources to the motor and control systems. Switch off the RV’s main power supply and unplug any switches or controllers connected to the slide mechanism. For hydraulic systems, ensure the pump is turned off and the battery is disconnected if necessary. Verify that no power is being supplied to the motors to prevent accidental activation during the manual process. This step is critical to ensure safety and avoid any potential electrical hazards while working on the slide-out mechanism.

Manual Retraction Methods

Manual retraction methods vary by slide type. Rack-and-pinion systems often require a wrench to turn the motor screw, while hydraulic slides may need valve operation. Schwintek slides typically involve disconnecting the motor and manually pushing the slide in. Each method ensures safe and controlled retraction without power assistance.

Rack and Pinion Slides

For rack-and-pinion slides, manual retraction involves using a wrench to turn the motor screw. This process requires steady pressure to roll the slide back in. It may take 10–15 minutes depending on the load and motor condition. Ensure the area is clear and apply consistent effort to avoid resistance. Disconnecting power sources beforehand is essential for safety. Always refer to the owner’s manual for specific instructions, as methods may vary slightly by manufacturer or model. Patience is key to successfully retracting the slide manually.

Hydraulic Slides

Hydraulic slides require manual retraction by opening the manifold valves and pushing the slide in. This process is labor-intensive and typically needs two or three people to manage the resistance. Ensure the area is clear and apply steady pressure to avoid complications. Disconnect power sources beforehand for safety. Some systems may require specialized tools or techniques, so always consult the owner’s manual for specific guidance. Hydraulic slides are durable but demand careful handling to prevent damage during manual operation.

Schwintek (In-Wall) Slides

Schwintek slides use an in-wall mechanism, making manual retraction more complex. To retract, disconnect the motor and ensure the system is freewheeling. Use a wrench to turn the motor screw steadily, applying consistent pressure. This process can take up to 15 minutes, depending on the load. Ensure the area is clear and secure the slide with blocks after retraction. Consult the owner’s manual for specific instructions, as improper handling can damage the internal gears or motor. Patience and care are essential to avoid system malfunctions.

Tools and Equipment Needed

A ratchet wrench, appropriate sockets, and sturdy blocking materials are essential for manually retracting RV slides. Ensure all tools are compatible with your slide mechanism to avoid damage.

Wrenches and Sockets

For manual retraction, a ratchet wrench and appropriate socket are essential. Use an adjustable wrench for hex nuts or an impact wrench for stubborn mechanisms. Ensure sockets match the motor screw size. A torque wrench may be needed for precise control. Always use high-quality tools to avoid stripping screws. If unsure, consult the owner’s manual for specific tool recommendations. Proper tools ensure safety and effectiveness during the retraction process, preventing damage to the slide mechanism.

Blocking and Securing the Slide

After manual retraction, secure the slide with sturdy blocks or wedges to prevent creeping. Place blocks between the interior wall and slide lip, ensuring a snug fit. Use high-strength materials like wood or metal for reliability. For added stability, consider installing slide locks or support brackets. Properly securing the slide ensures safety during travel and prevents unintended movement. Always test the setup before moving the RV to confirm the slide remains firmly in place.

Executing the Manual Retraction

Locate the slide motor and attach the appropriate wrench to the screw. Turn the screw clockwise to retract the slide. Apply steady pressure while pushing the slide inward. This process may take 10–15 minutes, depending on the system’s condition. Ensure the slide aligns properly and moves smoothly. If resistance is met, check for obstructions and address them before continuing. Once fully retracted, secure the slide to prevent movement during travel.

Turning the Motor Screw

To manually retract the slide, attach a wrench or ratchet to the motor screw. Turn the screw clockwise to begin retraction. Apply steady, consistent pressure while ensuring the slide moves smoothly. Depending on the system, this process may take 10–15 minutes. Keep the slide aligned to avoid misalignment issues. If resistance occurs, stop and check for obstructions or debris. Once fully retracted, secure the slide to prevent movement during travel. Always follow the manufacturer’s guidelines for your specific slide mechanism to ensure safety and proper operation.

Pushing the Slide In

Once the motor screw is turned, manually push the slide toward the RV. Ensure the slide remains aligned with the opening to prevent damage. Apply steady, firm pressure, and consider enlisting help if resistance is strong. Use blocking material like wood to stabilize the slide if it begins to creep. Continue pushing until the slide is fully retracted and flush with the RV wall. Secure it with locks or latches to maintain stability during travel. Always inspect the slide’s condition after manual retraction to ensure proper alignment and functionality.

Post-Retraction Steps

After manual retraction, secure the slide with blocking material or braces to prevent movement during travel. Inspect the slide and surrounding area for damage or misalignment issues.

Securing the Slide for Travel

To ensure safety while traveling, place blocking material like a 2×4 between the slide and RV wall. Secure the slide using locks or latches to prevent movement. Avoid over-tightening, as this could damage the mechanism. Double-check for any obstructions or misalignment. For added stability, consider using hydraulic jacks to support the slide. Always test the setup by gently rocking the RV to ensure the slide remains firmly in place during transit.

Checking for Underlying Issues

After manual retraction, inspect the slide mechanism for damage or wear. Check gears, hydraulic lines, and electrical connections for leaks or misalignment. Ensure the slide is properly aligned with the RV wall to avoid future issues. Look for obstructions that may have caused the initial malfunction. Test the system by extending and retracting the slide slightly to confirm smooth operation. If any problems are identified, address them immediately or consult a professional to prevent further complications during travel.

Maintenance and Prevention

Regular lubrication of moving parts and inspection of hydraulic lines and gears is essential. Clean and maintain electrical connections to prevent malfunctions. Schedule annual professional inspections to identify potential issues early. Keep the slide mechanism free from debris and obstructions to ensure smooth operation. Address any wear or damage promptly to prevent costly repairs and extend the lifespan of your RV slide system.

Regular System Checks

Regular system checks are vital to ensure smooth operation. Inspect gears, hydraulic lines, and electrical connections for wear or damage. Lubricate moving parts annually and clean debris from tracks. Check for fluid leaks in hydraulic systems and test electrical switches. Schedule professional inspections every 12 months to identify potential issues early. Address minor repairs promptly to prevent major breakdowns. Keep the slide mechanism clean and well-maintained to ensure reliability and extend its lifespan. Regular checks help avoid unexpected malfunctions during trips.

Addressing Obstructions

Addressing obstructions is crucial for smooth slide operation. Clear debris, dirt, or obstructions from tracks and gears to prevent jamming. Check for misaligned parts and adjust them if necessary. Inspect the slide’s path for items blocking its movement. Use appropriate tools to remove obstructions without damaging components. Ensure all moving parts are free from hindrances to allow proper manual retraction. Regularly cleaning and inspecting the system helps prevent issues and ensures reliable performance during travel or setup.

Seeking Additional Resources

Consult tutorials, guides, and forums for detailed instructions. YouTube offers video tutorials for manual retraction. Contact manufacturers like Lippert or HydraGear for specific guidance. Professional technicians can provide hands-on assistance. Always refer to reliable sources to ensure safety and accuracy when addressing slide-out issues.

Consulting Tutorials and Guides

Online tutorials and guides provide step-by-step instructions for manual retraction. YouTube videos demonstrate processes for rack-and-pinion, hydraulic, and Schwintek slides. RV forums and manufacturer websites offer detailed troubleshooting tips. Many guides include images and diagrams to help identify components like motors, gears, and actuators. Printable PDF manuals are often available for specific systems, ensuring clarity. These resources also cover safety precautions and maintenance tips to prevent future issues. Always cross-reference with your RV’s owner’s manual for system-specific advice.

Contacting Professional Help

If manual retraction proves challenging or unsafe, consider consulting a professional. RV dealerships and repair shops specialize in slide mechanisms and can diagnose issues. Certified technicians are familiar with systems like Lippert and HydraGear, ensuring proper repair. They can also provide maintenance tips to prevent future problems. Don’t hesitate to seek expert help if you’re unsure or encounter resistance. Professional assistance guarantees safety and avoids potential damage to your RV’s slide-out system.

the road by cormac mccarthy pdf

Cormac McCarthy’s The Road is a haunting exploration of survival‚ humanity‚ and existential themes in a post-apocalyptic world. The novel follows a father and son’s perilous journey‚ emphasizing their bond amidst devastation. McCarthy’s sparse‚ powerful prose captivates readers‚ making it a modern classic. Available in PDF formats‚ the book remains widely accessible‚ sparking philosophical discussions and literary acclaim.

Overview of the Novel

The Road by Cormac McCarthy is a gripping tale of survival in a post-apocalyptic world. A father and son navigate a barren landscape‚ facing moral dilemmas and existential questions. The novel explores themes of hope‚ humanity‚ and the environment’s collapse. Its sparse prose intensifies the emotional depth‚ making it a profound reflection on human resilience. Available in PDF‚ it remains a vital read.

Significance of the PDF Format

The PDF format of The Road enhances accessibility‚ allowing readers to engage with McCarthy’s profound narrative anywhere. Its digital convenience ensures the story’s themes of survival and hope reach a broader audience. The format also preserves the novel’s stark prose and bleak imagery‚ maintaining its emotional impact. Legal downloads further protect the author’s work while ensuring readers experience it responsibly.

The Plot Summary

The Road follows a father and son navigating a post-apocalyptic world‚ seeking survival and safety. Their journey highlights humanity’s resilience and the father’s protective devotion amidst devastation.

The Journey of the Father and Son

The father and son’s odyssey through a barren‚ post-apocalyptic landscape is a testament to their unyielding bond. With scarce resources and constant threats‚ their journey is a raw struggle for survival‚ driven by the father’s unwavering commitment to protect his son. McCarthy’s vivid portrayal captures the emotional depth and the harsh realities they endure.

The Post-Apocalyptic Setting

Cormac McCarthy’s The Road unfolds in a desolate‚ post-apocalyptic world devoid of civilization. The environment is harsh‚ with ash-filled skies and barren landscapes. The novel’s setting emphasizes the collapse of society‚ where survival is a daily struggle. The father-son journey through this bleak world underscores the loss of humanity and the fight to preserve hope in a shattered reality.

Themes in The Road

The Road explores profound themes of survival‚ existentialism‚ hope‚ despair‚ morality‚ and humanity. McCarthy’s vivid portrayal of a shattered world underscores the essence of human resilience and moral dilemmas.

Survival and Existentialism

Central to The Road is the struggle for survival and existential questioning in a desolate world. The father and son’s journey underscores the primal instinct to survive‚ while grappling with the meaning of existence. McCarthy’s prose highlights the tension between preserving humanity and succumbing to the harsh realities of their environment‚ provoking deep reflections on life’s purpose.

Hope and Despair in a Broken World

In The Road‚ hope and despair intertwine as the father and son navigate a barren‚ post-apocalyptic landscape. Their bond offers flickers of hope amidst overwhelming desolation‚ while the constant struggle to survive underscores the fragility of human resilience. McCarthy’s vivid portrayal of their emotional journey highlights the enduring power of hope‚ even in the face of unrelenting despair and uncertainty.

Morality and Humanity in Extremis

In The Road‚ McCarthy explores morality through the father’s protective instincts and the boy’s innate compassion. Their decisions reflect humanity’s struggle to maintain ethics in a lawless world. The novel highlights the tension between survival instincts and moral principles‚ raising questions about what defines humanity in the face of extreme adversity and despair.

The Environment and Its Impact

The novel portrays a barren‚ devastated world where nature has turned hostile. The environment mirrors the characters’ internal struggles‚ emphasizing survival’s harsh realities. McCarthy’s vivid descriptions of the desolate landscape underscore the loss of civilization and the moral decay it entails‚ creating a haunting backdrop for the father-son journey and existential themes.

Literary Style and Structure

Cormac McCarthy’s sparse‚ powerful prose in The Road creates a haunting atmosphere. His unique style‚ devoid of punctuation in dialogue‚ emphasizes the bleakness of the post-apocalyptic world‚ mirroring the characters’ emotional states and the desolate landscape they traverse.

McCarthy’s Unique Prose

Cormac McCarthy’s prose in The Road is sparse‚ evocative‚ and deeply impactful. His concise sentences and lack of punctuation in dialogue create a raw‚ immersive experience‚ mirroring the bleakness of the post-apocalyptic world. The narrative’s simplicity amplifies the emotional depth and existential themes‚ drawing readers into the father and son’s harrowing journey through desolation and survival.

Dialogue Without Punctuation

Cormac McCarthy’s decision to omit punctuation in dialogue creates a stark‚ natural flow‚ mirroring the raw‚ unfiltered nature of human speech. This stylistic choice heightens the emotional immediacy and urgency of the father-son interactions‚ emphasizing their bond and the bleak reality of their world.

Bleak Imagery and Symbolism

Cormac McCarthy’s The Road is renowned for its hauntingly vivid imagery‚ painting a desolate‚ ash-filled world devoid of color and life. Symbolism permeates the narrative‚ with the road itself representing both survival and futility. The recurring motif of fire signifies hope and humanity’s enduring spirit‚ contrasting sharply with the bleak surroundings‚ intensifying the emotional depth of the story.

Characters and Development

The Road centers on a father and son‚ their bond tested by a harsh‚ post-apocalyptic world. Their emotional journey explores survival‚ humanity‚ and the enduring power of love amidst devastation and loss;

The Father’s Perspective

The father in The Road embodies resilience and sacrifice‚ driven by the will to protect his son. His narrative voice‚ though often fragmented‚ reveals a deep moral compass and existential struggle‚ questioning humanity’s survival in a desolate world while clinging to hope and memory‚ as explored in PDF analyses of the novel.

The Son’s Innocence and Growth

The son in The Road symbolizes innocence and moral awakening amidst a shattered world. His questions and fears reveal a childish curiosity struggling to comprehend the harsh reality. Through their journey‚ he grows from naivety to understanding‚ grappling with right and wrong‚ as explored in PDF analyses of his character development and moral evolution in the novel.

Other Characters and Their Roles

In The Road‚ secondary characters like the mother and various survivors play crucial roles‚ reflecting the moral and emotional landscape. The mother’s absence underscores loss‚ while encounters with others reveal humanity’s duality. These interactions shape the father and son’s journey‚ emphasizing survival’s ethical dilemmas and the enduring bond between them in a bleak world.

Awards and Recognition

Cormac McCarthy’s The Road earned the Pulitzer Prize for Fiction in 2007‚ solidifying its acclaim. The novel’s profound themes and sparse prose have resonated globally‚ cementing its literary impact.

The Pulitzer Prize Win

Cormac McCarthy’s The Road received the Pulitzer Prize for Fiction in 2007‚ a milestone that underscored its literary brilliance. This prestigious award highlighted the novel’s profound exploration of human survival and existential themes‚ further cementing its status as a modern classic and a pivotal work in contemporary literature.

Other Literary Accolades

Beyond the Pulitzer Prize‚ The Road earned widespread critical acclaim and numerous nominations‚ including the National Book Critics Circle Award. Its haunting prose and profound themes solidified McCarthy’s reputation as a literary giant‚ further enhancing the novel’s status as a contemporary masterpiece.

PDF Accessibility and Availability

The Road by Cormac McCarthy is widely available in PDF format‚ ensuring easy access for readers worldwide. The digital version can be legally downloaded and read on various devices‚ making McCarthy’s profound narrative more accessible than ever.

Downloading the PDF Legally

The PDF version of The Road can be legally downloaded from reputable platforms like Internet Archive or purchased through digital bookstores. Websites such as pdfFiller also offer the novel for easy access‚ ensuring readers can engage with McCarthy’s powerful narrative legally and conveniently. This format allows readers to enjoy the story on various devices‚ enhancing its accessibility worldwide.

Benefits of the Digital Format

The digital format of The Road offers unparalleled convenience‚ allowing readers to access the novel on various devices without occupying physical space. It enables easy searching‚ highlighting‚ and note-taking‚ enhancing the reading experience. Additionally‚ the PDF version reduces the need for physical storage‚ making it environmentally friendly and ensuring the story’s accessibility for future generations in a sustainable way.

Cultural and Social Impact

The novel’s digital availability in PDF format has broadened its reach‚ fostering philosophical discussions and solidifying its influence on contemporary literature and cultural discourse worldwide.

The Novel’s Influence on Literature

Cormac McCarthy’s The Road has profoundly impacted modern literature‚ setting a new standard for post-apocalyptic narratives. Its exploration of existential themes resonates deeply‚ inspiring philosophical discussions and influencing contemporary writers. The novel’s availability in PDF formats has further amplified its reach‚ making it a cornerstone of literary studies and a timeless reflection on humanity’s resilience and fragility.

Film Adaptations and Media

Cormac McCarthy’s The Road was adapted into a film in 2009‚ directed by John Hillcoat and starring Viggo Mortensen. The movie faithfully captures the novel’s bleak essence‚ earning critical acclaim. The adaptation further cemented the story’s cultural impact‚ while the PDF version of the book continues to enhance its accessibility‚ allowing readers to engage with McCarthy’s profound narrative in multiple formats.

Philosophical Discussions Inspired

Cormac McCarthy’s The Road has sparked profound philosophical debates about existentialism‚ morality‚ and humanity’s survival instincts. The novel’s exploration of death‚ hope‚ and the unknown resonates deeply‚ prompting scholars to draw parallels with Derrida’s concepts of aporia and archive loss. Its themes of existence in extremis continue to inspire academic and existential inquiries‚ enriching literary and philosophical discourse globally.

Study Guides and Resources

PDF versions of The Road are widely available‚ alongside critical essays and analyses. Online platforms offer study guides‚ character maps‚ and thematic breakdowns to enhance understanding of McCarthy’s work.

Essays and Critical Analyses

PDF versions of Cormac McCarthy’s The Road are accompanied by scholarly essays and analyses. These resources explore themes like survival‚ existentialism‚ and humanity‚ offering deep insights into the novel’s haunting narrative.

Essays often examine McCarthy’s prose‚ moral dilemmas‚ and the post-apocalyptic setting. Critical analyses also discuss the father-son relationship and societal collapse‚ providing readers with a richer understanding of the text.

Reading Guides and Summaries

PDF versions of The Road often include reading guides and summaries. These resources provide overviews of the novel’s plot‚ themes‚ and characters‚ helping readers grasp its essence without spoilers. Summaries highlight key moments and symbolism‚ while guides break down chapters and analyze themes like survival‚ hope‚ and humanity.

Such tools are invaluable for students and casual readers seeking a deeper understanding of McCarthy’s work. They also offer insights into the novel’s post-apocalyptic setting and its emotional impact‚ making the story more accessible and engaging for a broader audience.

Critical Analysis and Reviews

Critics acclaim The Road for its profound exploration of humanity’s resilience and moral decay. PDF analyses highlight McCarthy’s sparse prose and bleak imagery‚ evoking emotional depth and philosophical reflection on survival and hope in a shattered world.

Praise for the Novel

The Road has received widespread critical acclaim for its profound storytelling and emotional depth. Critics praise McCarthy’s sparse yet powerful prose‚ which vividly portrays the father-son relationship. The novel’s exploration of survival‚ hope‚ and humanity has earned it the Pulitzer Prize and a place in modern literary canon‚ with its PDF format making it accessible to global readers.

Critiques and Controversies

While The Road is celebrated for its emotional depth and philosophical themes‚ some critics find its unrelenting bleakness and lack of punctuation challenging. The sparse prose‚ though powerful‚ can be divisive. Additionally‚ debates arise about the novel’s accessibility in PDF formats and its interpretation of humanity’s survival instincts‚ sparking broader discussions about its universal appeal and literary impact.

Cormac McCarthy’s The Road is a profound exploration of survival and humanity in a post-apocalyptic world. Its PDF availability makes it timeless‚ resonating with readers and sparking reflections on existence‚ hope‚ and despair.

Final Thoughts on The Road

Cormac McCarthy’s The Road is a masterpiece of contemporary literature‚ offering a poignant exploration of survival‚ morality‚ and the human condition. The father-son journey through a desolate world underscores themes of hope‚ despair‚ and existential resilience. Widely available in PDF formats‚ the novel’s accessibility has amplified its impact‚ earning it the Pulitzer Prize and fostering deep philosophical and cultural discussions globally.

list of tinctures and uses pdf

Tinctures are concentrated herbal extracts, offering versatility in natural remedies. Made by steeping plants in alcohol or vinegar, they provide potent solutions for various health needs and wellness goals.

What Are Tinctures?

Tinctures are concentrated liquid extracts made by steeping herbs, roots, flowers, or berries in alcohol, vinegar, or glycerin. They capture the active compounds of plants, offering a potent, bioavailable form for health support. Unlike teas or infusions, tinctures are highly concentrated, making them effective in small doses. They are commonly used sublingually or mixed with water for various health needs, from anxiety relief to immune support. Their long shelf life and ease of use make them a popular choice in herbal medicine, suitable for both acute and chronic conditions.

A Brief History of Tinctures in Herbal Medicine

Tinctures have ancient roots in herbal medicine, dating back centuries. Early civilizations used alcohol to preserve and extract plant remedies, recognizing their potent healing properties. In traditional African and European practices, tinctures were cornerstone treatments. The method evolved over time, with advancements in extraction techniques. Today, tinctures remain a vital part of holistic health, bridging ancient wisdom with modern usage. Their enduring popularity reflects their effectiveness and versatility in addressing various health concerns, making them a timeless tool in natural wellness and herbalism.

Benefits of Using Tinctures

Tinctures offer numerous benefits, including concentrated potency and easy absorption. They are versatile, addressing various health needs like anxiety, inflammation, and immune support. Tinctures are simple to use, with sublingual or diluted options. Their long shelf life makes them convenient for storage and travel. Additionally, tinctures allow for precise dosing, catering to individual needs. They are also portable and discreet, making them a practical choice for holistic wellness. Overall, tinctures provide an efficient and effective way to harness the power of herbal medicine for optimal health.

How Tinctures Are Made

Tinctures are crafted by steeping plant material in alcohol or vinegar, then straining and storing the liquid extract in amber bottles for potency and preservation.

Materials and Equipment Needed

To make tinctures, you’ll need dried or fresh herbs, a clean glass jar, and a solvent like alcohol or vinegar. Add cheesecloth or a fine mesh strainer for filtering. Use amber glass bottles with droppers for storage to protect from light. Labels and funnels are optional but helpful for organization and pouring. Ensure all equipment is sterilized to prevent contamination and spoilage.

Step-by-Step Process of Preparing Tinctures

Combine dried or fresh herbs with a solvent like alcohol or vinegar in a clean glass jar. Store in a cool, dark place for 2–6 weeks, shaking daily. Strain the mixture through cheesecloth into a bowl, pressing gently to extract all liquid. Discard solids and transfer the tincture to amber glass bottles with droppers. Label and store in a dark, cool place. For best results, allow the mixture to steep for the full recommended time before straining.

This process ensures potency and shelf stability.

Common Solvents Used in Tincture Preparation

The most common solvents for tinctures are alcohol (such as vodka or rum) and apple cider vinegar. Alcohol is preferred for its preservative qualities and ability to extract a wide range of herbal compounds. Vinegar is a popular alternative for those who avoid alcohol, though it is less effective for certain herbs. Glycerin, a plant-based solvent, is occasionally used for its sweetness and suitability for children. Each solvent has unique properties, making them ideal for specific herbal extractions and user preferences.

Choosing the right solvent ensures optimal extraction and preservation of the herbal remedy.

Common Types of Tinctures and Their Uses

Tinctures vary widely, each offering unique health benefits. Chamomile eases anxiety, Echinacea boosts immunity, Red Clover supports women’s health, and Reishi enhances mental clarity, showcasing their diverse therapeutic potential.

Chamomile Tincture: Anxiety, Wound Healing, and Inflammation

Chamomile tincture is a natural remedy known for its calming effects, often used to alleviate anxiety and stress. It also promotes wound healing by reducing inflammation and preventing infection. Rich in anti-inflammatory properties, chamomile tincture can soothe skin irritations, such as eczema, and provide relief from menstrual cramps. Its gentle nature makes it suitable for both internal and external use, offering a holistic approach to emotional and physical well-being.

Echinacea Tincture: Immune Support and Cold Relief

Echinacea tincture is a popular natural remedy for immune support and cold relief. Known for its anti-inflammatory and antiviral properties, it helps boost the immune system and combat infections. Often used during cold and flu seasons, echinacea tincture reduces the severity and duration of respiratory issues. It is also believed to enhance overall immune function, making it a preventive health choice. Additionally, it may soothe sore throats and alleviate inflammation, providing holistic relief for seasonal ailments.

Red Clover Tincture: Menstrual Health and Skin Benefits

Red clover tincture is renowned for its ability to support menstrual health and enhance skin vitality. It helps regulate menstrual cycles, alleviating PMS symptoms like cramps and mood swings. Additionally, its anti-inflammatory properties make it beneficial for skin conditions such as eczema and psoriasis, reducing redness and irritation. Rich in vitamins and minerals, red clover tincture nourishes and hydrates the skin, promoting a healthy complexion. Its holistic benefits make it a natural choice for both menstrual wellness and skin care, offering a gentle yet effective solution for everyday health concerns.

Reishi Mushroom Tincture: Immune and Mental Clarity

Reishi mushroom tincture is celebrated for its immune-boosting properties and ability to enhance mental clarity. It supports the body’s natural defenses, fostering resilience against illness. Additionally, it promotes mental focus and calmness, making it ideal for reducing stress and improving cognitive function. Reishi’s adaptogenic qualities help balance the body’s systems, contributing to overall wellness. This tincture is often used to enhance vitality and mental acuity, offering a natural way to support both physical and mental health in a holistic manner.

Safety and Precautions

Always consult a healthcare professional before using tinctures, especially for serious conditions. Be aware of allergic reactions and potential interactions with medications. Use as directed to avoid adverse effects.

Important Considerations Before Using Tinctures

Before using tinctures, consult a healthcare professional, especially for serious conditions. Be aware of potential allergic reactions and interactions with medications. Start with small doses to assess tolerance. Ensure proper storage in amber glass bottles to maintain potency. Follow recommended dosages and avoid self-medication for chronic or severe health issues. Pregnant women, children, and individuals with chronic conditions should exercise extra caution. Always verify the source and quality of herbal extracts to ensure safety and effectiveness. Proper usage can enhance wellness when approached responsibly.

Dosage Guidelines for Herbal Tinctures

Typically, herbal tinctures are taken in small doses, ranging from 20 to 40 drops per serving. Dosage depends on factors like weight, health status, and herb potency. Start with a low dose to assess tolerance, gradually increasing as needed. For chronic conditions, consistent use is often recommended. Always follow instructions from a healthcare provider or product labeling. Avoid exceeding suggested amounts to minimize side effects. Proper dosing ensures safety and effectiveness, making tinctures a reliable option for natural health support when used responsibly.

How to Store Tinctures

Store tinctures in amber glass bottles with tight-fitting lids to protect from light and air. Keep them in a cool, dark place like a cupboard. Refrigeration is optional but can extend shelf life. Always use a clean dropper to prevent contamination and ensure potency is maintained over time. Proper storage preserves the herbal properties and effectiveness of the tincture.

Best Practices for Maintaining Potency

To preserve the potency of tinctures, store them in amber glass bottles, which block UV light. Keep them in a cool, dark place, avoiding heat sources and direct sunlight. Always use a clean dropper to prevent contamination. Shelf life is typically 5-7 years if stored properly. Avoid exposure to moisture and oxygen, as these can degrade the herbal compounds. Regularly check for signs of spoilage, such as off smells or cloudy appearance. Proper storage ensures the tincture retains its therapeutic properties and remains effective over time.

Recommended Storage Containers and Conditions

Amber glass bottles with tight-fitting lids are ideal for storing tinctures, as they protect against UV light degradation. Keep them in a cool, dark place, such as a cupboard or pantry, away from direct sunlight and heat sources. Maintain a consistent temperature between 60-70°F for optimal preservation. Avoid refrigeration, as it can cause condensation and dilute the tincture. Ensure containers are airtight to prevent oxidation and contamination. Never use plastic or clear glass bottles, as they allow light to degrade the herbal compounds. Proper storage conditions help maintain the tincture’s potency and shelf life.

Tinctures offer a timeless, versatile approach to natural health, empowering individuals with accessible solutions for wellness. Their rich history and modern applications make them indispensable in holistic care.

The Versatility of Tinctures in Modern Health

Tinctures are widely used today for their versatility in addressing various health concerns. From anxiety relief with chamomile to immune support with echinacea, they offer tailored solutions. Red clover supports menstrual health, while reishi mushrooms enhance mental clarity. Their adaptability allows them to be used sublingually, added to teas, or mixed into formulations. This ease of use, combined with their potency, makes tinctures a cornerstone of modern herbal medicine, supporting everything from acute issues to long-term wellness goals.

Final Thoughts on Incorporating Tinctures into Daily Life

Incorporating tinctures into daily life can enhance overall well-being. They offer a natural, effective way to address health concerns, from stress relief to immune support. By selecting high-quality, plant-based extracts, individuals can tailor their wellness routines to specific needs. Whether used sublingually or added to beverages, tinctures provide a convenient and potent option. Always consult a healthcare professional before starting new supplements. With proper use, tinctures can be a transformative addition to a holistic lifestyle, promoting balance and vitality in the modern world.

orbit 56544 user guide

The Orbit 56544 is a versatile, user-friendly hose faucet timer designed to automate irrigation systems. It offers advanced features for efficient lawn and garden watering management.

1.1 Overview of the Orbit 56544 Model

The Orbit 56544 Hose Faucet Timer is an advanced, two-outlet irrigation controller designed for efficient lawn and garden watering. It allows users to manage two independent zones, enabling customizable watering schedules for different areas of their property. Its durable design ensures long-lasting performance, while its user-friendly interface simplifies setup and operation. The timer is compatible with standard hose faucets and supports a variety of watering programs. With its robust features and versatility, the Orbit 56544 is ideal for homeowners seeking to automate and optimize their irrigation systems. The product is supported by a detailed manual for easy installation and use.

1.2 Key Features of the Orbit 56544

The Orbit 56544 boasts a range of innovative features, including a two-outlet design for independent zone control and customizable watering schedules. It offers advanced programming options with a user-friendly interface, allowing precise control over irrigation cycles. The timer is equipped with a backlit display for easy navigation and includes a manual override feature for flexibility. Its durable construction ensures reliable performance in various weather conditions; Additionally, the timer is battery-powered, eliminating the need for complex wiring and making it a convenient solution for automating outdoor watering systems. These features make it an ideal choice for efficient garden and lawn care.

Installation and Setup

The Orbit 56544 installs easily by attaching to your faucet and setting the timer. Follow the manual for step-by-step guidance to ensure proper setup and function.

2.1 Physical Installation of the Timer

Start by attaching the Orbit 56544 to your faucet, ensuring compatibility with standard ¾-inch fittings. Secure the timer firmly to prevent leaks. Next, insert two AA batteries to power the device. Connect your hoses to the two outlets, each controlling independent watering zones. Finally, set the timer to the correct time and date to synchronize your watering schedules. Proper installation ensures efficient operation and maintains your garden’s health. Refer to the manual for detailed steps and troubleshooting guidance to avoid common issues. This setup allows for precise control over your irrigation system, optimizing water usage and plant care.

2.2 Initial Setup and Configuration

After installation, set the timer’s clock and date using the digital interface. Navigate through the menu to configure basic watering schedules, selecting the desired start time, duration, and frequency. Choose between automatic or manual modes. Ensure the timer is set to the correct time zone and water volume settings. Refer to the manual for detailed button functions and menu navigation. Testing the timer with a short watering cycle ensures proper operation. Proper configuration ensures efficient water management and tailored care for your plants. This step lays the foundation for advanced customization and scheduling.

Programming the Timer

Program the Orbit 56544 by setting the clock, creating custom watering schedules, and adjusting intervals. Use manual override for flexibility, ensuring efficient water management for your lawn and garden.

3.1 Setting the Clock and Date

Accurately set the clock and date to ensure precise watering schedules. Press the clock button, use the plus or minus buttons to adjust the time and date, then confirm to save your settings. This step is crucial for automating your irrigation system effectively. Refer to the manual for detailed instructions on synchronizing the timer with your local time. Proper setup ensures your watering schedules operate correctly and efficiently, tailored to your lawn and garden needs. Always double-check the time and date after setup to avoid scheduling errors.

3.2 Creating Custom Watering Schedules

To create custom watering schedules, navigate to the scheduling menu using the designated button. Select the outlet, choose the start time, and set the duration and frequency of watering. The timer allows for flexible scheduling, including daily, every other day, or specific days of the week. For two-outlet models, customize each zone independently. Use the manual override option to pause or resume watering as needed. Save your settings to ensure the schedule runs automatically. This feature provides precise control, optimizing water usage and promoting healthy plant growth. Refer to the manual for advanced customization options and troubleshooting tips.

Using the Two-Outlet Functionality

The Orbit 56544 offers two independent outlets, allowing you to manage separate watering zones. Each outlet can be programmed with unique schedules and settings for optimal efficiency.

4.1 Managing Independent Watering Zones

The Orbit 56544 allows you to manage two independent watering zones, giving you precise control over separate areas of your lawn or garden. Each zone can be programmed with unique settings, including start times, duration, and frequency, ensuring tailored watering schedules for different areas. This feature is ideal for managing varying water needs, such as flower beds requiring frequent watering and grass areas needing less. The timer’s interface makes it easy to customize each zone independently, ensuring optimal hydration and water efficiency. This functionality enhances flexibility and adaptability for diverse landscaping requirements.

4.2 Synchronizing Multiple Zones

The Orbit 56544 timer allows you to synchronize multiple watering zones, enabling simultaneous operation of both outlets. This feature is ideal for larger areas or uniform watering needs. By synchronizing zones, you can ensure consistent hydration across your lawn or garden, saving time and effort. The timer’s interface provides options to set synchronized start times and durations, while still allowing individual zone customization. This flexibility ensures efficient water distribution and tailored care for different areas, making it a practical solution for complex irrigation systems. Synchronization enhances overall watering efficiency and system performance.

Maintenance and Care

Regular cleaning and winterization ensure optimal performance. Protect the timer from frost and debris. Replace batteries annually for uninterrupted operation and reliable watering schedules throughout the season.

5.1 Cleaning the Timer and Faucet

Regular cleaning ensures the Orbit 56544 timer and faucet function properly. Use a soft cloth to wipe down the timer’s exterior, removing dirt or debris. For the faucet, inspect and clean the filter screen to prevent clogs. Avoid using harsh chemicals or abrasive materials, as they may damage the components. Gently rinse the screen with water and reinstall it. Periodically check for mineral buildup and descale if necessary. Proper maintenance prolongs the lifespan of the timer and faucet, ensuring reliable performance for your irrigation system.

5.2 Winterization and Frost Protection

To protect the Orbit 56544 timer and faucet from frost damage, drain all water from the system during winter. Disconnect and store hoses in a dry place. Insulate the faucet using foam covers or wrap it with heat tape. Store the timer in a cool, dry location to prevent moisture buildup. Remove batteries to avoid corrosion. Ensure all water is drained from the lines to prevent freezing and cracking. Proper winterization extends the lifespan of your irrigation system, ensuring it functions efficiently come spring.

Troubleshooting Common Issues

Address timer malfunctions by checking power sources and connections. For water flow problems, inspect solenoids and clean debris. Ensure proper programming and battery function for optimal performance.

6.1 Solving Timer Malfunctions

To address timer malfunctions, start by checking the power supply. Ensure batteries are correctly installed and have sufficient charge. If the display is unresponsive, perform a reset by turning the timer off and on. Inspect wiring connections for any damage or loose links, and clean or replace them as needed. Verify that the solenoid valve is functioning properly; if stuck or clogged, gently clean it to restore operation. Review programming settings to ensure accuracy, and consult the user guide for specific error code solutions. If issues persist, consider contacting customer support or replacing the timer.

6.2 Addressing Water Flow Problems

If water flow issues arise, check for blockages in the faucet or timer. Ensure the filter or nozzle is clean, as debris can restrict flow. Verify proper installation of the timer, making sure it is securely attached to the faucet and aligned correctly. Review watering schedules to ensure they are programmed accurately, as incorrect settings may limit water delivery. If low water pressure persists, inspect your home’s water supply or consult a professional to resolve the issue. Regular maintenance, such as cleaning internal components, can also help restore optimal water flow.

Advanced Features and Customization

The Orbit 56544 offers advanced features like manual override and adjustable watering intervals, allowing users to customize their irrigation system for optimal watering efficiency and convenience.

7.1 Using the Manual Override Option

The manual override feature on the Orbit 56544 allows users to temporarily pause or resume watering without altering the programmed schedule. This is particularly useful for unexpected watering needs or adjustments. By pressing the manual button, the timer disables the automatic mode, giving you control over the water flow. This feature ensures flexibility and convenience, especially during seasonal changes or specific plant care requirements. It’s an essential function for maintaining precise control over your irrigation system whenever needed. The override option is easy to activate and deactivate, ensuring uninterrupted watering schedules when desired.

7.2 Adjusting Watering Intervals

The Orbit 56544 allows users to adjust watering intervals with ease, ensuring optimal irrigation for plants. By using the timer’s interface, you can set specific start times and durations for each zone. The timer supports multiple intervals per day, providing flexibility for varying watering needs. Customizable intervals range from minutes to hours, depending on soil type and plant requirements. This feature ensures water is used efficiently, preventing overwatering and promoting healthy plant growth. Adjustments are made directly on the timer’s display, offering precise control over your irrigation schedule. This customization capability makes the Orbit 56544 ideal for diverse watering needs.

FAQs and Common Questions

Frequently asked questions about the Orbit 56544 include troubleshooting tips, error messages, and battery care. Users often inquire about custom schedules and interval adjustments for optimal watering.

8.1 Understanding Error Messages

The Orbit 56544 may display error messages for issues like low battery, incorrect clock settings, or sensor malfunctions. These codes help identify specific problems quickly. For example, an “E1” error often indicates a battery issue, while “E2” may signal a faulty sensor. Users can resolve these by replacing batteries, resetting the timer, or checking sensor connections. Referencing the manual ensures accurate troubleshooting. Regularly reviewing error messages helps maintain optimal performance and prevents unexpected interruptions in watering schedules. Addressing these issues promptly ensures the timer functions smoothly and efficiently for lawn and garden care.

8.2 Battery Replacement and Care

The Orbit 56544 timer requires two AA alkaline batteries for operation. Replace batteries when the low-battery indicator appears. Open the battery compartment, located on the back, by sliding it downward. Install new batteries, ensuring correct polarity. Avoid mixing old and new batteries. For optimal performance, use high-quality alkaline batteries. If the timer is not used for an extended period, remove batteries to prevent leakage. Clean terminals with a soft cloth before inserting new batteries. Proper battery care ensures reliable operation and prevents corrosion, extending the timer’s lifespan and maintaining accurate watering schedules for your lawn and garden.

The Orbit 56544 Hose Faucet Timer is a reliable, efficient tool for lawn and garden care. Its ease of use and advanced features ensure optimal watering management and conservation.

9.1 Final Tips for Optimal Use

For the best experience with the Orbit 56544, ensure regular cleaning of the faucet and timer to prevent mineral buildup. Always check battery levels and replace them annually. Utilize the manual override feature for unexpected watering needs. Properly winterize the timer to avoid frost damage. Regularly review and adjust watering schedules to match seasonal changes. Store the timer indoors during harsh winters to prolong its lifespan. By following these tips, you can maximize the timer’s efficiency and extend its operational longevity for years of reliable service.

zora neale hurston hoodoo in america pdf

Zora Neale Hurston was a renowned African American novelist, anthropologist, and folklorist, celebrated for her work during the Harlem Renaissance. Her research on Hoodoo in America, conducted in the 1930s, highlighted the cultural significance of African American spiritual practices, blending folklore, spirituality, and conjuring. Hurston’s fieldwork in the Deep South, supported by Franz Boas, provided a unique lens into Hoodoo’s traditions and its role in African American identity.

1.1 Biography of Zora Neale Hurston

Zora Neale Hurston, born on January 7, 1891, in Notasulga, Alabama, was a prominent African American novelist, anthropologist, and folklorist. She grew up in Eatonville, Florida, one of the first self-sufficient Black towns in the U.S., which later influenced her writing. Hurston studied at Howard University and Barnard College, where she earned an anthropology degree under Franz Boas. Her career spanned fiction, non-fiction, and field research, with works like Their Eyes Were Watching God and Mules and Men. Her groundbreaking research on African American folklore and Hoodoo practices remains seminal, showcasing her dedication to preserving cultural heritage.

1.2 Hurston’s Role as an Anthropologist and Folklorist

Zora Neale Hurston’s work as an anthropologist and folklorist was pivotal in documenting African American cultural practices. Under the mentorship of Franz Boas, she conducted extensive fieldwork in the rural South, capturing oral traditions, rituals, and Hoodoo practices. Her anthropological approach emphasized authenticity, immersing herself in communities to gather stories and songs. Hurston’s work in this field not only preserved these traditions but also highlighted their significance in African American identity, challenging stereotypes and offering a nuanced portrayal of Black cultural life. Her dual role as a scholar and participant provided a unique perspective, enriching both folklore studies and anthropology.

Hoodoo in America: An Overview

Hoodoo, a blend of African, Native American, and European traditions, encompasses spirituality, conjuring, and herbalism. Rooted in African diasporic culture, it serves as a tool for empowerment and resilience.

2.1 Definition and Cultural Significance of Hoodoo

Hoodoo, a spiritual practice rooted in African traditions, combines elements of herbalism, conjuring, and ancestor reverence. It holds significant cultural importance as a means of resilience and empowerment.

2.2 Hoodoo Practices and Rituals in African American Culture

Hoodoo practices involve rituals like rootwork, conjuring, and ancestor veneration, reflecting African American cultural resilience. Rootworkers use herbs, chants, and charms to heal or protect. Rituals often occur at crossroads, symbolizing transitions and spiritual intersections. Ancestor reverence is central, honoring those who passed down these traditions. These practices, documented by Hurston, emphasize empowerment and connection to African heritage, blending spirituality with practical solutions for everyday challenges. Hoodoo’s rituals are deeply rooted in community, serving as a testament to African American identity and cultural continuity.

Zora Neale Hurston’s Research on Hoodoo

Zora Neale Hurston conducted extensive fieldwork in the American South, documenting Hoodoo practices and rituals. Her research emphasized Hoodoo as a legitimate cultural and spiritual practice, capturing its significance in African American communities and traditions.

3.1 Hurston’s Fieldwork in the American South

Zora Neale Hurston conducted her fieldwork in the rural American South, particularly in communities where African American traditions thrived. With the support of anthropologist Franz Boas, she immersed herself in the cultural practices of the region, gathering stories, rituals, and beliefs. Her work in lumber camps and small towns provided a unique perspective on Hoodoo, allowing her to document its practices authentically. These experiences shaped her understanding of Hoodoo as a vital part of African American heritage, blending spirituality, folklore, and daily life.

3.2 Key Findings and Observations in “Hoodoo in America”

Zora Neale Hurston’s “Hoodoo in America” revealed Hoodoo as a complex blend of African, European, and Native American influences, deeply rooted in spirituality and conjuring. She observed its role in addressing life’s challenges, such as health, love, and protection. Hurston emphasized Hoodoo’s cultural significance, portraying it as a credible practice rather than mere superstition. Her work highlighted its resilience and adaptability, showing how it evolved in America while retaining African traditions. By documenting rituals and beliefs, Hurston underscored Hoodoo’s importance in African American identity and its enduring impact on communities.

The Publication “Hoodoo in America”

Zora Neale Hurston’s “Hoodoo in America,” published in 1931, offers insightful perspectives on African American spiritual practices, highlighting their cultural significance and authenticity.

4.1 Historical Context of the Publication

Zora Neale Hurston’s “Hoodoo in America” was published in 1931, a time when African American cultural expression was gaining attention due to the Harlem Renaissance. Hurston, supported by anthropologist Franz Boas, conducted extensive fieldwork in the rural South, particularly in Florida, where she documented Hoodoo practices. Her work emerged during a period of heightened interest in African American folklore, yet it also faced criticism for its perceived exoticization of Black culture. The publication coincided with Hurston’s rising prominence as a writer and scholar, blending her anthropological training with her literary flair to present Hoodoo as a vital aspect of African American life.

4.2 Major Themes and Ideas Explored in the Work

Zora Neale Hurston’s “Hoodoo in America” delves into the spiritual and cultural practices of African Americans, emphasizing Hoodoo as a blend of folklore, conjuring, and spirituality. She portrays Hoodoo as a legitimate religious practice, highlighting its roots in African traditions and its evolution in the Americas. Hurston explores themes of resilience, cultural preservation, and identity, showcasing how Hoodoo served as a means of empowerment and survival for African Americans. Her work challenges stereotypes, presenting Hoodoo as a complex, multifaceted system deeply embedded in African American life, while balancing anthropological rigor with literary storytelling.

Cultural and Historical Context of Hoodoo

Hoodoo, rooted in African traditions, evolved in America through the blending of spiritual practices, folklore, and conjuring. It reflects the resilience and cultural adaptation of African Americans.

5.1 African Origins of Hoodoo and Its Evolution in America

Hoodoo traces its origins to African spiritual traditions, brought to America through the transatlantic slave trade. Enslaved Africans carried practices rooted in ancestor reverence, herbalism, and ritualistic healing. In the Americas, these traditions blended with Indigenous knowledge of local plants and European Christian rituals, evolving into a unique syncretic practice. Hoodoo became a survival mechanism, offering spiritual strength and resilience amid oppression. Its evolution reflects the adaptive nature of African diasporic cultures, preserving ancestral ties while adapting to new environments. Over time, Hoodoo in America developed distinct regional variations, shaped by the cultural melting pot of the South.

5.2 Hoodoo as a Blend of Folklore, Spirituality, and Conjuring

Hoodoo is a dynamic blend of African folklore, spirituality, and conjuring, reflecting the resilience of African American culture. It combines ancestral traditions with elements of Christianity and Indigenous practices, creating a unique spiritual system. Rooted in the belief that all things possess spiritual energy, Hoodoo uses rituals, herbs, and charms to address life’s challenges. Its practices, such as healing, protection, and divination, are deeply intertwined with community life. While often misunderstood or sensationalized, Hoodoo remains a vital expression of African American identity, offering empowerment and connection to cultural heritage.

Hurston’s Contribution to the Study of African American Folklore

Zora Neale Hurston’s work significantly enriched the study of African American folklore, offering profound insights into its cultural, spiritual, and historical dimensions through her anthropological lens.

6;1 Hurston’s Other Works, Such as “Mules and Men”

Zora Neale Hurston’s Mules and Men (1935) is a seminal collection of African American folklore, capturing stories, songs, and rituals from the rural South. This work complements her Hoodoo research, showcasing her dedication to preserving cultural heritage. It reflects her anthropological approach, blending personal narratives with communal traditions. Mules and Men not only highlights Hurston’s storytelling prowess but also underscores her role as a bridge between academia and grassroots culture, further cementing her legacy in African American studies.

6.2 Her Legacy in Preserving African American Cultural Heritage

Zora Neale Hurston’s work stands as a testament to her commitment to preserving African American cultural heritage. Her anthropological studies and literary contributions, including Mules and Men and Hoodoo in America, have provided invaluable insights into the traditions and spirituality of African American communities. By documenting folklore and Hoodoo practices, Hurston ensured that these aspects of cultural identity were not lost. Her legacy continues to influence modern scholarship and discourse, highlighting the resilience and richness of African American traditions. Hurston’s efforts remain a cornerstone in the celebration and understanding of Black cultural heritage.

The Significance of “Hoodoo in America” Today

Zora Neale Hurston’s Hoodoo in America remains vital, offering insights into African American spirituality and cultural resilience. It continues to inspire modern scholarly discourse on identity and heritage.

7.1 Relevance of Hurston’s Work in Modern Scholarly Discourse

Zora Neale Hurston’s Hoodoo in America remains a cornerstone in modern scholarly discourse, offering profound insights into African American cultural practices and spirituality. Her meticulous documentation of Hoodoo rituals and traditions provides a vital lens through which contemporary scholars explore themes of identity, resilience, and cultural preservation. Hurston’s work challenges historical marginalization, elevating Hoodoo from obscurity to a recognized element of African American heritage. This has made her research indispensable in interdisciplinary studies, bridging anthropology, literature, and history. Her legacy continues to inspire new generations of researchers, ensuring her work’s enduring relevance in understanding African American identity and spirituality.

7.2 Hoodoo as a Testament to Resilience and African American Identity

Hoodoo, as documented by Zora Neale Hurston, stands as a powerful testament to African American resilience and identity. Rooted in African traditions and adapted to the harsh realities of slavery and segregation, Hoodoo became a means of spiritual survival and cultural preservation. Hurston’s work highlights how Hoodoo blended folklore, spirituality, and conjuring, serving as a source of strength and identity for African Americans. By legitimizing these practices, Hurston underscored their importance in fostering community and resistance. Today, Hoodoo remains a vital symbol of African American resilience and cultural continuity, reflecting the enduring spirit of a people who thrived despite oppression.

Zora Neale Hurston’s pioneering work on Hoodoo in America preserved African American cultural heritage, revealing its profound spiritual and historical significance. Her research remains a vital resource today.

8.1 Summary of Hurston’s Impact on the Study of Hoodoo

Zora Neale Hurston’s work on Hoodoo in America significantly advanced the understanding of African American spiritual practices. Her fieldwork and writings, particularly in Hoodoo in America, legitimized Hoodoo as a vital aspect of African American cultural heritage. By documenting rituals, beliefs, and traditions, Hurston challenged stereotypes and emphasized Hoodoo’s role in resilience and identity. Her anthropological approach humanized these practices, offering a nuanced perspective that continues to influence modern scholarship. Hurston’s legacy ensures that Hoodoo remains a celebrated and studied facet of African American history and spirituality.

8.2 Final Thoughts on the Importance of Preserving Cultural Heritage

Zora Neale Hurston’s work underscores the vital importance of preserving cultural heritage. By documenting Hoodoo and African American folklore, she ensured that these traditions are not lost to time. Her efforts highlight the necessity of honoring and understanding the cultural practices that define communities. Preserving such heritage fosters education, awareness, and pride, combating stereotypes and promoting unity. Hurston’s legacy reminds us that cultural preservation is not just about the past but also about shaping a future where diverse identities are celebrated and respected. Her work remains a testament to the enduring relevance of cultural heritage in modern society.

husqvarna z246 parts manual

The Husqvarna Z246 Parts Manual is a comprehensive guide designed to help users maintain, repair, and troubleshoot their zero-turn mower effectively. It provides detailed diagrams, part numbers, and step-by-step instructions for optimal performance and longevity. Whether you’re a seasoned professional or a DIY enthusiast, this manual ensures you have the resources needed to keep your mower in top condition. Regular maintenance, warranty information, and troubleshooting tips are all covered to enhance your mowing experience.

Overview of the Husqvarna Z246 Mower

The Husqvarna Z246 is a high-performance zero-turn mower designed for efficiency and ease of use. It features a robust 54-inch cutting deck and a powerful engine, making it ideal for maintaining large lawns. With its zero-turn radius, the Z246 offers precise maneuverability, allowing for tight turns and accurate cutting around obstacles. The mower is built with durability in mind, featuring a sturdy frame and high-quality components. Its ergonomic controls and comfortable design ensure a smooth mowing experience, even for extended periods. Whether for professional or residential use, the Z246 is engineered to deliver consistent results and long-lasting performance. Regular maintenance, guided by the parts manual, ensures optimal functionality and extends the mower’s lifespan.

Importance of the Parts Manual for Maintenance and Repair

The Husqvarna Z246 parts manual is indispensable for effective maintenance and repair. It provides detailed diagrams and part numbers, ensuring accurate identification and ordering of components. This resource is crucial for diagnosing issues, guiding repairs, and preventing costly mistakes. By following the manual’s instructions, users can perform routine maintenance, such as oil changes and deck cleaning, to maintain optimal performance. Additionally, it includes troubleshooting tips to address common problems, helping to extend the mower’s lifespan. The manual also outlines warranty information, ensuring users understand what is covered and how to avoid voiding it. Overall, the parts manual is essential for keeping the Z246 in peak condition, enhancing safety, and ensuring efficient operation.

Key Sections of the Husqvarna Z246 Parts Manual

The manual contains detailed parts diagrams, tool requirements, and warranty guidelines. It also includes maintenance schedules, troubleshooting steps, and repair instructions, ensuring comprehensive support for users.

Parts Diagrams and Component Identification

The Husqvarna Z246 Parts Manual includes detailed diagrams that visually represent each component of the mower, making it easier to identify and locate parts. These diagrams are organized by sections, such as the deck, engine, and drive system, allowing users to quickly find what they need. Each part is labeled with specific numbers and descriptions, which correspond to the parts list in the manual. This feature is particularly useful for DIY repairs and ensures that users can order the correct replacement parts without confusion. The clear visuals and precise labeling help reduce errors and save time during maintenance or repairs. By referencing these diagrams, users can better understand how different components interact and ensure proper assembly and function.

Tools and Equipment Required for Maintenance

The Husqvarna Z246 Parts Manual outlines the essential tools and equipment needed for effective maintenance and repairs. These include a socket set, wrenches, screwdrivers, and a torque wrench for precise adjustments. Additionally, items like a drain pan, funnel, and oil filter wrench are necessary for oil changes. For blade maintenance, a sharpening tool or replacement blades may be required. The manual also recommends having safety gear, such as gloves and eyewear, to ensure protection during tasks. Proper tools and equipment are crucial for completing maintenance efficiently and safely, as specified in the manual. By having these items on hand, users can address issues promptly and maintain their mower’s performance. This section ensures users are well-prepared for any maintenance or repair task.

Warranty Information and Service Guidelines

The Husqvarna Z246 Parts Manual provides detailed warranty information, ensuring customers understand the coverage and terms for their mower. The standard warranty typically includes a three-year period, covering defects in materials and workmanship. Regular maintenance, such as oil changes and blade inspections, is required to maintain warranty validity. The manual also outlines service guidelines, emphasizing the importance of using genuine Husqvarna parts for repairs and replacements. Proper maintenance practices, like keeping the mower clean and dry, are highlighted to prevent unnecessary damage. Additionally, guidelines for troubleshooting and addressing common issues are included to help users resolve problems promptly. By adhering to these service guidelines, users can ensure their mower operates efficiently and remains under warranty. This section serves as a valuable resource for maintaining the longevity and performance of the Z246 mower.

Maintenance and Repair Tips

Regular maintenance is crucial for optimal performance and longevity. Keep the mower clean, change oil frequently, avoid rocks, and use non-alcohol gas for best results.

Regular Maintenance Schedule for Optimal Performance

To ensure your Husqvarna Z246 operates at its best, follow a consistent maintenance schedule. Before each use, check the oil level and top it off if necessary. Use non-alcohol gas to prevent engine issues. After mowing, clean the deck thoroughly to remove grass clippings and debris, which can lead to rust or poor performance. Sharpen the mower blades regularly to maintain a clean cut and prevent wear on the mower deck. Every 50 hours of use, change the engine oil and filter. Additionally, inspect and replace the air filter as needed to ensure proper airflow. Check the drive and blade belts for signs of wear or cracks and replace them if necessary. Lubricate moving parts periodically to reduce friction and extend the lifespan of your mower.

Common Issues and Troubleshooting Steps

The Husqvarna Z246 may encounter issues like engine stalling when motion control arms are engaged or drive/blade belt slippage. To address these, check the switches and wiring for proper function. Inspect the belts for wear or cracks and replace them if necessary. If the mower fails to move, ensure the pulleys and tensioners are adjusted correctly. For poor cutting performance, sharpen or replace dull blades and clean the mower deck to prevent clogging. Regularly inspect the air filter and replace it if dirty to maintain proper engine airflow. Refer to the parts manual for specific troubleshooting steps and part replacements to resolve issues efficiently and ensure optimal performance.

Best Practices for Extending Mower Lifespan

To extend the lifespan of your Husqvarna Z246, regular maintenance is crucial. Keep the mower clean and dry, especially after use, to prevent rust and corrosion. Change the oil frequently to ensure the engine runs smoothly and remains lubricated. Avoid mowing over rocks or debris, as this can damage the blades and deck. Use only non-alcohol gasoline, as alcohol-based fuels can degrade fuel lines and components over time. Sharpen blades regularly to maintain cutting efficiency and reduce strain on the engine. Store the mower in a dry, protected area during the off-season to prevent moisture damage. By following these practices, you can significantly prolong the lifespan of your mower and ensure optimal performance for years to come.

Troubleshooting Common Problems

Common issues with the Husqvarna Z246 include engine stoppage when engaging motion controls, drive/blade belt slippage, and deck alignment problems. Regular belt tension checks and cleaning debris can resolve many issues.

Engine and Drive System Issues

Engine and drive system issues in the Husqvarna Z246 often stem from improper maintenance or wear. Common problems include engine stalling when engaging the motion control arms, which may indicate faulty switches or sensors. Regular inspection of the drive belts and pulleys is crucial, as misalignment or wear can cause slippage and reduced performance. Ensuring the mower deck is properly aligned and clearing debris from the underside can also prevent engine strain. Replacing worn or damaged belts and pulleys with OEM parts is recommended for optimal functionality. Always refer to the parts manual for correct replacement procedures and torque specifications to maintain the integrity of your mower’s engine and drive system.

Blade and Deck Maintenance Tips

Proper maintenance of the blade and deck is essential for maintaining the Husqvarna Z246’s cutting performance. Regularly inspect and sharpen the mower blades to ensure clean cuts and prevent lawn damage. Dull blades can tear grass, leaving it susceptible to disease. Clean the deck frequently to remove grass clippings and debris, which can rust the metal and reduce airflow. Check the blade bolt tightness and balance the blade to prevent vibration. Lubricate deck pulleys and hinges as needed to ensure smooth operation. Replace worn or damaged blades with OEM parts for optimal performance. Always refer to the parts manual for specific torque specifications and maintenance schedules to keep your mower running efficiently and extending its lifespan. Proper blade and deck care will ensure a professional-grade cut every time.

The Husqvarna Z246 Parts Manual is a vital resource for maintaining, repairing, and troubleshooting your mower. It ensures longevity, optimal performance, and safe operation, making it indispensable for owners.

Final Thoughts on Using the Parts Manual Effectively

Using the Husqvarna Z246 Parts Manual effectively is key to extending your mower’s lifespan and ensuring peak performance. Regularly consult the manual for maintenance schedules, troubleshooting, and repair guidance. Keep the mower clean and dry, change the oil frequently, and avoid running over rocks to prevent damage. Use only non-alcohol gas, as recommended. For repairs, refer to the detailed diagrams and part numbers to ensure accuracy. If issues arise, such as a slipping drive/blade belt, address them promptly to avoid further complications. By following the manual’s guidelines, you can achieve over 400 hours of reliable service. This resource is indispensable for DIY enthusiasts and professionals alike, ensuring your Husqvarna Z246 remains in top condition for years to come.

worcester comfort 2 rf manual

The Worcester Comfort 2 RF Manual is a comprehensive guide for installing and operating the programmable wall-mounted control unit and wireless remote functionality, ensuring efficient heating management.

1.1 Overview of the Worcester Comfort 2 RF System

The Worcester Comfort 2 RF System is a programmable, wall-mounted control unit designed for efficient heating and hot water management. It features wireless remote control functionality, allowing users to adjust settings conveniently; Compatible with Worcester Bosch boilers, the system ensures seamless integration for optimal performance. The RF technology enables reliable communication between the control unit and the boiler, maintaining stable operation. Users can program up to six heating and three hot water timings daily, enhancing energy efficiency and comfort. The system’s intuitive interface simplifies programming, making it user-friendly for both homeowners and installers. This overview highlights its key components and purpose, aligning with the manual’s goal of guiding users to maximize its benefits.

1.2 Importance of the Manual for Installation and Operation

The Worcester Comfort 2 RF Manual is essential for proper installation, configuration, and operation of the system. It provides detailed step-by-step instructions, ensuring installers and users understand technical requirements and safety guidelines. The manual includes troubleshooting tips and operational insights, helping users optimize energy efficiency and comfort. By following the manual, users can program heating and hot water timings effectively, leveraging the system’s full potential. It also serves as a reference for maintaining compliance with manufacturer recommendations, preserving warranty validity, and accessing technical support when needed. This guide is indispensable for achieving seamless functionality and long-term satisfaction with the Worcester Comfort 2 RF System.

Key Features of the Worcester Comfort 2 RF

The Worcester Comfort 2 RF boasts a programmable wall-mounted control unit, wireless remote functionality, and seamless compatibility with Worcester Bosch boilers. Its intuitive interface allows users to set heating and hot water timings effortlessly, ensuring optimal energy efficiency and comfort. The system also features advanced connectivity options, enabling remote control via a dedicated key, and is designed to integrate with existing heating systems. These features make it a versatile and user-friendly solution for modern heating needs, providing precise temperature control and enhanced convenience for homeowners.

2.1 Programmable Wall-Mounted Control Unit

The Worcester Comfort 2 RF features a programmable wall-mounted control unit designed for ease of use and precise temperature management. With a clear LCD display, users can set up to six heating and three hot water timings daily. The unit allows for flexible scheduling, ensuring energy efficiency and comfort. Its intuitive interface enables easy navigation and programming, while the built-in holiday mode provides additional convenience. The control unit is compatible with Worcester Bosch boilers, making it a seamless addition to existing heating systems. This feature-rich design ensures users can customize their heating preferences, optimizing both energy usage and home comfort effortlessly.

2.2 Wireless Remote Control Functionality

The Worcester Comfort 2 RF offers seamless wireless remote control functionality, enabling users to manage their heating system effortlessly from any room. The system uses radio frequency (RF) signals to communicate between the programmable wall-mounted control unit and the boiler, eliminating the need for wiring. This feature enhances convenience, allowing users to adjust settings without physical access to the boiler. The wireless connection ensures reliable communication, with optimal RF signal strength for consistent performance. The remote control functionality is easy to set up and integrates smoothly with the control unit, providing a modern and efficient way to control heating and hot water systems. This innovation simplifies home comfort management.

2.3 Compatibility with Worcester Bosch Boilers

The Worcester Comfort 2 RF is specifically designed to work seamlessly with Worcester Bosch boilers, ensuring optimal performance and compatibility. This integration allows for precise temperature control and efficient energy management. The system is compatible with various Worcester Bosch boiler models, including the Greenstar range, making it a versatile solution for different heating setups. The compatibility ensures that all features, such as wireless remote control and programmable timers, function flawlessly with the boiler. This seamless integration enhances the overall heating system’s efficiency, reliability, and user experience, making it an ideal choice for homeowners using Worcester Bosch boilers.

Installation Guide for the Worcester Comfort 2 RF

The installation process involves isolating the boiler, programming the control unit, and ensuring proper wireless connectivity. Detailed technical specifications and requirements are outlined in the manual.

3.1 Step-by-Step Installation Process

The installation begins with isolating the boiler and ensuring all manual valves are set to the lowest position. Next, mount the programmable wall-mounted control unit in a central location. Install the receiver unit near the boiler, ensuring proper wiring connections. Pair the control unit with the receiver to establish wireless communication. Finally, program the heating and hot water timings according to your preferences. Refer to the manual for detailed wiring diagrams and compatibility checks with Worcester Bosch boilers. Proper installation ensures seamless functionality and optimal performance of the system.

3.2 Technical Specifications and Requirements

Understanding the technical specifications and requirements is essential for proper installation and operation of the Worcester Comfort 2 RF. The system operates on a 868 MHz wireless frequency, ensuring reliable communication between the control unit and receiver. It is compatible with Worcester Bosch boilers, making it a seamless addition to existing heating systems. The control unit requires a 2-core cable connection, while the receiver connects directly to the boiler. The device operates in temperatures between 0°C and 40°C and humidity levels up to 80%. Ensure all wiring meets safety standards, and the receiver is mounted within 1 meter of the boiler for optimal performance.

Operating the Worcester Comfort 2 RF

Operating the Worcester Comfort 2 RF involves programming heating and hot water timings, navigating the user-friendly interface, and utilizing wireless remote control for enhanced convenience and efficiency.

4.1 Programming the Heating and Hot Water Timings

Programming the Worcester Comfort 2 RF allows users to set up to six heating and three hot water timings daily. The wall-mounted control unit provides a user-friendly interface for scheduling, ensuring optimal comfort and energy efficiency. By navigating through the menu, users can customize their preferences, adjusting start and end times with ease. This feature enables precise control over heating and hot water, aligning with daily routines and reducing unnecessary energy consumption. The system’s wireless functionality further enhances convenience, allowing adjustments from anywhere in the home. Proper programming ensures seamless operation, making it an essential step for maximizing the system’s potential.

4.2 Navigating the User Interface

The Worcester Comfort 2 RF features an intuitive user interface designed for easy navigation. The control unit includes a clear LCD display and a menu-driven system, allowing users to access various settings seamlessly. The interface provides options to adjust heating and hot water timings, set temperatures, and monitor system status. Users can navigate using the buttons located below the screen, with clear labels guiding them through the menu. The interface also includes a navigation menu with options like “Clock,” “Temperature,” and “Advanced Settings.” This user-friendly design ensures that even those less familiar with technology can operate the system with confidence and precision.

Troubleshooting Common Issues

Common issues with the Worcester Comfort 2 RF include RF signal strength problems and connectivity losses. Refer to the manual for detailed troubleshooting steps and solutions.

5.1 RF Signal Strength and Connectivity Problems

RF signal strength and connectivity issues are common with the Worcester Comfort 2 RF. Ensure the receiver is positioned away from physical obstructions and electronic interference. Check that the system is powered on and paired correctly. If issues persist, refer to the manual for resetting the control unit or re-pairing the devices. Weak signals may require relocating the receiver or booster installation. Regularly update firmware and ensure devices are within the recommended range for optimal performance; Consult troubleshooting guides or contact Worcester Bosch support for further assistance if problems remain unresolved.

5.2 Resetting the Control Unit

Resetting the Worcester Comfort 2 RF control unit can resolve various operational issues. To reset, press and hold the ‘OK’ and ‘Cancel’ buttons simultaneously for 10-15 seconds until the display resets. This action restores factory settings but retains programmed heating and water schedules. Ensure the system is powered on during the reset. After resetting, reconfigure any custom settings if necessary. If issues persist, refer to the manual or contact Worcester Bosch support for further assistance. Regular resets can help maintain optimal performance and address unforeseen glitches in the system. Always follow the manual’s instructions for a successful reset process.

The Worcester Comfort 2 RF Manual serves as an essential resource for both installation and operation, ensuring optimal performance of the system. By following the guidelines, users can efficiently manage their heating and hot water settings. The programmable features and wireless functionality enhance convenience, while compatibility with Worcester Bosch boilers guarantees reliability. Troubleshooting tips and reset procedures provide solutions for common issues. This manual empowers users to maximize energy efficiency and comfort. For further assistance, Worcester Bosch’s technical support is readily available. Thank you for utilizing this guide to unlock the full potential of your Worcester Comfort 2 RF system.

mtd snowblower owners manual

Safety Precautions and Warnings

Always read and follow the safety rules in the MTD snowblower manual. Wear protective gear like gloves and goggles. Avoid operating in hazardous conditions or near children. Ensure proper maintenance to prevent accidents.

1.1 Essential Safety Rules

Always read and follow the safety rules outlined in the MTD snowblower manual. Wear protective gear such as gloves, safety glasses, and sturdy footwear. Ensure the area is clear of obstacles and bystanders. Never operate the snowblower near children or pets. Keep loose clothing and long hair tied back to avoid accidents. Familiarize yourself with the machine’s controls before use. Ensure the snowblower is properly assembled and maintained. Follow all warnings and guidelines to ensure safe and effective operation.

1.2 Hazardous Situations to Avoid

Avoid operating the MTD snowblower in extreme weather conditions or near open flames. Do not use the machine if the carburetor settings are incorrect or if the spark plug wire is loose. Never operate the snowblower with damaged or worn parts, such as shave plates or shear pins, as this can lead to accidents. Keep the area clear of debris and avoid throwing snow near people or windows. Ensure proper ventilation when using the snowblower in enclosed spaces to prevent carbon monoxide buildup.

1.3 Proper Protective Gear

Always wear protective gear when operating the MTD snowblower. This includes gloves, goggles, and sturdy boots to prevent injuries. Dress in warm, layered clothing to avoid hypothermia. Ensure loose clothing or accessories do not interfere with controls. Use ear protection if operating in noisy conditions. Proper gear ensures safer operation and reduces the risk of accidents while using the snowblower.

Product Features and Specifications

The MTD snowblower features powerful engines, durable augers, and adjustable chutes. Models like the MTD 140, 150, and 179cc offer versatile performance for varying snow conditions.

2.1 Overview of MTD Snowblower Models

The MTD snowblower lineup includes a variety of models designed for different snow-clearing needs. Popular models like the MTD 140, 150, and 179cc offer powerful performance. The 190-032-101 and 190-469A models feature advanced components for heavy-duty use. Each model is equipped with durable augers, adjustable chutes, and user-friendly controls, ensuring efficient snow removal. These snowblowers are built to handle light to heavy snowfall, making them suitable for both residential and large-area applications.

2.2 Key Components and Functions

The MTD snowblower features a robust auger that collects and throws snow. The belt drives the auger, ensuring smooth operation. Shave plates and shear pins protect the machine from damage. Skid shoes adjust to different surfaces, preventing ground contact; The control panel allows easy adjustment of settings, while the chute directs snow flow. These components work together to provide efficient and controlled snow removal, ensuring optimal performance in various winter conditions.

2.3 Understanding the Control Panel

The control panel on your MTD snowblower centralizes key functions for easy operation. The choke and throttle controls regulate engine speed, while the auger engagement lever activates the snow collection system. The chute control allows directional adjustments, and the deflector angle can be fine-tuned for precise snow placement. Familiarize yourself with these controls to optimize performance and ensure safe, efficient snow removal. Refer to your MTD snowblower manual for detailed instructions on using each feature effectively.

Assembly and Installation

Begin by unpacking and inventorying all components. Follow the MTD snowblower manual for step-by-step assembly instructions. Attach handles, install the chute, and ensure all bolts are tightened securely. Refer to the manual for specific torque settings and alignment guidelines. Use basic tools like wrenches and screwdrivers. Double-check all connections before first use to ensure proper function and safety.

3.1 Step-by-Step Assembly Instructions

Begin by carefully unpacking the MTD snowblower and verifying all components against the parts list in the manual. Attach the handlebars by aligning the bolts and tightening them securely. Next, install the chute assembly, ensuring it rotates smoothly. Connect the control cables to the throttle and chute direction lever. Refer to the manual for specific torque specifications. Finally, attach the skid shoes and check the auger for proper alignment. Double-check all connections before use.

3.2 Required Tools and Parts

To assemble your MTD snowblower, gather essential tools: a socket wrench, screwdrivers, and pliers. Ensure all parts are included, such as handlebars, control cables, chute assembly, skid shoes, and auger components. Refer to the manual for a detailed parts list. Additional items like grease and bolts may be needed for secure connections. Double-check the packaging to confirm no components are missing before proceeding with assembly to avoid delays or additional trips to the store.

3.3 Initial Setup and Adjustments

After assembly, perform initial adjustments to ensure proper function. Tighten all bolts and screws according to the manual. Adjust the chute alignment and cable tension for smooth operation. Check the auger and impeller for proper alignment. Lubricate moving parts as specified. Test the snowblower on a flat surface to ensure balanced operation. Refer to the manual for specific torque settings and adjustment procedures to ensure safety and optimal performance during the first use. Proper setup guarantees efficient snow clearing and reduces wear on components.

Operating Instructions

Familiarize yourself with controls and start the engine as outlined. Operate on level ground, adjust chute direction, and maintain steady speed. Refer to the manual for detailed guidance.

4.1 Starting and Stopping the Engine

To start the engine, ensure the snowblower is on a level surface. Prime the engine by pressing the primer button 2-3 times. Move the choke to the “start” position and pull the ignition cord firmly. Once running, gradually release the choke. To stop, reduce the throttle and turn off the ignition. Avoid sudden stops. Refer to the manual for specific instructions and troubleshooting common issues like a flooded engine. Always follow safety guidelines during operation.

4.2 Proper Snowblower Operating Techniques

Always wear protective gear and ensure the area is clear of obstacles. Start with a slow, steady pace, keeping the snowblower at a consistent height. Avoid blowing snow toward people or windows. Use the chute controls to direct snow evenly. Never touch the auger or impeller while running. Keep children and pets at a safe distance. Stop the engine when not in use or during maintenance. Regularly inspect and clear debris to ensure smooth operation and prevent damage to the machine.

4.3 Using the Chute and Directional Controls

The chute and directional controls allow precise snow distribution. Adjust the chute angle using the handle or crank to direct snow up to 190 degrees. Use the directional controls to change the throwing distance. For optimal performance, ensure the chute is clear of debris. Always stop the engine before making adjustments. Refer to your MTD snowblower manual for specific instructions on fine-tuning the chute and controls for varying snow conditions and terrain.

Maintenance and Servicing

Regular maintenance ensures optimal performance. Lubricate moving parts, inspect the auger and blades for damage, check belts and spark plug condition, and drain old fuel before storage. Refer to your manual for specific schedules and guidelines.

5.1 Regular Maintenance Schedule

Perform routine checks to ensure your MTD snowblower operates efficiently. Inspect and replace worn shear pins, clean debris from the chute, and lubricate auger and drive shafts monthly. Replace spark plugs annually and check belts for cracks or wear. Follow the manual for specific maintenance intervals. Proper care extends equipment life and prevents unexpected breakdowns during winter use.

5.2 Winterizing Your Snowblower

Winterizing your MTD snowblower ensures it remains functional for the next season. Drain and stabilize the fuel system to prevent corrosion. Clean the machine thoroughly, removing dirt and debris. Apply rust-inhibiting oil to metal parts and inspect for damage. Store the snowblower in a dry, protected area to avoid moisture damage. Follow the manual for specific winterization steps to maintain performance and longevity.

5.3 Troubleshooting Common Issues

Common issues with your MTD snowblower may include a clogged chute, auger not turning, or poor engine performance. Check for blockages in the chute and auger. Ensure shear pins are intact and replace if broken. Refer to the manual for diagnostic steps. Addressing these issues promptly prevents further damage and ensures optimal performance. Always follow safety guidelines when troubleshooting to avoid injury or additional malfunctions.

Storage and Disposal

Store your MTD snowblower in a dry, clean area to protect it from corrosion. Before long-term storage, drain fuel and clean the unit thoroughly. Dispose responsibly.

6.1 Proper Storage Techniques

Before storing your MTD snowblower, clean it thoroughly to remove dirt, snow, and ice. Drain the fuel tank or use a fuel stabilizer to prevent degradation. Disconnect the spark plug for safety. Store the unit in a dry, well-ventilated area, away from flammable materials. Avoid exposing it to direct sunlight or moisture. Use a breathable cover to protect against dust and humidity. Ensure all parts are secure to prevent damage during storage.

6.2 Preparing for Long-Term Storage

Before long-term storage, clean the snowblower thoroughly, removing dirt and snow. Drain the fuel tank or add a fuel stabilizer to prevent degradation. Disconnect the spark plug for safety. Store in a dry, cool place, away from direct sunlight and moisture. Cover the unit with a breathable material to protect against humidity and dust. Ensure all moving parts are lubricated and secure to prevent rust or damage. Proper preparation ensures your MTD snowblower remains in good condition for future use.

6.3 Eco-Friendly Disposal Methods

For eco-friendly disposal, recycle or properly dispose of your MTD snowblower. Check local recycling centers that accept large machinery or metals. Remove hazardous materials like batteries and fluids, disposing them according to local regulations. Donate or sell functional units. If non-operational, dismantle and recycle parts responsibly. Consult MTD’s environmental guidelines for proper disposal methods. Ensure environmentally safe practices to minimize ecological impact.

Repair and Replacement Parts

Identify common wear parts like augers or belts. Order genuine MTD parts for reliability. Refer to your manual or contact MTD support for assistance.

7.1 Identifying Common Wear and Tear Parts

Common wear parts include augers, belts, shave plates, and shear pins. These components are prone to damage from heavy use or abrasive snow conditions. Regularly inspect the skid shoes and impeller for wear. Replace any damaged or excessively worn parts to maintain optimal performance and prevent further damage to your snowblower. Always consult your MTD manual for specific guidance on identifying and replacing these parts.

7.2 Ordering Genuine MTD Parts

To ensure optimal performance, always use genuine MTD parts. Visit the official MTD website or contact an authorized dealer to order replacement components. Use your snowblower’s model number to find compatible parts. Genuine parts are designed to meet safety and quality standards, ensuring reliability and longevity. Avoid third-party alternatives that may void your warranty. Order online or through customer support for convenient delivery. Always verify part numbers before purchasing to ensure accuracy.

7.3 DIY Repair Tips and Guidelines

For minor repairs, consult your MTD snowblower manual for guidance. Always disconnect the spark plug before starting work. Use genuine MTD parts to ensure compatibility and safety. Common DIY fixes include replacing shear pins, belts, or shave plates. Tighten loose bolts and lubricate moving parts regularly. If unsure, refer to the troubleshooting section or contact an authorized service dealer. Avoid attempting complex repairs without proper tools or expertise to prevent further damage. Keep a well-lit workspace and follow safety precautions.

Warranty and Customer Support

Understand your warranty coverage, contact MTD customer service for assistance, and locate authorized dealers for genuine parts and expert support.

8.1 Understanding Your Warranty Coverage

Your MTD snowblower warranty covers parts and labor against defects for a specified period, typically 2-5 years, depending on the model. Normal wear and tear is excluded. Review your manual for detailed terms and conditions. Warranty service requires proof of purchase. Contact MTD customer support for claims or clarifications. Ensure to register your product for warranty validation and timely assistance. Refer to the manual for specific coverage details and limitations.

8.2 Contacting MTD Customer Service

For assistance with your MTD snowblower, visit the official MTD website for contact details; Call their customer service hotline or send an email for inquiries; You can also mail inquiries to MTD LLC, P.O. Box 361131, Cleveland, OH 44136-0019. Ensure to have your model number ready for efficient support. Visit their website for live chat options and additional resources. Prompt assistance is available for warranty claims, parts, and troubleshooting.

8.3 Finding Authorized Service Dealers

Visit the official MTD website to locate authorized service dealers near you. Use the dealer locator tool by entering your zip code. Ensure your snowblower is serviced by professionals to maintain warranty validity. Contact MTD customer service for assistance in finding certified dealers. Authorized dealers provide genuine parts and reliable repairs, ensuring your snowblower operates efficiently. Regular servicing by experts prolongs equipment lifespan and maintains performance standards. Always verify dealer authorization to avoid unauthorized repairs.

kindergarten reading books pdf

Kindergarten reading books in PDF format provide a fun and interactive way to introduce young learners to reading. These engaging, developmentally appropriate books feature vibrant illustrations, simple language, and introduce basic phonics and sight words to build a strong foundation for early literacy skills.

Overview of Early Reading Development

Early reading development in kindergarten focuses on building foundational literacy skills through phonemic awareness, alphabet recognition, and basic comprehension. Children progress from identifying shapes and letters to forming simple words. Printable PDF books with repetitive text and vibrant illustrations support this journey, helping kids connect sounds to letters and understand storytelling. Interactive elements, such as rhyming and word families, enhance engagement and reinforce learning. These resources lay the groundwork for fluent reading and a lifelong love of learning.

Importance of Printable Reading Materials

Printable reading materials are essential for kindergarten literacy development, offering convenience and accessibility. They allow teachers and parents to customize lessons, reinforcing phonics and sight words. PDF books are cost-effective, reusable, and easily shared, making them ideal for classroom or home use. Their engaging designs and repetitive text help children practice reading skills confidently. These materials also promote fine motor skills through activities like tracing and coloring, fostering a love for learning while preparing young readers for academic success.

Benefits of Using PDF Format for Kindergarten Books

The PDF format offers numerous advantages for kindergarten reading materials. It ensures consistent and high-quality visuals across devices, preserving vibrant illustrations and clear text. PDFs are easily accessible, requiring no special software, and can be printed or viewed digitally. They are also eco-friendly, reducing the need for physical copies. Additionally, PDFs are secure and cannot be easily altered, ensuring content remains intact. This format is ideal for interactive elements like clickable links, enhancing engagement for young learners while maintaining affordability and convenience for educators and parents.

Popular Types of Kindergarten Reading Books

Kindergarten reading books PDFs include decodable books for phonics, sight word books for recognition, and interactive storybooks. Classic tales and themed books also engage young learners effectively.

Decodable Books for Phonics Skills

Decodable books are designed to align with phonics instruction, helping kindergartners practice specific sounds and word patterns. These books use repetitive text and simple stories to build fluency. By focusing on word families like -at, -an, and consonant blends (BL, BR, CL), they reinforce early reading skills. For example, stories about bats, cats, and hats introduce the -at sound, while books featuring words like “blend” or “climb” teach consonant combinations. Printable PDFs of these books make them accessible for practice at home or in the classroom, ensuring consistent skill development.

Sight Word Books for Recognition

Sight word books are essential for teaching recognition of high-frequency words. These PDF books feature repetitive, simple text with engaging illustrations. They focus on common words that don’t follow phonetic rules, such as “the,” “and,” and “is.” By incorporating these words into relatable stories, children build reading confidence and fluency. Interactive elements like highlighting or tracing words enhance learning. Printable formats allow educators to tailor activities, ensuring children master these foundational words, which are crucial for early reading success and comprehension.

Interactive and Engaging Storybooks

Interactive storybooks captivate young readers with colorful illustrations and engaging narratives. These PDF books often include activities like flaps to lift, buttons to press, or pull-out tabs, fostering hands-on learning. Stories focus on themes like friendship, sharing, and adventure, while incorporating simple text. Interactive elements encourage active participation, making reading a fun experience. PDF formats allow easy printing and digital access, ensuring these storybooks are both entertaining and educational, helping kindergartners develop a love for reading while building essential literacy skills in an enjoyable way.

Classic Children’s Books for Kindergarten

Classic children’s books are timeless treasures that introduce young readers to simple, engaging stories. These beloved tales often feature charming illustrations and moral lessons, fostering a love for reading while building foundational literacy skills in a fun and memorable way.

Timeless Stories for Early Readers

Timeless stories for early readers are crafted with universal themes and engaging illustrations, making them perfect for kindergartners. These classic tales, such as “The Busy Little Kangaroo” and “Its Busy Being 3!”, use simple language and repetitive patterns to help young learners recognize words and build confidence. Featuring relatable characters and moral lessons, these stories foster a love for reading while introducing basic literacy skills. Many of these books are available in PDF format, offering convenience for teachers and parents to print and share, ensuring accessibility and enjoyment for early readers.

Illustrated Books with Simple Language

Illustrated books with simple language are perfect for kindergartners, combining vibrant visuals with easy-to-read text. These books captivate young learners, helping them connect words with images and build early literacy skills; Stories like “The Busy Little Kangaroo” use repetitive phrases and engaging plots to foster a love for reading. The clear, concise language and colorful illustrations make these PDF books ideal for early readers, while their accessibility ensures they can be easily shared in classrooms or at home, supporting learning and enjoyment.

Seasonal and Themed Reading Books

Seasonal and themed books captivate young readers with stories tied to holidays, events, and social skills. These PDFs make learning engaging and relevant, fostering a love for reading while exploring themes like friendship, sharing, and celebrating together.

Holiday-Themed Stories

Holiday-themed reading books for kindergarten are a delightful way to celebrate seasonal events while fostering early literacy skills. These vibrant PDFs feature engaging stories tied to festivals like Christmas, Halloween, Easter, and Thanksgiving. They incorporate simple language, colorful illustrations, and repetitive phrases to captivate young readers. Many books include activities like puzzles or coloring pages to enhance learning. These stories often focus on themes of sharing, kindness, and friendship, making them both entertaining and educational. They provide a fun way for children to connect reading with real-life celebrations and traditions, fostering a love for both reading and cultural awareness.

Books Focused on Social Skills

Kindergarten reading books focused on social skills help young learners navigate relationships and emotions through engaging stories. These PDFs often feature characters facing common challenges, such as sharing, cooperation, and empathy. Stories are designed to promote discussions about feelings, friendship, and conflict resolution. Many books include simple, repetitive text and colorful illustrations to capture children’s attention. Activities like role-playing or discussion questions are sometimes included to reinforce learning. These books are invaluable for teaching social-emotional skills, helping children develop kindness, self-awareness, and respect for others in a fun, relatable way.

Phonics and Word Family Mini-Books

Phonics and word family mini-books are designed to help young readers master common word patterns. These short, engaging books feature activities like matching games and fill-in-the-blank exercises to reinforce learning. With colorful visuals and interactive elements, they make phonics fun and accessible for kindergarten students. Perfect for guided practice or independent fun!

Word Families (-at, -an, -in)

Word family mini-books focus on common endings like -at, -an, and -in to help young readers identify patterns and decode words. These books feature simple, repetitive stories with engaging visuals, making it easier for kindergartners to recognize and remember words. For example, children can practice reading words like “cat,” “hat,” and “mat” in -at themed books. Similarly, -an and -in books introduce words such as “fan” and “pin.” Interactive activities like matching games and fill-in-the-blank exercises reinforce learning, building phonics skills and confidence in early readers.

Consonant Blends (BL, BR, CL)

Mini-books focusing on consonant blends like BL, BR, and CL help kindergartners recognize and pronounce these complex sounds. Stories feature characters and objects that begin with these blends, such as “brush,” “brick,” and “clock.” Interactive activities like matching games and fill-in-the-blank exercises reinforce learning. These books are designed to build phonics skills, making it easier for young readers to decode words and improve fluency. Each story is simple, with engaging visuals to keep children interested and motivated to practice reading aloud with confidence.

Activities to Complement Reading Books

Engaging activities like printable worksheets, interactive games, and crafts complement reading books, enhancing early literacy skills and making learning fun for kindergartners.

Printable Worksheets and Exercises

Printable worksheets and exercises are invaluable tools for reinforcing reading skills in kindergarten. They often include activities like matching games, word tracing, and sequencing, which help children practice phonics and sight word recognition. Many worksheets are designed to complement reading books, offering engaging exercises that make learning fun. With colorful illustrations and simple instructions, these resources cater to young learners, encouraging hands-on practice and independent learning. They also provide opportunities for creativity, such as cutting and assembling mini-books, making the learning process both interactive and enjoyable for kindergartners.

Interactive Games and Crafts

Interactive games and crafts are excellent ways to make reading engaging for kindergartners. Activities like cutting, coloring, and assembling mini-books allow children to explore creativity while reinforcing reading concepts. Games such as matching sight words or sequencing stories encourage active participation and teamwork. Crafts like creating book characters or themed decorations tie learning to fun, hands-on experiences. These activities not only enhance comprehension but also build fine motor skills and confidence, making reading a joyful and immersive experience for young learners.

Interactive Digital Books

Interactive digital books bring stories to life with animations, sounds, and clickable elements, making reading a dynamic experience for kindergartners. Platforms like Starfall offer engaging, audio-enhanced stories that support early literacy skills and foster a love for independent reading.

Starfall and Other Online Platforms

Starfall and similar platforms offer a wealth of interactive digital books and phonics activities tailored for kindergartners. These resources feature animated stories, games, and exercises that make learning to read engaging and fun. Many platforms provide printable PDF books, word family mini-books, and sight word exercises. Interactive games and exercises complement the reading materials, reinforcing phonics skills and fluency. These tools adapt to different learning styles, offering audio-enhanced stories and hands-on activities. They also include parent-teacher resources, making them versatile for both home and classroom use. Such platforms are invaluable for early literacy development;

Audio-Enhanced Reading Experiences

Audio-enhanced reading experiences bring stories to life for young learners, combining engaging narratives with professional narration. These tools, often available as PDFs with embedded audio, allow children to follow along as stories are read aloud, improving their phonological awareness and fluency. Interactive features like word highlighting and pause options help reinforce learning. Many platforms offer free downloads, making these resources accessible for both classroom and home use. This multisensory approach ensures that kindergartners develop a love for reading while building essential skills in a fun and immersive way.

Guide to Choosing the Right Reading Books

Selecting the right reading books for kindergartners involves considering age-appropriate content, skill level, and engaging illustrations. Align books with curriculum goals and your child’s interests for effective learning.

Aligning with Curriculum Goals

When selecting kindergarten reading books, it’s essential to align them with curriculum goals to ensure they support learning objectives. Books should focus on foundational skills like phonics, sight words, and comprehension. They should also incorporate themes that promote social-emotional growth, such as friendship and sharing. By choosing content that matches what’s being taught in the classroom, these PDF books can reinforce lessons and provide a cohesive learning experience for young students. This approach helps build confidence and a love for reading early on.

Matching Reading Levels

Kindergarten reading books in PDF format are designed to match varying reading levels, ensuring each child progresses at their own pace. From simple CVC words to more complex sight word recognition, these books cater to different stages of early literacy. They often include engaging illustrations and repetitive text to reinforce learning. By aligning content with a child’s skill level, these PDF books help build confidence and fluency. Interactive elements like clickable sounds or animations further enhance the learning experience, making reading both fun and effective for young learners.

Kindergarten reading books in PDF format are invaluable tools for fostering early literacy skills. They provide engaging stories, phonics practice, and sight word recognition, all while being easily accessible. These books cater to diverse learning styles, making reading fun and interactive. By leveraging these resources, educators and parents can help young learners build a strong foundation for future academic success. With their versatility and educational value, kindergarten reading books in PDF remain a cornerstone of early childhood education.